Important
Each 10-Bay TechGuard Locker requires a dedicated 15 A circuit.
Understanding the Keypad and LEDs
The Digital Keypad
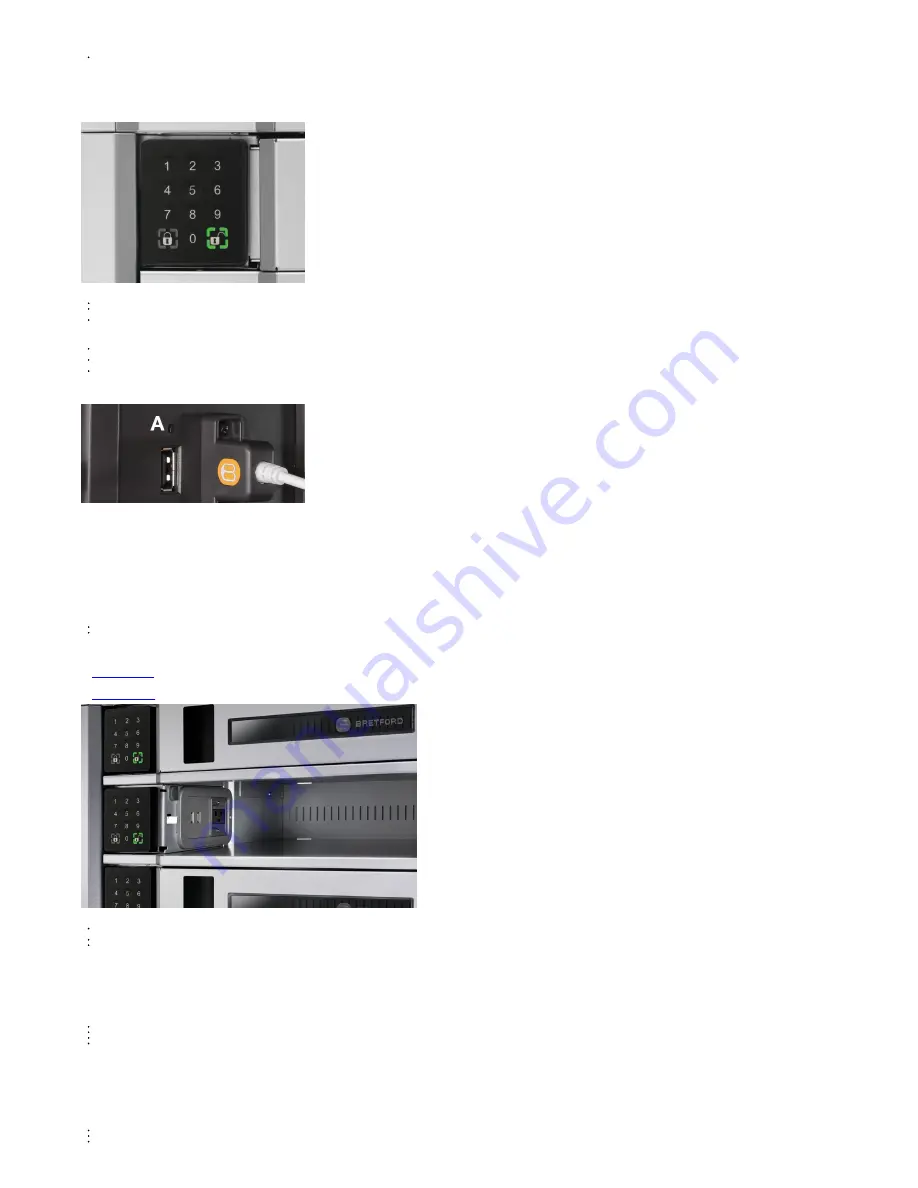
To the left of each TechGuard Locker bay, you'll find the digital keypad. Each keypad offers
buttons 0-9, a Lock button and an Unlock button.
The Lock button and Unlock buttons also include LEDs to indicate the current status of an
individual bay.
The Unlock Button LED
The Unlock LED will illuminate solid green when it is available for use.
The Unlock button's LED will continue to blink for sixty (60) seconds after being pressed or
until locked with a four-digit code.
When Locked, while entering a four-digit code, the corners of the Unlock LED will
illuminate green as each number is pressed.
The Lock Button LED
While entering a four-digit code to lock a bay, the corners of the Lock LED will illuminate
red as each number is pressed.
After entering a four-digit code, the Lock LED will blink red until the Lock button is pressed
to register the code and lock the bay.
The Lock LED will illuminate solid red when devices are locked in a bay.
Courtesy Light Settings
Step-By-Step
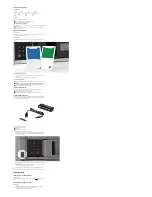
1. Remove any connected USB cables and retention clips from the frontmost USB port.
2. Insert and press a paperclip into the top screw hole (A) above the USB port.
3. The interior LED will flash one of three patterns, wait one (1) second and then flash the next
pattern.
LED Flash Patterns
1. 1 Flash - The light will turn on only when the door is opened.
2. 2 Flashes - The light will always be on.
3. 3 Flashes - The light will always be off.
Opening a TechGuard Locker Bay
Step-By-Step
1. Press the Unlock button for the bay you wish to open. You will hear a click sound.
2. Open the door to the corresponding bay.
Important
The door will remain unlocked for five (5) seconds after pressing the Unlock button.
The Unlock button's LED will continue to blink for sixty (60) seconds after being pressed or
until locked with a four-digit code.
Charging Your Devices
Step-By-Step
1.
Open a TechGuard Locker bay
.
2. Place your devices into the bay and connect them to the appropriate AC outlet or USB port
located along the inside left wall.
3. Close the door.
4.
Lock the Techguard Locker Bay
.
Important
Each bay of a TechGuard Locker can accommodate charging of one (1) AC device and two
(2) USB devices at the same time.
Each AC outlet can accommodate up to a 100 W charging adapter.
Each USB port offers a maximum 2.4 A charge.
Locking A TechGuard Locker Bay
Step-By-Step
Your browser does not support the video tag.
1. Close the TechGuard Locker bay door.
2. Using the Keypad, enter a four-digit code.
3. Press the Lock button.
Important
As you press each digit, a corresponding corner of the Lock button LED will light up.
Once you enter a four-digit code, the Lock button will blink.
You must press the Lock button after entering a four-digit code to lock your devices.
The red Lock button LED will remain illuminated to show it is locked and in use.
Unlocking A TechGuard Locker Bay
Step-By-Step
Your browser does not support the video tag.
1. Enter your personal four-digit code.
2. Press the unlock button.
3. Open the door and remove your devices.
4. Close the door.
Important
As you press each digit, a corresponding corner of the Unlock button LED will light up.
Once you enter a four-digit code, the Unlock button will blink.
You must press the Unlock button after entering a four-digit code to unlock your devices.
Summary of Contents for 1-Bay
Page 6: ...owners...


