background image

7. FILTERING & CHANGING THE OIL 

Make sure the deep fryer is unplugged and the oil has cooled before cleaning or storing the 

deep fryer.

The oil does not need to be changed after each use.  In general, the oil will be tainted rather 

quickly when frying food containing a lot of protein (such as poultry, meat or fish).  When oil is 
mainly used to fry potatoes and is filtered after each use, it can be used 8 to 10 times.  
However, do not use the same oil for longer than 6 months.

To filter the oil, first make sure the oil has cooled and then empty the oil from the oil container 

(#3) into another container or bottle. Fig. 6 
Wash and dry the oil container and basket.  Refill the oil container with the oil, pouring the oil 
through a wire strainer or paper filter. Fig. 7

Fig. 6

Fig. 7

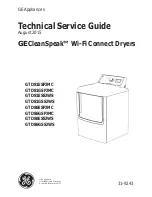
8. How To Reset the Deep Fryer 

• Set the temperature setting dial (#8) to “Min” position.
• Turn the “On/Off” switch (#6) to the “Off” position.
• Let the deep fryer cool for minimum 15 minutes.
• Turn the “On/Off” switch (#6) to the “On” (#6) position.
• Push the reset button (#18) located on the back of the control panel (#5) inside the cord 

storage (#19) compartment. Fig. 8

Cord Storage

Fig. 8

Reset 

If for some reason the deep fryer stops heating, the reason might be that the safety reset 
switch has disconnected.  To reconnect the the deep fryer, follow the instructions listed below:

10

Summary of Contents for Platinum Pro EP65

Page 1: ...Professional Deep Fryer Use and Care Instructions Model EP65 TM EURO PRO Operating LLC Boston MA 02465 1 800 798 7398 www euro pro com...

Page 2: ...it for the unit to cool completely before removing the heating element 12 Extreme caution must be used when moving any appliance containing hot oil or other hot liquids 13 Do not leave appliance unatt...

Page 3: ...horoughly 2 Filling the Stainless Steel Container With Oil Using Solid Fat 3 Installing the Control Panel Into Its Place 4 Using the Deep Fryer Pre Heating Filling the Frying Basket Frying Food 5 At t...

Page 4: ...With Heating Element 6 On off Switch 7 Temperature Indicator Light 8 Temperature Setting Dial 9 Lid Handle 10 Lid Cover 11 Basket Rest 12 Thermostat 13 Heating Element 14 Frying Basket 15 Basket Handl...

Page 5: ...frying basket 14 Always make sure the basket handle is securely attached to the basket To attach the handle to the frying basket insert the metal part of the handle inside the metal bracket on the fr...

Page 6: ...greater risk of splashing Using a fork carefully make some holes in the fat Make sure the lid is securely closed while fat is melting Set temperature dial 8 to 320 F 160 C 5 2 Filling the Stainless St...

Page 7: ...5 into the Guide Rails mounted on the metal body 1 Slide the Guide Edges down till the end Important Notice The Automatic Safety Switch ensures that the unit will not operate unless the Control Panel...

Page 8: ...aximum lines inside the oil container 3 The frying basket 14 should not be immersed in the oil during the pre heating Replace the lid cover 10 Plug the appliance into a 120 volt outlet Turn the on off...

Page 9: ...y crispy results limit quantity to 3 4 Lb 350 gr or less Frying Food Warning To avoid injury or burns do not touch any metal parts on the deep fryer because they may be hot Always use the frying baske...

Page 10: ...e lid cover 10 slowly and wait to allow steam to escape before opening the lid cover 10 completely Lift up the frying basket 14 by the handle 15 Place it on the basket rest 11 and allow the food to dr...

Page 11: ...take longer to cook Important When frying frozen food such as French Fries you should not exceed 1 lb 454 gr For healthy crisp results limit quantity to 3 4 Lb 350 gr or less The following cooking tim...

Page 12: ...il container 3 into another container or bottle Fig 6 Wash and dry the oil container and basket Refill the oil container with the oil pouring the oil through a wire strainer or paper filter Fig 7 Fig...

Page 13: ...ng instructions in section 1 Before using for the First Time Never immerse the control panel 5 cord or plug in water or any other liquid Do not place the control panel 5 cord or plug in the dishwasher...

Page 14: ...ranties The responsibility of EURO PRO Operating LLC if any is limited to the specific obligations expressly assumed by it under the terms of the limited warranty In no event is EURO PRO Operating LLC...

Reviews: