background image

GB

19

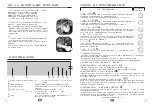
Loading the dishwasher

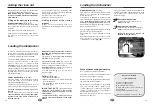
Upper basket 

(Fig. 11 - 12)

This basket is particularly intended to hold
glasses, cups, ramekins, small salad bowls,
bowls, saucers etc… 
Place glasses so that they do not touch and tip
them sufficiently so that they do not retain any
water.

Place the hollow end of glasses, cups

and bowls facing downwards.

Arrange the

dishes methodologically to gain space (rows of
glass, cups, and bowls)

Use the height adjustable holding bar for large
glasses or large-stemmed glasses.
Cups, ladles, etc... can be arranged too on the
rack.
By varying the position of the baskets, you can
alter the layout of the rack to suit every
combination of crockery 

(fig. 12B)

.

The upper basket should be adjusted to the
HIGH position when loading large plates in the
lower basket. The setting can be execute
basket in charge.

Setting the HIGH POSITION

Slowly lift the basket until you hear a

click

on each side.

Setting the LOW POSITION

Lift the basket completely on both sides

(click)

and then follow it downwards.

Make sure that the two runners are
adjusted to the same level.

CLICK

STOP

CLICK

Economical and ecological washing

Do not pre-wash your dishes by hand.

Use all the capacities of your dishwasher. It will
wash economically and ecologically.

Always choose the programme best adapted to
the stains and the type of dishes.

Avoid using too much detergent, regenerating
salt and rinsing liquid. Observe the
recommendations contained in this manual
(pages 17 and 18) as well as the product
manufacturer’s instructions.
Make sure that the water softener is properly
adjusted. (see page 17)

Objects not suitable

for your dishwasher

- Wooden chopping boards
- Pewter or copper objects
- Non-stainless steel objects
- Cutlery with wooden, horn or mother-of-

pearl handles

- Antique or hand-painted crockery

When buying dishes or cutlery, check

18

GB

Loading the dishwasher

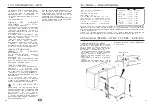
Adding the rinse aid

Rinsing product is necessary as it avoids stains
on the dishes and makes drying easier. 

IMPORTANT! Only use products intended
for dishes and NOT detergents intended for
hand washing !

Filling and adjusting the rinsing
product container (Fig. 6 - 7)

Put the door in a horizontal position when filling
the container and unscrew the cap in the door
clockwise.
Fill to just below the to the adjusting lever.

If the product overflows during filling, remove
the excess with a sponge to avoid foam
forming.

If you experience stains or bad drying after
several cycles, you may if necessary adjust the
dosage using the selector:
Soft water : level 1 to reduce the dose
Hard water : level 3 to increase it.

Finding the level of the rinsing
product.

A light on the control band shows you
requirements in rinsing product when the door
is ajar.

In order to obtain good cleaning results, be
sure to remove any large food residues before
switching on the machine. Any burnt or stuck-
on residues must be removed beforehand.

The model DWE 300 dish-washer has two
racks for 14 place-settings, or 162 items
(figures 10-11-13), to standard DIN
44990.Always point the inside of the crockery
downwards. Ensure that no item conceals
another and that nothing obstructs the spraying
facility. After switching on, check that the
spraying arms can move freely. No item should
overlap the baskets.

Lower basket 

(Fig. 8 - 9 - 10)

Place the dishes so that water may circulate
freely and spray all the utensils. (Avoid
attaching and piling dishes up).
This basket is especially intended to hold:
plates, cutlery, dishes, frying pans, saucepans.

Put large-sized plates and frying pans on
the side.

Avoid mixing plates and soup dishes. 

You

should preferably place same-sized plates
together. Place soup dishes at the back, in
the high pin area.

Make sure nothing obstructs the rotation of
the lifting arm (saucepan handles, cutlery or
large dishes).

The baskets in the 

bottom rack fold away

(fig. 9B)

to take large dishes.

The cutlery trays slide

and can be put

anywhere on the lower basket. You can adjust
them according to the dishes you wash.

Removable grids

are available if you wish to

load cutlery in an orderly fashion.
For optimum washing, you can use these
separation grids.

Cutlery : (Fig. 13)

• Place handles downwards.
• Separate silverware from other metals using

the separating grill.

• It is preferable to place small spoons in the

separating grills.

IMPORTANT NOTE :

For reasons of

safety, we recommend you place sharp-
ended table knives blade down in the
cutlery basket.
Long-bladed cutlery and other sharp
utensils should be placed flat in the upper
basket

.

Summary of Contents for DWE 500

Page 1: ...DWE 500 Code 3 06451 B 07 00 F GB GR P Lave Vaisselle NOTICE D UTILISATION Dishwasher OPERATING INSTRUCTIONS Maquína de lavar MANUAL DE INSTRUÇÕES Ï ÓÙËÚ Ô ÐÈ Ù Ó ÂÐÂÍËÁ ÙÈÎ Ó ÛËÌÂÈ ÛÂ Ó ...

Page 2: ......

Page 3: ...ment de l appareil suite à d autres causes que celles mentionnées sur cette notice débranchez l appareil retirez la prise ou couper le circuit concerné et prenez contact avec notre service après vente L appareil répond aux consignes de sécurité en vigueur Les réparations éventuelles doivent être effectuées par des personnes qualifiées Les réparations ou changements non conformes peuvent entraîner ...

Page 4: ...ation de votre lave vaisselle se fait sur un sol moquetté veillez à régler les patins afin de laisser un espace d aération sous l appareil Bavette d insonorisation Fig 15 sur certains modèles pose libre Pour une insonorisation optimum veillez à ce que la bavette livrée avec l appareil soit correctement installée La hauteur des pieds étant réglée Basculez légèrement le lave vaisselle sur l arrière ...

Page 5: ...vissez dans le sens des aiguilles d une montre le bouchon se trouvant sur la porte Remplissez jusqu à affleurer le haut du levier de réglage En cas de débordement de produit lors du remplissage épongez l excès pour éviter la formation de mousse Vous pouvez si besoin après quelques cycles en cas de traces ou de mauvais séchage ajuster le réglage au moyen du sélecteur Eau douce repère 1 pour diminue...

Page 6: ... Intensif Un prélavage chaud et un lavage accentués sur le panier inférieur sont adaptés pour les casseroles plats ou faitouts placés dans ce panier Touche option SÉCHAGE CONDENSEUR Pour parfaire le séchage des différentes pièces de vaisselle votre appareil est doté d un système de séchage à condenseur Après le dernier rinçage chaud la vapeur se condense sur les parois du lave vaisselle où une zon...

Page 7: ...er une nouvelle option Sélection d un Départ différé Après avoir sélectionné un programme appuyez sur la touche Départ différé Un temps de décalage d une heure apparait alors sur l afficheur A chaque nouvel appui sur cette touche le temps est augmenté d une heure jusqu à 9 heures maximum Le fait d appuyer sur la touche après un décalage de 9 heures vous affiche à nouveau la durée du programme dépa...

Page 8: ...arations éventuelles doivent être effectuées par des personnes qualifiées Des réparations effectuées par des personnes non qualifiées peuvent entraîner des dangers pour l utilisateur Si malgré ces remarques vous avez encore des problèmes adressez vous à votre revendeur ou à notre Service Après Vente Veuillez mentionner le type de l appareil le n de série ou le numéro mentionné sur la plaque signal...

Page 9: ... corrosive effect on the mouth and pharynx if they are swallowed Keep dishwasher products as well as other cleaning products out of reach of children These products if they are swallowed have a corrosive effect in the mouth and pharynx If the machine does not operate correctly for reasons other than those mentioned in this leaflet disconnect the machine from the mains power supply pull out the plu...

Page 10: ...ling your dishwasher on carpet adjust the feet so that you leave space for air to circulate underneath the machine Soundproofing apron Fig 15 on some free standing models For optimum soundproofing make sure the apron delivered with the machine is correctly installed Having adjusted the feet for height Tilt the dish washer backwards slightly so as to clip the apron onto the bottom of the plinth Mak...

Page 11: ...a horizontal position when filling the container and unscrew the cap in the door clockwise Fill to just below the to the adjusting lever If the product overflows during filling remove the excess with a sponge to avoid foam forming If you experience stains or bad drying after several cycles you may if necessary adjust the dosage using the selector Soft water level 1 to reduce the dose Hard water le...

Page 12: ...s option is adapted to the Intensive programme A hot prewash and a wash giving emphasis to the contents of the upper basket are suitable for pans dishes or stockpots Condenser dry option To dry the contents completely your dish washer has a condenser drier system After the final hot rinse the steam condenses on the walls of the machine where a cold area has been created by a curtain of cold water ...

Page 13: ... than Autoprogramme Switch on the machine and set the selector knob to the chosen programme The duration of the programme you have chosen appears on the indicator if you have not selected a delayed start To select an option Press the button for the chosen option The appropriate light will come on and will go off at the end of the programme The Condenser dry option will remain in memory at the end ...

Page 14: ... user If you have problems not covered by these remarks consult your dealer or After Sales Service Have the machine type series number or that mentioned on the rating plate inside the door ready You will so avoid unnecessary delays and cost 24 GB Cleaning and maintenance instructions Your dishwasher comes with a self cleaning pulse filter that constantly filters small particles of dirt trapped in ...

Page 15: ...causas que as mencionadas neste manual desligue o aparelho retire a ficha ou corte o respectivo circuito e contacte o nosso serviço após venda O aparelho corresponde às indicações de segurança em vigor As reparações eventuais devem ser efectuadas por pessoas qualificadas As reparações ou mudanças não conformes podem provocar perigos para o utilizador No caso de uma substituição só utilize peças de...

Page 16: ...instalação da sua máquina se faz em solo alcatifado regule os patins para deixar um espaço de arejamento debaixo do aparelho Pala de insonorização Fig 15 em alguns modelos de instalação livre Para uma insonorização óptima preste atenção para que a pala fornecida com o aparelho fique correctamente instalada Quando a altura dos pés estiver regulada Inclinar ligeiramente a máquina de lavar loiça para...

Page 17: ...porta na posição horizontal e desaperte no sentido das agulhas do relógio a tampa que se encontra na porta Encha até tocar levemente a parte superior da alavanca de regulação No caso de transbordamento do produto durante o enchimento limpar com uma esponja o excedente para evitar a formação de espuma Pode se for necessário após alguns ciclos no caso de traços ou de uma secagem má ajustar a regulaç...

Page 18: ...urosa ou composta de peças frágeis Esta opção diminui a temperatura de lavagem excepto no programa Frágil 40 C bem como a duração do ciclo Tecla opção SECAGEM CONDENSADOR Para completar a secagem das diferentes peças de loiça o seu aparelho é dotado dum sistema de secagem com condensador Após o último enxaguamento quente o vapor condensa se nas paredes da máquina onde uma zona fria é criada atravé...

Page 19: ...e a duração do programa seleccionado anteriormente Anulação dum programa em funcionamento Premir a tecla Start durante 3 segundos consecutivos Todos os sinais apagam se e o visualizador indica 00 até uma nova selecção de programa Os sinais luminosos indicadores de falta de produtos iluminam se quando o aparelho fica sob tensão sal Ilumina se quando é necessário colocar sal Após um enchimento de sa...

Page 20: ... esgoto estenda a no chão a extremidade dentro dum recipiente inicie um programa o esgotamento deve começar Corte então o Funcionamento Paragem coloque novamente a cana de esgoto no lugar e inicie novamente o seu programa Este aparelho corresponde às normas de segurança em vigor As reparações eventuais devem ser efectuadas por pessoas qualificadas As reparações efectuadas por pessoas não qualifica...

Page 21: ... Ï ÛÔ Ó ÝËÌÈ ÚÔÎÂÈÌ ÓÔ Ó ÂÍ ÛÊ Ï ÛÂÙÂ Û ÁÔ ÚË ÛÙ ÂÚ ÙËÙ ÔÈ ÂÓÙÔÈ ÈÝ ÌÂÓÂ Û ÛÎÂ ÐÚ ÐÂÈ Ó ÙÔÐÔ ÂÙÔ ÓÙ È Î Ù Ð Ó Û ÓÂ ÈÝ ÌÂÓÔ Ð ÁÎÔ ÂÚÁ Û ÛÙÂÚÂ Ì ÓÔ ÛÙ ÈÐÏ Ó ÐÈÐÏ ÓÈÛÙ Ù È Ó ÌËÓ ÓÂ ÓÂÙÂ Ô ÙÂ Ó ÛÙËÚ ÝÂÛÙÂ ÛÙËÓ ÓÔÈÎÙ Ð ÚÙ ÙÔ ÐÏ ÓÙËÚ Ô Û ÛÎÂ ÌÐÔÚÂ Ó Ó ÙÚ ÐÂ Ó Ð ÂÈ ÝËÌÈ Û ÛÎÂ Ù ÐÚÔÔÚ ÝÂÙ È Ó ÐÏ ÓÂÈ ÐÔÎÏÂÈÛÙÈÎ Î È Ì ÓÔ ÐÈ Ù Î È ÂÓ ÐÚ ÐÂÈ Ó ÚËÛÈÌÔÐÔÈÂ Ù È ÁÈ ÏÏË Ú ÛË Û ÓÈÛÙÔ ÌÂ Ó ÌËÓ ÚËÛÈÌÔÐÔÈÂ ÙÂ È Ï ÙÂ Á...

Page 22: ...Ù Ó ÐÔ È Ó ðÈÎ 4 ºÚÔÓÙ ÛÙ ÙÔ ÐÏ ÓÙ ÚÈÔ Ó Â Ó È Î Ï ÈÛÔÚÚÔÐËÌ ÓÔ Î È ÛÙ ÂÚ Ù ÛÛÂÚ Ð È Â Ó È Ú ÌÈÝ ÌÂÓ Ú Ì ÛÙÂ Ù Ó ÚÂÈ ÝÂÙ È ÌÂ Ó ÎÏÂÈ Ó Î ÙÛ È Î Î Ú ÌÈÛË Ù Ó ÐÔ È Ó ÌÐÔÚÂ Ó ÌÂÙ ÙÔÐ ÛÂÈ ÙÔ Î ÓÙÚÔ ÙË Ð ÚÙ Î È Ó Î ÓÂÈ ÙË Û ÛÎÂ Ó ÎÔ ÙÛ ÓÂÈ ËÌ ÓÙÈÎ ªË Û Ó ÛÂÙ ÙÔ ÐÏ ÓÙ ÚÈÔ Ì ÙÔ ËÏÂÎÙÚÈÎ ÎÙ Ô Î È ÙÔ ÎÙ Ô Ð ÚÔ ÓÂÚÔ Ð Ú Ì ÓÔ ÌÂÙ ÙËÓ ÔÚÈÛÙÈÎ ÂÁÎ Ù ÛÙ ÛË Ó Ë ÂÁÎ Ù ÛÙ ÛË ÙÔ ÐÏ ÓÙËÚ Ô Û Á ÓÂÈ Û ÐÂ Ô Ì ÌÔÎ ...

Page 23: ...Î È Ù Ì ÈÚÔ Ð ÚÔ Ó Û ÓÂÚÁ Ð ÓÔÍ ÙÔ ÙÛ ÏÈ ÛÂÚ ÙÛÈ ÌÂ Ï Ð Í ÏÔ Î ÎÎ ÏÔ Ê ÏÓÙÈÛÈ Ð ÏÈ ÐÔÚÛÂÏ ÓË Ë ÌÌ ÓË ÛÙÔ ÚÈ Ù Ó ÁÔÚ ÝÂÙ ÐÈ Ù ÐÔÙ ÚÈ 42 GR ÔÐÔ ÙËÛË Ù Ó ÐÈ ÙÈÎ Ó Ì Û ÛÙÔ ðÈÛ Á Á ÙÔ ÐÚÔÞ ÓÙÔ Ô ÐÚÔÞ Ó ÍÂÐÏ Ì ÙÔ Â Ó È Ð Ú ÙËÙÔ È ÙÈ ÐÔÙÚ ÐÂÈ ÙÔ Û ËÌ ÙÈÛÌ ÏÂÎ Ó ÛÙ ÐÈ ÙÈÎ Î È Â ÓÔ ÙÔ ÛÙ ÁÓ Ì ª ÃÚËÛÈÌÔÐÔÈ ÙÂ Ì ÓÔÓ ÐÚÔÞ ÓÙ ÂÈ ÈÎ ÁÈ ÐÏ ÓÙ ÚÈÔ Î È Ã ÐÚÔÞ ÓÙ Î ÚÈÛÌÔ ÐÔ ÐÚÔÔÚ ÝÔÓÙ È ÁÈ ÙÔ ÐÏ ÛÈÌÔ ÛÙÔ ÚÈ Ï Ú...

Page 24: ...Ë Â Ú ÛÙ ÐÈ ÙÈÎ ÏÂÈÙÔ ÚÁ Ù ÂÏ ÙÙ ÓÂÈ ÙË ÂÚÌÔÎÚ Û ÐÏ Û Ì ÙÔ ÂÎÙ ÛÙÔ ÐÚ ÁÚ ÌÌ Ï ÛÈÌÔ Â Ú ÛÙ Ó 40 ÆC Î Î È ÙË È ÚÎÂÈ ÙÔ Î ÎÏÔ Ï ÎÙÚÔ EI IKO PO PAMMA IA KAT APO E Ó Ù ÙËÙ ÐÔ Û ÐÚÔÛÊ ÚÂÈ ÙÔ ÂÓÙ ÙÈÎ ÐÚ ÁÚ ÌÌ Î È ÐÚÔ Ï ÐÂÈ ÝÂÛÙ ÐÚ ÐÏ ÛË Î È Ó Ù ÐÏ ÛË ÛÙÔ Î Ù Î Ï È ÁÈ Ó Î Ú ÛÔ Ó Û ÛÙ ÔÈ Î ÙÛ Ú ÏÂ Î È Ù Ù È ÐÔ ÙÔÐÔ ÂÙ ÛÂÙÂ ÛÙÔ Î Ï È Ù Ï ÎÙÚÔ ÏÂÈÙÔ ÚÁ Ù ÁÓ Ì ÌÂ ÌÐ ÎÓ Ù È Ó ÔÏÔÎÏËÚ ÛÂÙÂ ÙÔ ÛÙ ÁÓ Ì Ù Ó È Ê Ú ...

Page 25: ...Ô ÓÔ ÍÙ ÙËÓ Ð ÚÙ Î È ÙÔÐÔ ÂÙ ÛÙ ٠ÐÈ ÙÈÎ Ì Û ÛÙÔ ÐÏ ÓÙ ÚÈÔ Â È Â Ù ÙÈ Ù ÐÈ ÙÈÎ ÂÓ ÌÐÏÔÎ ÚÔ Ó ÙÔ Ú ÔÓ ÂÎ ÛÌÔ µ ÏÙ ÙÔ ÐÚÔÞ Ó ÐÏ Û Ì ÙÔ Ì Û ÛÙÔ È ÓÔÌ Ï ÛÙ ÙËÓ Ð ÚÙ ðÐÈÏÔÁ ÙÔ Ù Ì ÙÔ ÐÚÔÁÚ ÌÌ Sensor Clean Ó ÏÔÁ Ì ÙÔ ÌÔÓÙ ÏÔ ªÂ ÙÔ Ó ÌÌ ÙË Û ÛΠÙÔ ÐÚ ÁÚ ÌÌ Ù ÂÐÈÏ ÁÂÙ È Ù Ì Ù ÙÔ Ê Ù ÎÈ Ù Ì ÙÔ ÐÚÔÁÚ ÌÌ Ó ÂÈ Î È Ð Ú Ì ÓÂÈ Ó ÌÌ ÓÔ Ì ÚÈ ÙÔ Ù ÏÔ ÙÔ Î ÎÏÔ ÏÂÈÙÔ ÚÁ H È ÚÎÂÈ ÙÔ ÐÚÔÁÚ ÌÌ ÙÔ ÐÔ ÂÐÈÏ Í Ù ...

Page 26: ... ÓÔ ÎÂÎ ÌÌ ÓÔ ÙÛ ÎÈÛÌ ÓÔ ªÂÙ ÙÔÐ Û Ù ÙË Û ÛÎÂ Û Î È ÛÙËÓ ÐÂÚ ÐÙ ÛË Ù ÙË ÁÂ Ú Ù ÐÚÔ Ù Ð Û È Ó Í Ó ÏÂÙ Û ÏÂÈÙÔ ÚÁ ÙËÓ ÓÙÏ ÍÂÎÚÂÌ ÛÙ ÙÔ Û Ï Ó ÐÔÛÙÚ ÁÁÈÛË ÐÏ ÛÙ ÙÔÓ Î Ù Ì ÙËÓ ÎÚË Ì Û ÛÂ Ì ÏÂÎ ÓË Î È ÏÙÂ Ó ÐÚ ÁÚ ÌÌ ÐÔÛÙÚ ÁÁÈÛË ÐÚ ÐÂÈ Ó Í Ó Ú ÛÂÈ Ï ÛÙ ٠Ù ÙÔ È Î ÐÙË ÏÂÈÙÔ ÚÁ FF Í Ó ÏÙ ÙÔ Û Ï Ó ÐÔÛÙÚ ÁÁÈÛË ÛÙË ÛË ÙÔ Î È Í Ó ÏÙ ÙÔ ÐÚ ÁÚ ÌÌ Ó Ð Ú ÙÈ Û Ì Ô Ï Ù Ù ÐÚÔ Ï Ì Ù ÂÍ ÎÔÏÔ Ô Ó Ó Ð Ú Ô Ó Â...

Page 27: ...ok 1 Work top certain models 2 Upper basket 3 Cleaning liquid container 4 Regenerating salt container 5 Self cleaning micro filter 6 Rating plate After sales service references 7 Lower sprinkling arm 8 Main filterl 9 Waste trap 10 Rinsing product container P A foto acima com o cesto inferior retirado permite lhe visualizar os principais elementos descritos neste manual de utilização 1 Tampo de tra...

Page 28: ...14 15 9 10 11 9B 12 13 12B ...

Page 29: ... references 7 Lower sprinkling arm 8 Main filterl 9 Waste trap 10 Rinsing product container P A foto acima com o cesto inferior retirado permite lhe visualizar os principais elementos descritos neste manual de utilização 1 Tampo de trabalho alguns modelos 2 Cesto superior 3 Distribuidor de produto de lavagem 4 Reservatório de sal regenerador 5 Microfiltro automático 6 Placa sinalética Referência S...

Page 30: ...14 15 9 10 11 9B 12 13 12B ...

Reviews: