background image

en

    Home Connect

52

4.

Press the Start button.

©Ÿ 

 will appear on the display panel 

(switched on).The appliance's Wi-Fi 

function is now switched on.

©”” 

 will appear on the display panel 

(switched off). The appliance's Wi-Fi 

function is now switched off.

5.

You can exit the Home Connect 

settings by pressing the 

Remote 

Start


}

 button.

Note:  

If 

©Ÿ

 (switched on) appears on 

the display but you actually wanted to 

select 

©””

 (switched off), you will need 

to repeat all of these steps again.

Note:  

If Wi-Fi is not activated on your 

appliance, you will not be able to 

connect it to your home network or to 

the app.

Resetting your network 

settings

You can clear the network settings and 

break the connection to your 

smartphone or tablet PC by resetting 

the network settings.

1.

Switch the appliance on.

2.

Press and hold the 

Remote Start


}


button for more than 3 seconds.

‘ž£

 (connect automatically) will 

appear on the display panel.

3.

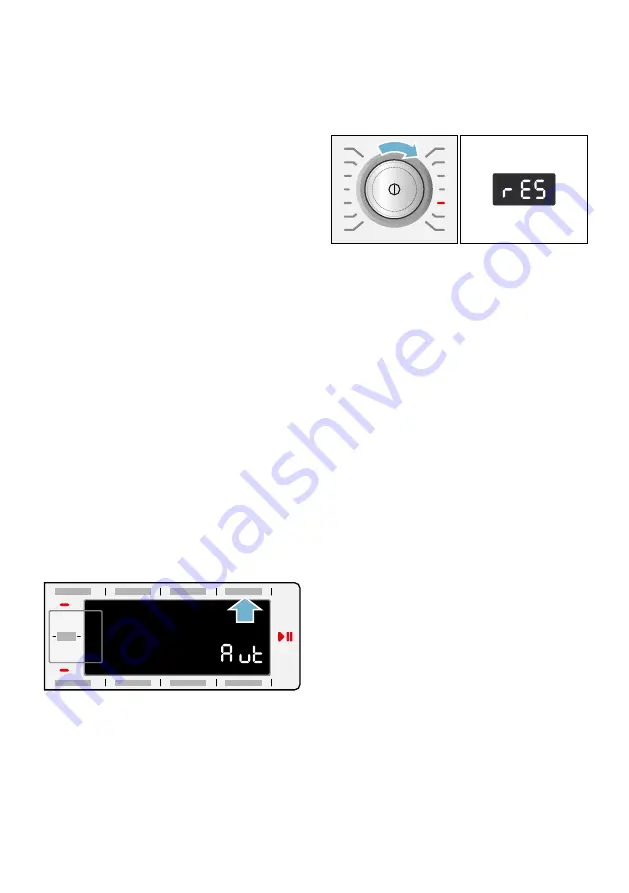
Turn the programme selector to 

position 5. 

§“†

 (reset network 

settings) will appear on the display 

panel.

4.

Press the Start button.

5.

¢“†

 (yes) will appear on the display 

panel.

6.

Press the Start button to confirm.

“Ÿš 

 (end) will appear on the display 

panel. The network settings have now 

been reset. Your appliance is no longer 

connected to your home network or the 

Home Connect app.

7.

You can exit the Home Connect 

settings by pressing the 

Remote 

Start


}

 button.

Notes

If the network settings could not be 

reset, 

“§§

 (fault) will appear on the 

display panel.

If you want to operate the appliance 

via the Home Connect app again, 

you will need to reconnect it to your 

home network and to the 

Home Connect app either 

automatically or manually.

Summary of Contents for WAWH8660GB

Page 1: ...en Instruction Manual and Installation Instructions Washing machine WAWH8660GB ...

Page 2: ...perating and installation instructions describe different models any differences will be pointed out at the relevant points in the text Read these operating and installation instructions before switching on the washing machine Display rules Warning This combination of symbol and signal word indicates a possibly dangerous situation Not heeding the warning can cause death or injuries Caution This si...

Page 3: ...machine 25 Control panel 26 Display panel 28 Z Laundry 30 Prepare the laundry 30 Sorting laundry 30 C Detergent 31 Correct selection of detergent 31 Saving energy and detergent 31 Overview of programmes 32 Programmes on the programme selector 32 Starching 37 Dyeing bleaching 37 Soaking 37 0 Programme default settings 38 Temperature 38 Spin speed 38 Finished In 38 i DOS settings 39 Additional progr...

Page 4: ...itch off 54 Switching the drum care information signal on off 54 Exiting setting mode 54 H Sensors 55 Automatic load sensing 55 Unbalanced load detection system 55 AquaSensor 55 2 Cleaning and maintenance 56 Machine housing control panel 56 Drum 56 Descaling 56 i DOS detergent draw and its housing 57 The drain pump is blocked emergency draining 58 The drain hose at the siphon is blocked 59 Filter ...

Page 5: ... outside of the scope of its intended application and is forbidden This appliance is suitable for operation with cold mains water and commercially available detergents and care products must be suitable for use in washing machines This appliance is intended for use up to a maximum height of 4000 metres above sea level Before you switch on the appliance Check that there is no visible damage to the ...

Page 6: ... by persons with a lack of experience or knowledge as long as they are supervised or have received instruction on how to use the appliance safely and they have understood the potential risks of using the appliance Children must not play with this appliance Do not allow children to clean or maintain this appliance unsupervised Keep children under 3 years and pets away from this appliance Do not lea...

Page 7: ... or care products Keep detergents and care products out of the reach of children Installation Warning Risk of electric shock fire material damage damage to the appliance If the appliance is not installed properly this may lead to a dangerous situation Make sure that The mains voltage on your power socket matches the rated voltage specified on the appliance identification plate The connected loads ...

Page 8: ...tion potentially resulting in injury or material damage Place the appliance on a clean even solid surface and using a spirit level to guide you level it with the screw in feet Riskofinjury materialdamage damagetotheappliance If you take hold of any of the appliance s protruding parts e g the appliance door in order to lift or move it these parts may break off and cause injury Do not take hold of a...

Page 9: ...heappliance The use of hoses supplied by other brands to connect to the water supply may result in material damage or damage to the appliance Use the hoses supplied with the appliance or genuine spare part hoses only Materialdamage damagetotheappliance The appliance is secured for transportation by transport locking devices If the transport locking devices are not removed before the appliance is o...

Page 10: ...eight on the appliance door when it is open Riskofinjury If you climb onto the appliance the worktop may break which may result in injury Do not climb onto the appliance Riskofinjury If you reach into the drum while it is still rotating you risk injuring your hands Wait until the drum has stopped rotating Warning Risk of scalding When washing at high temperatures there is a risk of scalding if you...

Page 11: ...o contact with live components Therefore please note Switch off the appliance Disconnect the appliance from the power supply pull out the plug Never take hold of the mains plug with wet hands When removing the mains plug from the socket always take hold of the plug itself and never the mains cable otherwise this may damage the mains cable Do not make any technical modifications to the appliance or...

Page 12: ...re parts and accessories only Caution Material damage damage to the appliance Cleaning agents and agents for pretreating laundry e g stain removers prewash sprays etc may cause damage if they come into contact with the surfaces of the appliance Therefore please note Do not allow these agents to come into contact with the surfaces of the appliance Clean the appliance with nothing but water and a so...

Page 13: ...s you to compare the consumption levels of the different programmes when choosing your programme settings and decide on an energy and water saving programme setting Energy saving mode The display panel lighting goes out after a few minutes and the A button flashes Press any button to activate the lighting Energy saving mode is not activated if a programme is running Automatic switch off If the app...

Page 14: ...required to connect the water drain hose to a siphon Useful tools Spirit level for aligning Spanner with WAF13 for loosening the transport braces and WAF17 for aligning the appliance feet 3 Mains cable 0 Bag Installation and operating instructions Customer services location directory Warranty Cover caps for openings after the transport braces have been removed Adaptor with sealing washer from 21 m...

Page 15: ...ure To prevent leaks and water damage you must follow the instructions in this section Notes In addition to the safety information listed here the local water and electricity supplier may have special requirements If in doubt have the appliance connected by a specialist Installation surface Note The washing machine be stable so that it does not move around The installation surface must be firm and...

Page 16: ...cks are not removed the drum for example may become damaged when the machine is operated Before using the appliance for the first time make sure that you completely remove all four transport locks Keep the locks in a safe place To prevent transport damage from occurring if the appliance is moved at a later date you must refit the transport locks before transporting the appliance Note Keep the scre...

Page 17: ...re available from specialist dealers customer services Extension for Aqua Stop and cold water supply hose approx 2 50 m order no WM Z2380 WZ 10130 CZ 11350 Z 7070X0 A longer supply hose approx 2 20 m for standard models individual component number for customer services 00353925 PD FP a FP a FP a FP a FP PD FP a FP a FP ...

Page 18: ...ten the screw connections by hand If the screw connections are tightened too much with a tool pliers the thread may become damaged When connecting to a 21 mm tap first fit an adapter with a sealing washer from 21 mm to 26 4 mm supplied depending on the model Optimum water pressure in the supply network At least 100 kPa 1 bar Maximum 1000 kPa 10 bar When the tap is open the water flow rate is at le...

Page 19: ...lip out Caution Damage to the appliance fabrics If the end of the drain hose is immersed in the drained water water may be sucked back into the appliance and may damage the appliance fabrics Make sure that The plug does not block drainage from the washbasin The end of the drain hose is not immersed in the drained water The water drains away quickly enough Note Do not kink the water drain hose or p...

Page 20: ... turning it in a clockwise direction 2 Check the alignment of the washing machine with a spirit level and adjust it if necessary Change the height by turning the appliance feet All four appliance feet must stand firmly on the ground 3 The lock nuts on all four appliance feet must be screwed tightly against the housing using a suitable WAF17 spanner In doing so hold the foot tight and do not adjust...

Page 21: ...ing machine is only connected to an alternating current supply via a properly installed earthed socket The mains plug fits the socket The cable cross section is adequate The earthing system is properly installed The mains cable is only replaced by a qualified electrician if this is necessary Replacement mains cables are available from customer services No multiple plugs couplings or extension cabl...

Page 22: ... protective film from the control panel 4 Plug into the mains 5 Turn on the tap Run the programme without laundry 1 Switch on the appliance 2 Close the door do not load any laundry 3 Set the Drum Clean 90 C programme 4 Open the detergent drawer 5 Pour approx 1 litre of water into compartment v u 6 Pour standard washing powder into compartment v uII Note To prevent foaming only use half of the amou...

Page 23: ...onnect the washing machine from the mains 4 Drain any residual water Page 58 cleaning and maintenance drain pump blocked emergency draining 5 Remove the hoses 6 Empty the dispensers Page 57 Fitting the transportation securing means 1 Remove the covers and keep them in a safe place If required use a screwdriver 2 Insert all four sleeves Clip the mains cable securely in the holders Insert the transp...

Page 24: ...Cottons 2 FODFN Sort the laundry Observe the maximum load depending on the model on the display panel Load the laundry Close the door 3 If necessary change the default programme settings and or select additional settings Start the programme 4 End of the programme Open the door and remove the laundry To switch off press the button Turn off the tap for models without Aqua Stop ...

Page 25: ...the appliance en 25 Getting to know the appliance Gettingtoknowtheappliance Washing machine 6 7 Detergent drawer Page 42 0 Operating display panel 8 Door with door handle 9S Open the door 9T Close the door Service flap ...

Page 26: ...e settings Page 40 SpeedPerfect EcoPerfect Prewash Aqua Plus H Changing the default programme settings Page 38 Temperature Spin speed Spin Finished In time P Child Lock 3 sec E Activate deactivate to prevent the set functions from being changed accidentally To do this press the Finished In and buttons at the same time for approximately 3 seconds Page 43 X A button for Starting a programme Interrup...

Page 27: ... do not start the programme via the Home Connect app during this time If you carry out any operations on the appliance itself such as opening the door or selecting a different programme the remote start button will be deactivated for safety reasons Notes Remote start can only be activated if the door is closed Remote start cannot be activated if the childproof lock is on Press and hold the button ...

Page 28: ...ropped below the minimum permitted level Filling Page 45 0 Temperature in C Ž 90 Ž cold 8 Spin speed in rpm 0 1600 Max spin speed depending on the selected programme and model 0 no spin cycle draining only Page 38 Rinse Stop Page 38 Finished In time e g 2 30 Programme duration depends on the programme selection in h min hours minutes End time preselection 1 24 h Programme ends after h h hours Basi...

Page 29: ...been pulled out ù is flashing After the programme has started Detergent drawer not fully pushed in Door ÿ is continu ously lit The washing machine door can be opened ÿ is flashing After the programme has started The door is not closed properly Tap r is continu ously lit Tap not turned on no water pressure r is flashing Water pressure too low may increase the programme duration Childproof lock Page...

Page 30: ... items separately Wash new coloured items separately the first time you wash them Soiling Wash laundry with the same level of soiling together Some examples of soiling levels can be found on Page 31 Light Do not prewash select the SpeedPerfect setting if necessary Normal Heavy Load less laundry select a programme with prewash Stains Remove pretreat stains while they are fresh Firstly dab with soap...

Page 31: ...ilk or viscose Programme Delicate Silk cold max 40 C Detergent for woollens Suitable for wool Wool programme cold max 40 C Saving energy and detergent For light and normal soiling you can save energy lower washing temperature and detergent Note When measuring the amount of all detergents additives care products and cleaning agents please always check the manufacturer s instructions and information...

Page 32: ...ou want to achieve a particular water temperature use the programme without the EcoPerfect setting and with a higher temperature as required The SpeedPerfect setting is suitable as a short programme for lightly soiled laundry Max 9 kg 5 kg Ž 90 C 0 1600 rpm EcoPerfect SpeedPerfect Prewash Aqua Plus Detergent è fabric softener è Cottons Eco ü Hard wearing fabrics heat resistant fabrics made of cott...

Page 33: ...achine washable delicate fabrics or silk Max 2 kg Ž 40 C 0 800 rpm EcoPerfect SpeedPerfect Prewash Aqua Plus Detergent è fabric softener è W Wool Hand or machine washable items that are made of wool or contain wool particularly gentle wash programme to prevent laundry from shrinking with longer pauses in the programme during which the items rest in the water Notes Wool is of animal origin e g ango...

Page 34: ...ndicator light flashes if you have not used a programme at 60 C or higher for a long time Notes Run the programme without laundry Use standard washing powder or a detergent that contains bleach To prevent foaming only use half the amount of detergent recommended by the detergent manufacturer Do not use detergents designed for woollens or delicates 0 kg 80 90 C 1200 rpm Detergent fabric softener Su...

Page 35: ...nstructions Notes Use a special detergent that is suitable for machine washing and dose in accordance with the manufacturer s instructions Laundry must not be treated with fabric softener Before washing clean the detergent drawer thoroughly all compartments to remove fabric softener residue Max 1 kg Ž 40 C 0 800 rpm EcoPerfect SpeedPerfect Aqua Plus Detergent fabric softener Outdoor Membrane coate...

Page 36: ...d bedspreads also suitable for items stuffed with down Note Wash large items separately Use a detergent that is designed for delicates and follow the instructions on the item s care label Use detergent sparingly Max 2 5 kg down Max 2 kg Ž 60 C 0 1200 rpm EcoPerfect SpeedPerfect Aqua Plus Detergent fabric softener Automatic 40 C Hard wearing items the degree of soiling and the type of fabric are au...

Page 37: ... pause the programme 6 Leave the laundry to soak for as long as required then either press the A button again to continue the programme or change the programme Notes Load laundry of the same colour No additional detergent is required the soaking solution is used for washing Auto Intensive More intensive treatment of the laundry the degree of soiling and the type of fabric are automatically detecte...

Page 38: ... The maximum speed that can be set depends on the model and programme that has been selected Finished In Before starting the programme you can preselect the programme end Ready in time in hourly increments h hour up to a maximum of 24 hours To do this 1 Select a programme The programme duration is displayed for the selected programme e g 2 30 hours minutes 2 Press the Finished In button repeatedly...

Page 39: ...el of softness i DOS w for detergent Dosage strengths You can change the settings for automatic detergent dosage before the programme starts You can find information on degrees of soiling on Page 31 i DOS i for fabric softener Dosage strengths Depending on what stage the programme is in you can change the settings for automatic detergent dosage ª High heavy soiling and staining Medium average soil...

Page 40: ...EcoPerfect Energy optimised washing by reducing the temperature while achieving a washing result that is consistent with the selected programme without the EcoPerfect setting Prewash For heavily soiled laundry Notes If intelligent dosage is selected the detergent will be dispensed automatically for the prewash and the main wash Set the i DOS dosage to medium to prevent overdosing If dosing manuall...

Page 41: ... panel Temperature Spin speed The maximum load and the duration of the programme alternately The indicator light for the i DOS settings if intelligent dosage has been selected Information on water and energy consumption In appliances with a drum light The drum is lit after switching on the appliance after opening and closing the door and after starting the programme The light switches off automati...

Page 42: ...he programme default settings You can use the default settings for each washing cycle or change them To do this repeatedly press the corresponding button until the required setting is displayed Note Pressing and holding the buttons automatically runs through the setting values until the last one Then press the button again and you will be able to change the setting values again The settings are ac...

Page 43: ...ctive E flashes briefly The childproof lock is active and the programme selector was turned or a button was pressed Note The childproof lock remains active even once the washing machine has been switched off Before selecting the next programme deactivate the childproof lock Adding laundry After starting the programme you can add or remove laundry if necessary Press the A button to do this The A bu...

Page 44: ... the display panel The A button indicator lamp is off Removing laundry switching off the appliance 1 Open the door and remove the laundry 2 Press the button The appliance is switched off 3 Turn off the tap Note Not required for Aqua Stop models Notes Do not leave any items of laundry in the drum They may shrink in the next wash or discolour another item Remove any foreign objects from the drum and...

Page 45: ... liquid products that the manufacturer recommends adding to the detergent drawer Do not mix different liquid detergents If changing your liquid detergent type manufacturer etc empty the dispenser completely and clean it Page 57 Do not use products containing solvents caustic agents or volatile substances e g bleach Do not mix detergent and fabric softener Do not use products that have expired or a...

Page 46: ...ge 39 In addition to intelligent dosage cleaning aids e g stain remover can be added manually to compartment v u if necessary Page 47 Note The selection on off and the selected dosage strength for i DOS i and i DOS w are saved for each programme until they are changed again even if the washing machine is switched off Topping up the detergent fabric softener If the indicator light for the selected ...

Page 47: ...nding i DOS button w or i for approx 3 seconds The preset basic dosage will appear in the display panel 2 Set the required basic dosage using the Finished In or buttons 3 The setting is activated without needing to be confirmed You can now wait for a short while or press any button except the i DOS buttons to revert to the original setting Note The settings are saved until they are changed again e...

Page 48: ...Notes When dosing all detergents cleaning aids and cleaning agents always follow the manufacturer s instructions If dosing detergent manually do not add additional detergent to the intelligent dosage dispenser set intelligent dosage to off ö This will prevent overdosing and foaming Dilute viscous fabric softener and fabric conditioner with water to prevent blockages Dosing and adding detergent 1 P...

Page 49: ...ome Connect app to make changes while the appliance is in operation You will be able to use the Home Connect app to see any adjustments made directly on the appliance itself however Connecting to your home network automatically If your router has a WPS function you can connect the appliance to your home network automatically If your router does not have a WPS function you will need to connect the ...

Page 50: ...smartphone or tablet PC 5 Call up the Wi Fi settings on your smartphone or tablet PC 6 Connect your smartphone or tablet PC to the HomeConnect Wi Fi network and enter the password key HomeConnect Note The connection process may take up to 60 seconds 7 Once you have connected successfully open the Home Connect app on your smartphone or tablet PC 8 In the Home Connect app enter the name SSID and pas...

Page 51: ...shown automatically select Appliance search and then Connect an appliance in the Home Connect app 7 Carry out the last steps in the Home Connect app to connect your appliance If the appliance has connected successfully Ÿ connected will appear on the display panel 8 You can exit the Home Connect settings by pressing the Remote Start button Note If a connection could not be established fault will ap...

Page 52: ...t PC by resetting the network settings 1 Switch the appliance on 2 Press and hold the Remote Start button for more than 3 seconds ž connect automatically will appear on the display panel 3 Turn the programme selector to position 5 reset network settings will appear on the display panel 4 Press the Start button 5 yes will appear on the display panel 6 Press the Start button to confirm Ÿš end will a...

Page 53: ...network which is connected to the Internet your appliance transmits the following categories of data to the Home Connect server initial registration Unique appliance identification consisting of appliance codes as well as the MAC address of the installed WiFi communication module Security certificate of the WiFi communication module to ensure a secure IT connection The current software and hardwar...

Page 54: ...w change the settings Changing the signal volume Use the Finished In or button to change the following settings at the corresponding programme selector positions 2 The volume of the information signals and or 3 The volume of the button signals Exit setting mode or Selecting deselecting the appliance automatic switch off With the programme selector in position 4 press the Finished In or button to s...

Page 55: ...tribution of the laundry by repeatedly starting and stopping drum spinning If the laundry is extremely unevenly distributed the speed is reduced or the spin cycle is not performed for safety reasons Note Place large and small items of laundry evenly in the drum Page 41 Page 62 AquaSensor depending on the model During the rinse cycle the AquaSensor checks the degree of turbidity turbidity is caused...

Page 56: ...ns Notes Ensure the room in which the washing machine is set up is well ventilated Leave the door and detergent dispenser tray open slightly when the washing machine is not in use Occasionally run a wash using the Cottons 60 C programme and powder detergent Machine housing control panel Wipe the housing and the control panel with a soft damp cloth Remove the detergent residue immediately Do not cl...

Page 57: ...g plugs and empty the contents into a suitable container d Then push the sealing plugs back in completely 2 Cleaning the dispensers detergent drawer The detergent drawer can be removed completely to allow you to clean to dispensers after you have emptied them a Empty the dispensers before removing the drawer Note Only put the drawer handle back on after you have finished cleaning b Pull out the dr...

Page 58: ... Warning Risk of scalding When you wash at high temperatures the water gets very hot If you come into contact with the hot water you may be scalded Allow the water to cool down 1 Turn off the water tap so that no more water can flow in and has to be drained via the drain pump 2 Switch off the appliance Pull out the mains plug 3 Open and remove the service flap 4 Take the drain hose out of the reta...

Page 59: ...attach the drain hose and secure the connection point using the hose clamp Filter in the water supply blocked First reduce the water pressure in the supply hose 1 Turn off the tap 2 Select any programme except Rinse Spin Empty 3 Press the A button Allow the programme to run for approximately 40 seconds 4 Press the button The appliance is switched off 5 Pull out the mains plug Then clean the filter...

Page 60: ...isk of scalding if you come into contact with hot water and laundry If possible leave it to cool down first Warning Risk of injury You may injure your hands if you reach into the drum while it is turning Do not reach into the drum when it is turning Wait until the drum has stopped turning Caution Water damage Any escaping water may cause water damage Do not open the door if water can be seen throu...

Page 61: ...Page 59 E 23 There is water in the base trough the appliance is leaking Turn off the tap Call the after sales service Page 64 E The childproof lock is activated deactivate it Page 43 Å is lit continuously Too much foam has been detected and additional wash cycles have been activated Add less detergent to the next wash cycle with the same load The indicator light for the Drum Clean programme is fla...

Page 62: ... it Page 43 Is selected Rinse Stop no final spin Page 44 Can the door only be opened by the emergency release Page 60 The programme will not start Have you pressed the A button or selected Finished In time Is the door closed Is the E childproof lock activated Deactivate it Page 43 If ù is flashing the detergent drawer has not been pushed in fully Push the drawer in correctly The drum briefly jerks...

Page 63: ... made with down Use less detergent for the next wash cycle Repeated intensive foaming Check your basic dosage and dosage strength settings If necessary use a different liquid detergent Detergent fabric softener drips off the seal and collects on the door or in the seal fold There is too much detergent fabric softener in the dispensers Do not fill the dispensers above the Max mark I am unable to co...

Page 64: ...ained service personnel using genuine spare parts There is detergent residue on the laundry Some phosphate free detergents contain water insoluble residue Select Rinse or brush the laundry after washing P appears on the display panel when the cycle is paused The water level is too high It is not possible to add laundry Close the door immediately if necessary Press the A button to resume the progra...

Page 65: ... 60 kWh 45 l 1 h Delicates Silk 30 C 2 kg 0 19 kWh 37 l _ h wool 30 C 2 kg 0 19 kWh 41 l _ h Programme Approximate information on the residual moisture WAWH2 WAWH8 WAWH4 WAWH0 Max 1600 rpm Max 1400 rpm Max 1200 rpm Max 1000 rpm Cottons 44 48 53 62 Easy Care 40 40 40 40 Delicates Silk 30 30 30 30 Wool 45 45 45 45 Observed values may deviate from the indicated values due to influence of water pressu...

Page 66: ... 0 12 W Power consumption when it is left on 0 43 W Power consumption when networked Wi Fi in standby mode duration 3 8 W 15 min Standard programmes for cottons in accordance with Regulation EU no 1015 2010 Programme temperature Load Approximate programme duration Cottons Eco ü ú 9 kg 4 _ h Cottons Eco ü ú 4 5 kg 4 h Cottons Eco ü û 4 5 kg 4 h Programme setting at maximum speed for testing and ene...

Page 67: ...s valid for the service life of the appliance 3 It is a prerequisite of all warranty claims that the appliance with Aqua Stop must have been installed and connected correctly in accordance with our instructions this also includes a correctly fitted Aqua Stop extension genuine accessories Our warranty does not cover defective feed lines or fittings leading to the Aqua Stop connection at the tap 4 A...

Page 68: ...001187556 9603 You can find the contact information for all countries in the attached after sales service directory 7 Advice and repair order in the event of faults GB 0344 892 8979 Calls charged at local or mobile rate IE 01450 2655 0 03 per minute at peak Off peak 0 0088 per minute ...

Reviews: