Bosch Security Systems | 2011-02
Praesideo 3.5
| Installation and User Instructions | 4 | Amplifiers
en
| 159
9.3 Connectors
9.3.1 Introduction
This section gives an overview of typical system
connections using the multi channel interface.
•
Connecting to the basic amplifiers (see section 9.3.2).
•
Connecting to the network (9.3.3).
•
Connecting the multi channel interface by-pass (see
section 9.3.4).
•
Connecting the control inputs (see section 9.3.5).
•
Connecting the control outputs (see section 9.3.6).
9.3.2 Connecting to the basic amplifier
The double amplifier connectors 1 to 14 are used for the
basic amplifier channels. The double amplifier
connectors 15 and 16 are available for two spare basic
amplifier channels.
The connection to the basic amplifier is made with two
modular (RJ45) connections.
The connections of the basic amplifier and the multi
channel interface have a triangle (top row) and a circle
(bottom row) symbol.
1 Connect the triangle symbol connector of the multi
channel interface to the triangle symbol connector of
the basic amplifier.
2 Connect the circle symbol connector of the multi
channel interface to the circle symbol connector of
the basic amplifier.
9.3.3
Connecting the network
Use the system bus connectors and LBB4416 network
cables to connect the multi channel interface to the
Praesideo system. Both connectors are interchangeable.
Normally the multi channel interface receives its power
from the connected amplifiers. This is the
recommended setting, but if it is not connected to an
Caution
Do not connect the circle symbol connector of
the multi channel interface to the triangle symbol
connector of the power amplifier.
Caution
Do not connect the modular (RJ45) connectors
to any Telecom or Ethernet network. These
connectors are dedicated for the multi channel
interface and the basic amplifiers only.
table 9.1 Basic amplifier interface connections
Top row, indicated with
triangle
Bottom row, indicated
with circle
Pin
Signal
Pin
Signal
1
Relay A Out
1
Audio Out +
2
Relay B Out
2
Audio Out -
3
Ground
3
Ground
4
DC Back-up
monitor In
4
24 V supply In/
Out
5
Mains monitor In
5
Spare relay Out
6
Stand by Out
6
Mute Out
7
100 V In +
7
Overheat In
8
100 V In -
8
Ready In
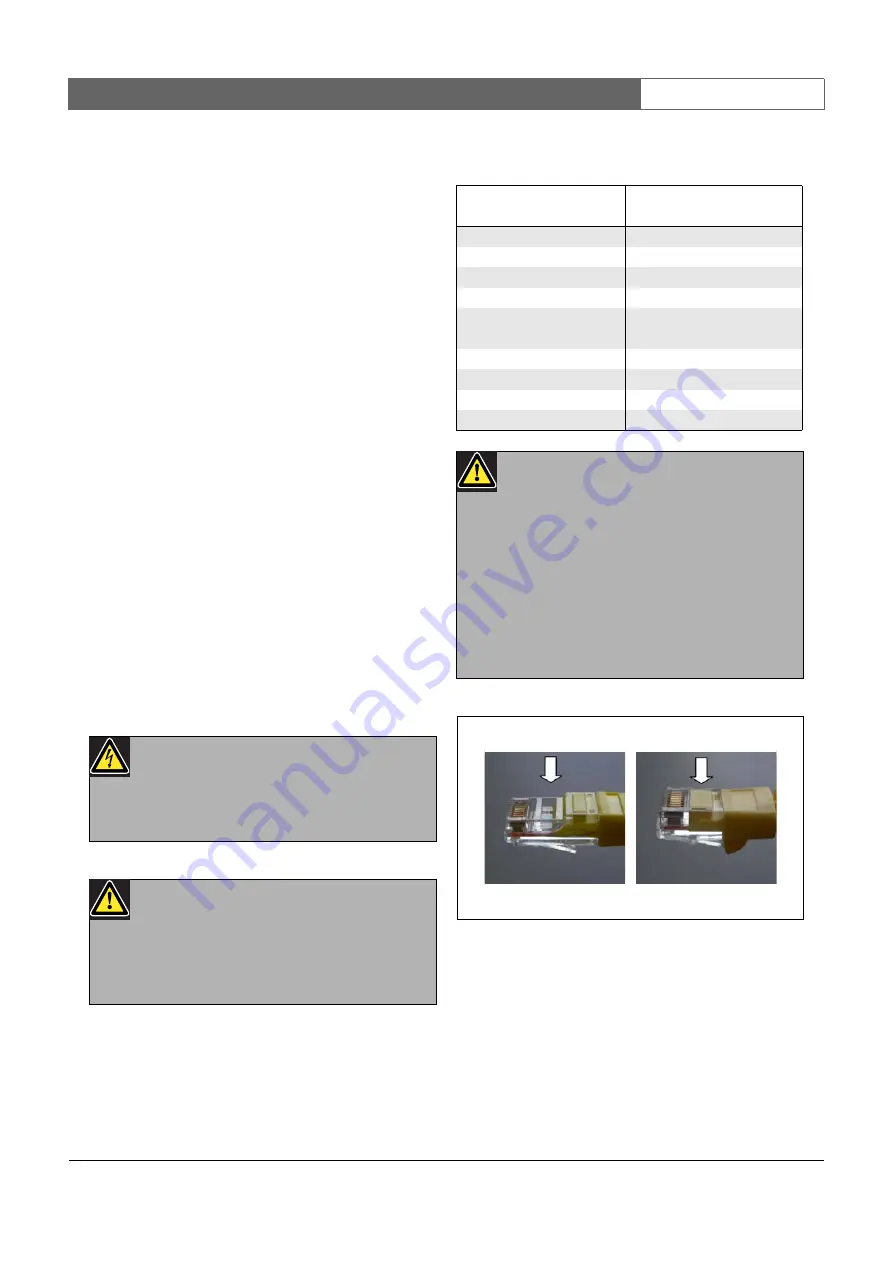
Caution
Always use CAT-5 modular plugs with an empty
connector crimp part (refer to figure 9.3, part A).
Some (pre-)assembled CAT-5 modular plugs
have a connector crimp part that is filled with
plastic (refer to figure 9.3, part B). These
connectors do not give a reliable connection to
the modular (RJ45) connectors on the basic
amplifiers and multi channel interfaces and can
therefore cause unexpected fault events.
figure 9.3: (pre-) assembled CAT-5 modular plugs
B
A


