English 6
Installation
Procedure
WARNING:
To avoid electrical shock hazard, before installing the
cooktop, switch power off at the service panel and lock the panel to
prevent the power from being switched on accidentally.
Seal the Cooktop with
Foam Tape
Apply the foam tape packaged with the cooktop to underside of the cooktop along
the perimeter before installing.
Prepare the Countertop
Cut out the countertop per the dimensions shown in section
Countertop Cutout
Dimensions above.
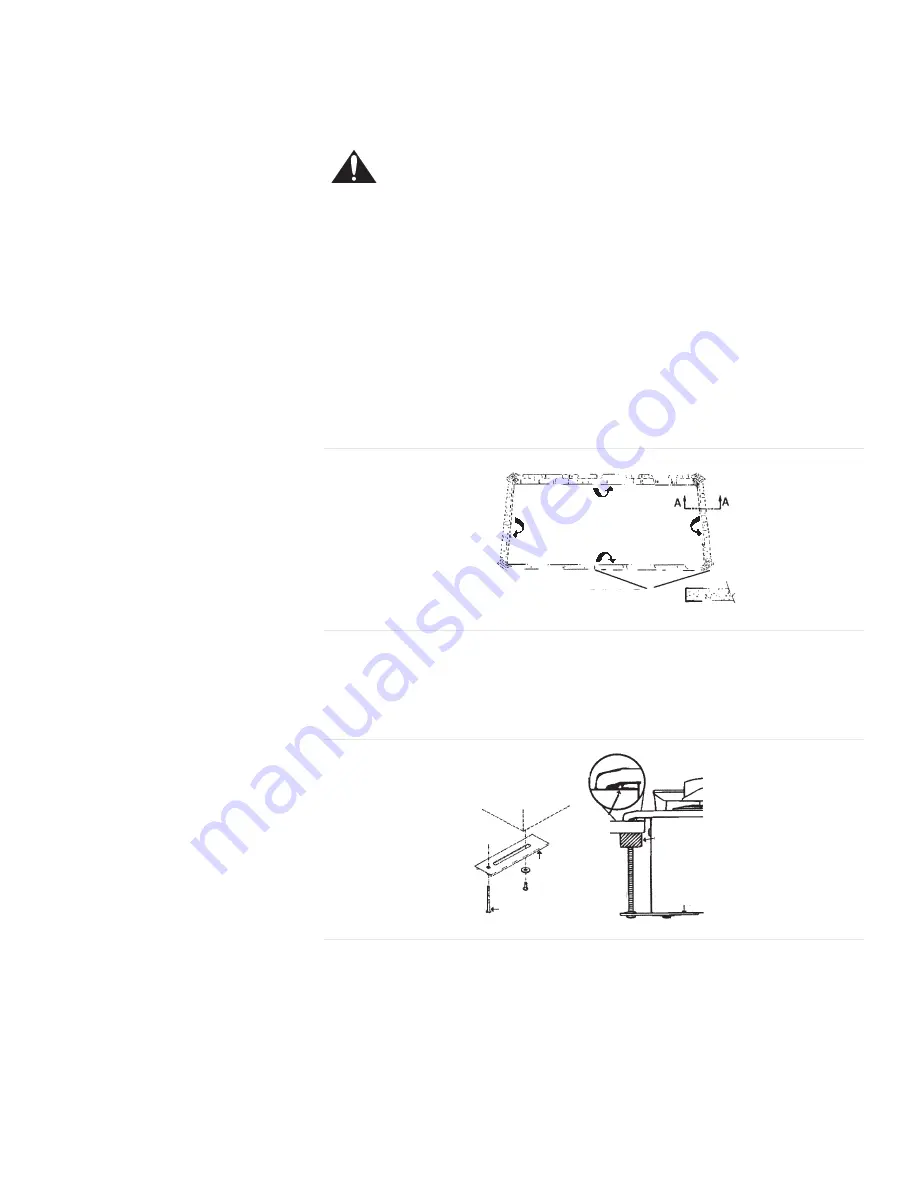
For solid surface material installations such as Surell™ and
Corian®, consult with solid surface manufacturer. Apply heat reflective tape such
as Scotch Aluminum Foil Tape #425 or #427 around the cutout so that it folds
over on the top and sides. Do not wrap the tape underneath the cooktop. Be sure
the tape extends beyond the outermost flange of the cooktop. All corners should
be covered with tape.
Attach Brackets to the
Cooktop
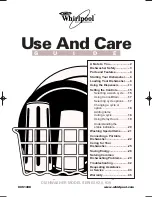
Attach clamps of the hold-down brackets packaged with the cooktop to the rough-
in box. Use the washer and screws provided.
Install the Cooktop
Insert cooktop into the cutout. Adjust hold-down brackets to desired position and
tighten screws to rough-in box. Insert adjusting screw into clamp and secure cook-
top to countertop.
For solid surface material installations: Insert a wooden block between the end of
the screw and the bottom of the countertop. Do not overtighten adjusting screw.
Trim excess aluminum tape around cooktop flange.
Figure 3: Counter Cutout – Solid Surface Countertops
Heat Reflective Tape
Cutout shows location
of Aluminum Reflective Tape
Section "A - A"
Figure 4: Attaching Hold-Down Brackets
Rough-in Box
Foam
Tape
(Seal)
Adjusting
Screw
Adjusting
Screw
Clamp
Clamp
Wooden Block
(to be used with
solid surfacing
material, i.e.
Surell™ and
Corian®)


