Robert Bosch LLC
VCI User’s Guide | Version 3.1 | April 2012
VCI User’s Guide | Version 3.1 | April 2012
Robert Bosch LLC
Getting Started | VCI Network Communications Setup Functions | 8
7 | Getting Started | Update VCI Tester Software
Select VCI by
Click to see
6. In the VCI Manager application, VCI Explorer tab,
select the VCI to interface with in the Detected VCIs
window.
Hold your cursor over the VCI icon to see a popup with
the IP address and the configured connections or click
on Show Details to see the detail view of the selected
VCI.
Click on Connect, in either view, to connect to the VCI.
The VCI is displayed with a green check mark on your
display indicating that your VCI Manager application is in
control of that VCI. Once you have connected to a VCI,
another VCI Manager application on another PC will still
detect your VCI but it will be displayed with a red “no”
symbol indicating that it is not available. A VCI can only be
connected to a single PC at a time.
Note
If your VCI is connected via USB, the functions
on all tabs are available; if your VCI is not
connected via USB, the functions on the
Network Setup and VCI Update tabs are not
available.
The VCI Detailed View window shows the PC S/W Version
information for the VCI Manager application and the
VCI S/W Version for the VCI Tester Software as well as
available interfaces and IP addresses, as shown in the
illustration above.
u
If your VCI Manager application is more recent than
the VCI Tester Software, you will need to update your
VCI Tester Software, see Update VCI Tester Software.
u
If your VCI Tester Software is more recent than your
VCI Manager application, you will need to update your
Shop Foreman Pro software. You can download the
latest Shop Foreman Pro software version
from the Bosch Diagnostics website,
www.boschdiagnostics.com.
Update VCI Tester Software
After you install a new Diagnostic application software
version, your VCI Manager application may be more recent
than your VCI Tester Software version. You will need to
connect each VCI that you have via the USB cable to the
PC with the new software and update the VCI Tester
Software.
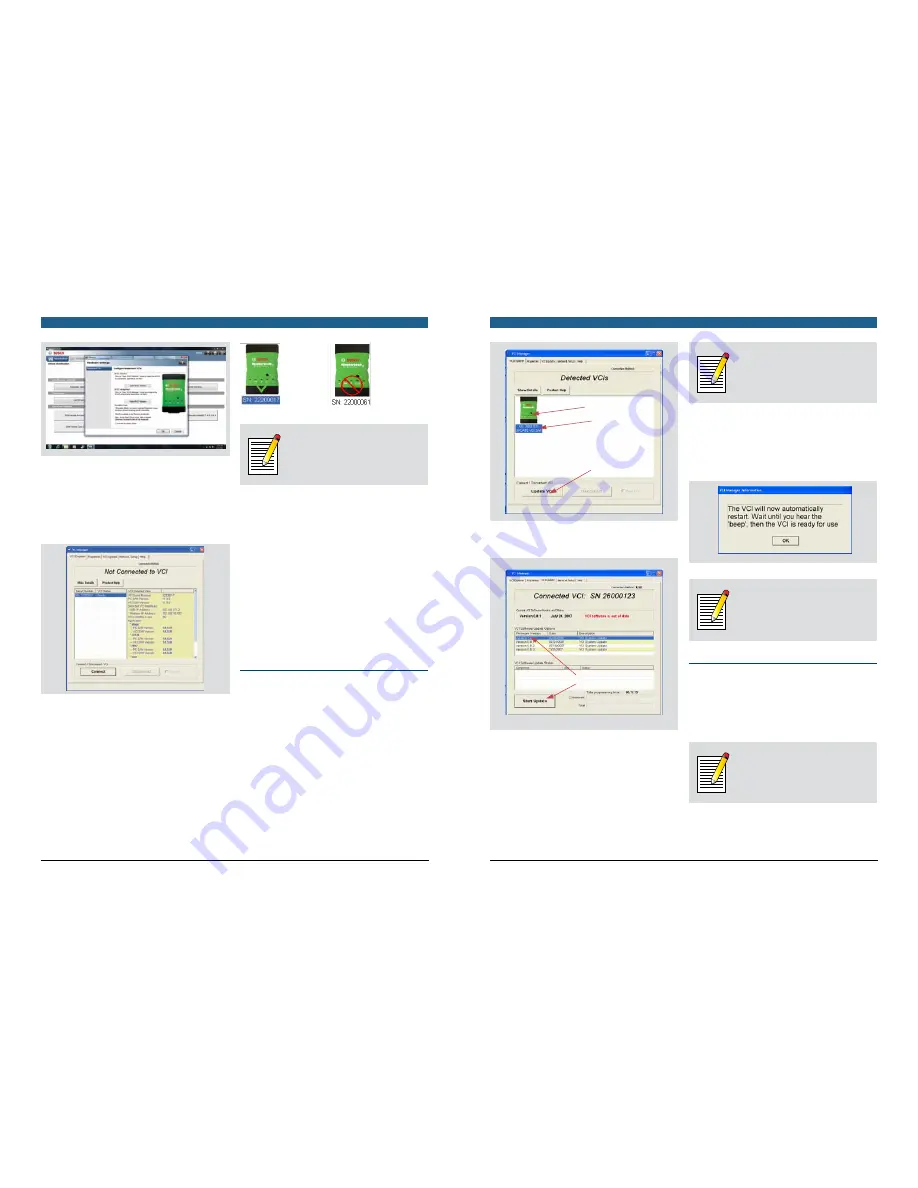
1. Start the VCI Manager application, refer to Starting the
VCI Manager application.
2. The VCI will appear on the VCI Explorer tab, as shown
below.
B. Click Update VCI
Serial number
A. Click to select
A. Select the VCI.
B. Click the “Update VCI” button.
C. Select software version
D. Click start update
C. Select the latest version of the VCI Tester Software.
D. Click Start Update.
Do not unplug the VCI from the PC or remove
power from the VCI during the update process.
Note
The update process may take up to 30 minutes
to complete per VCI before starting the update
process, make sure you have enough time.
3. When you see the message shown at the right, click
OK.
The VCI Manager application switches automatically to
the VCI Explorer tab and your VCI will appear when it
has finished the restart and Power On Self Test
(POST).
Note
After updating, the VCI restart process will take
a few minutes to complete the boot process as
new files are being written to the SD card.
VCI Network Communications Setup
Functions
The Network Setup tab in the VCI Manager application is
used to change the VCI connection interfaces, wireless
access or security settings, or to clear any previous
network settings.
Note
Do not use a USB hub to connect multiple VCIs
to a PC. The VCI has a static USB address and
address conflicts will occur.


