16
en | Setup tasks
CIP5000 series storage
2019-10 | V01 | F.01U.380.028
Quick installation guide
Bosch Security Systems B.V.
1
2
3
Figure
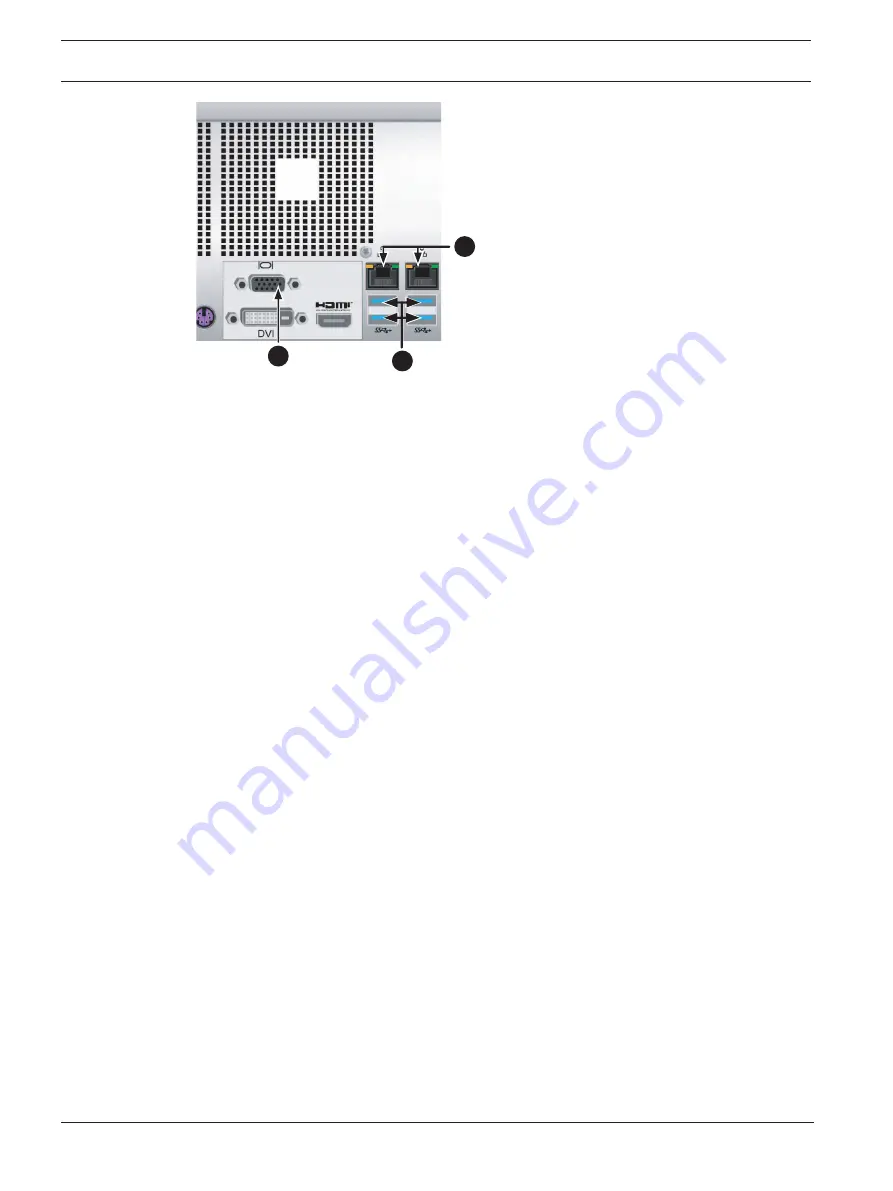
4.10: I/O ports on the rear panel
Connections for system management on rear panel:
1.
VGA port
2.
1000BASE-T RJ-45 ports
3.
USB 3.0 ports
4.4.1
Initial setup
Use a USB or PS/2 keyboard and a VGA monitor to establish a direction connection to the
Windows operating system.
All the I/O ports needed to do this are located on the rear panel. Connect a monitor, keyboard
and mouse to the appropriate port and you will be ready to login after the server has booted
up.
For instructions on how to login as administrator to the Windows OS user interface, refer to
Task 6: login to windows, page 19
4.4.2
Network connection
There are two 1 Gb/s Ethernet RJ-45 ports on the rear panel for connection to an Ethernet
network. After logging into the Management GUI as the administrator, you can change the
network settings.
To connect the server to a local Ethernet for management:
1.
Attach one end of an Ethernet cable to the network connector or standard NIC in the
Host PC. Attach the other end of the Ethernet cable to one of the ports on the standard
network switch.
2.
Attach one end of an Ethernet cable to one of the ports on the standard network switch.
Attach the other end of the Ethernet cable to an Ethernet port (1000 BASE-T) on the back
of the server.
4.5
Task 5: connect power and power on
Insert one power cable into the power receptacle for each power supply unit (PSU) and
connect the each PSU to a suitable power source. The enclosure is equipped with two PSU
using an N+1 arrangement.
Summary of Contents for CIP-5316W-00N
Page 1: ...CIP5000 series storage CIP 5316W 00N CIP 5424W 00N en Quick installation guide ...
Page 2: ......
Page 29: ......


