


BDVM-8455MPBTV
- 5 -
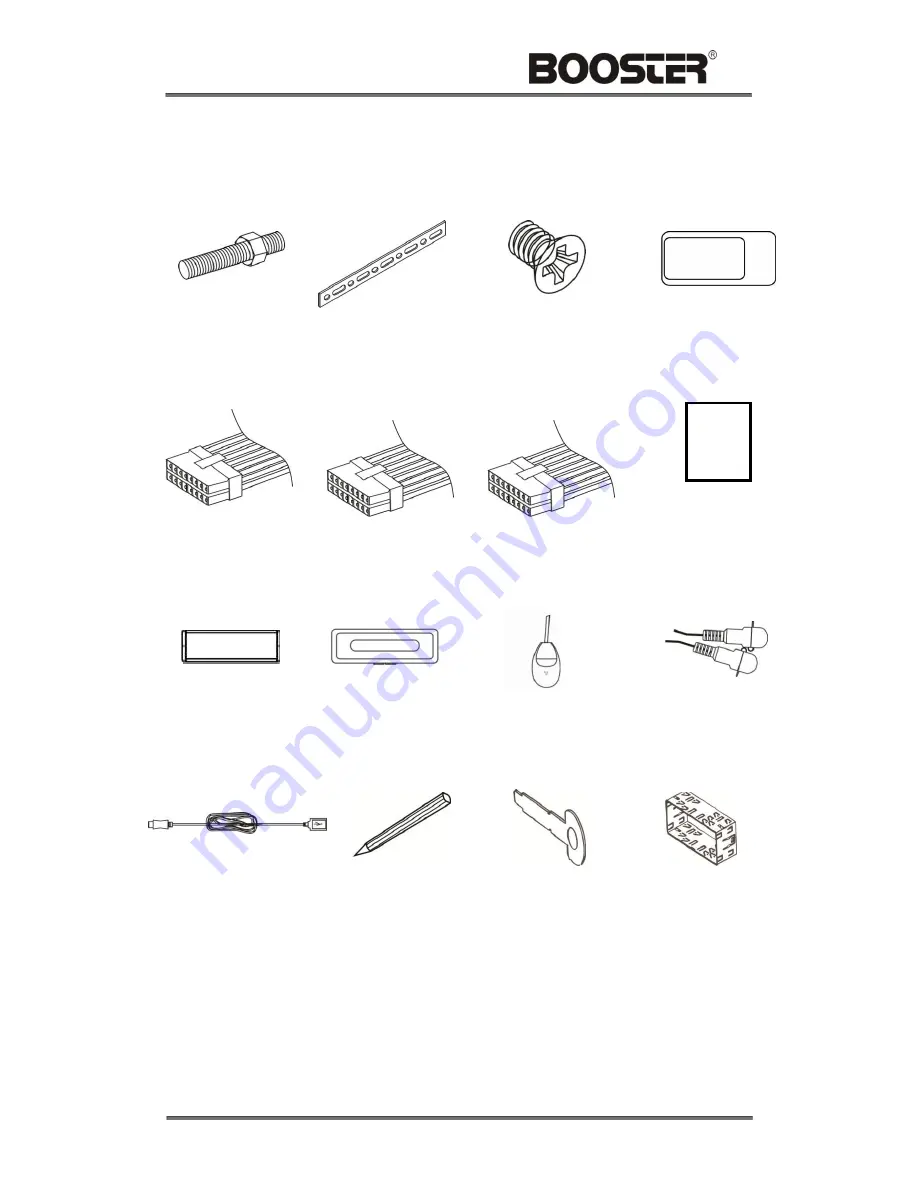
ACCESSORIES
Bolt and Nut M5 x 1 Back Strap x 1
M5X5 Screws x 4 Remote Control x 1
Power Wire x 1 Connecter Wire x 1 Connecter Wire x 1 Operational Manual x 2
Trim Bezel x 1 Faceplate Case x 1 External Microphone x 1 AUX Cable x 1
USB Cable x 1 Stylus x 1 Keys x 2 Mounting Sleeve x 1
1
2
3
4
5
6
8
9
10
00
12
2
4
7
11
1
4
13
4
14
16
15


