background image

©Copyright LOTRONIC 2016 


BOOST-LIGHT70 

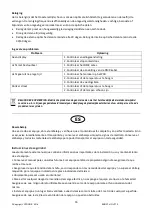
Fixture Cleaning 

The cleaning of internal and external optical lenses and/or mirrors must be carried out periodically to optimize 
light output. Cleaning frequency depends on the environment in which the fixture operates: damp, smoky or 
particularly dirty surrounding can cause greater accumulation of dirt on the unit’s optics. 


Clean with soft cloth using normal glass cleaning fluid. 


Always dry the parts carefully. 


Clean the external optics at least every 20 days. Clean the internal optics at least every 30/60 days. 


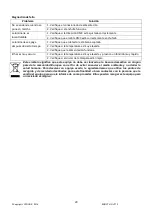
VII. Trouble-shooting 

Problem 

Solution 

No display when power is on 

1. Check if the power is correctly connected. 
2. Check the outlet is powered 

Light is out of control 

1. Check if the DMX address code is correctly set. 
2. Check if the DMX cable is correctly connected. 

The light is off after working for a while 

1. Check if the sensor is soldered on the LED PCB 
2. Check if the temperature is too high or not. 
3. Check if Power supply is damaged. 

The beam is dark  

1. Check if the temperature is too high and cause a fast fade. 
2. Check if there are too much dust on the surface of light. 


This marking indicates that this product should not be disposed with other household wastes 
throughout the EU. To prevent possible harm to the environment or human health from uncontrolled 
waste disposal, recycle it responsibly to promote the sustainable reuse of material resources. To 
return your used device, please use the return and collection systems or contact the retailer where the 
product was purchased. They can take this product for environmental safe recycling.


Déballage 

Dès réception de l’appareil, ouvrez le carton et vérifiez que le contenu est complet et en bon état. Sinon, 
prévenez immédiatement le transporteur et conservez l’emballage s’il montre des signes de mauvais 
traitements. Conservez le carton et tous les matériaux d’emballage afin de pouvoir transporter l’appareil en 
toute sécurité. 


Consignes de sécurité


Lisez attentivement ce manuel qui contient des informations importantes sur l’installation, l’utilisation et 
l’entretien de cet appareil. 
• Conservez le manuel pour référence ultérieure. Si l’appareil change un jour de propriétaire, assurez-vous que 
le nouvel utilisateur est en possession du manuel. 
• Assurez-vous que la tension secteur convient à cet appareil et qu’elle ne dépasse pas la tension d’alimentation 
indiqué sur la plaque signalétique de l’appareil.   
• Uniquement pour utilisation à l’intérieur! 
• Afin d’éviter tout risque d’incendie ou de choc électrique, ne pas exposer cet appareil à la pluie ou à 
l’humidité. Assurez-vous qu’aucun objet inflammable ne se trouve à proximité de l’appareil pendant son 
fonctionnement. 

Summary of Contents for BOOST-LIGHT70

Page 1: ... LIGHT70 LED PAR SET B BO OO OS ST T L LI IG GH HT T7 70 0 GB INSTRUCTION MANUAL F MANUEL D UTILISATION D BEDIENUNGSANLEITUNG NL HANDLEIDING ES MANUAL DE INSTRUCCIONES Imported from China by LOTRONIC S A Av Z Gramme 9 B 1480 Saintes ...

Page 2: ...e and be sure to replace with same fuse size and type Maximum ambient temperature Ta is 104 F 40 C Do not operate the fixture at temperatures higher than this In the event of a serious operating problem stop using the unit immediately Never try to repair the unit by yourself Repairs carried out by unskilled people can lead to damage or malfunction Please contact the nearest authorized technical as...

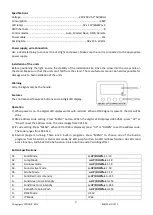
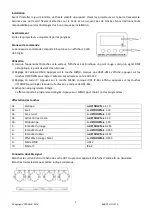
Page 3: ...digital LED display works with red dots When a DMX signal is present the dot will be shiny 2 DMX address code setting Press MENU button When the digital LED displays d001 d512 press UP or Down to set the address code The code ranges from 001 512 3 IP code setting Press MENU When IP 01 IP 64 is displayed press UP or DOWN to set the address code The code ranges from 001 512 4 Internal program runnin...

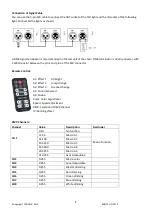
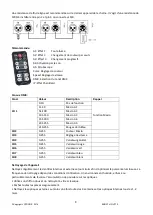
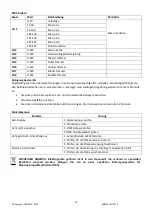
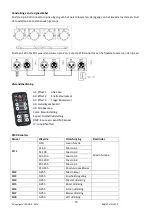
Page 4: ...R connector Remote Control A1 Effect 1 All bright A2 Effect 2 Jump change A3 Effect 3 Gradual change A4 Sound activated A5 Strobe Color Color adjustment Speed Speed adjustment DMX Selection of DMX channel IP Running effect DMX Channels Channel Value Description Reminder CH 1 0 10 No function Macro function 11 50 Macro A1 51 100 Macro A2 101 150 Macro A3 151 200 Macro A4 201 255 Macro A5 210 255 Re...

Page 5: ...To prevent possible harm to the environment or human health from uncontrolled waste disposal recycle it responsibly to promote the sustainable reuse of material resources To return your used device please use the return and collection systems or contact the retailer where the product was purchased They can take this product for environmental safe recycling Déballage Dès réception de l appareil ouv...

Page 6: ...e décrite et le commutateur doit rester facilement accessible Les lampes utilisées dans ce jeu de lumière ne peuvent être remplacées que par le fabricant ou un service de réparation agréé ou un technicien qualifié AVERTISSEMENT CONCERNANT LES PILES La télécommande fournie avec Ce produit contient une pile bouton Si la pile bouton est avalée elle peut provoquer de graves brûlures internes en 2 heur...

Page 7: ...Lorsque que d001 d512 s affiche appuyez sur les touches UP DOWN pour régler l adresse Les adresses vont de 001 512 3 Réglage du code IP Appuyez sur la touche MENU Lorsque IP 01 IP 64 s affiche appuyez sur les touches UP DOWN pour régler le code de l adresse Le code va de 001 512 4 Activation du programme intégré L effet comporte 5 programmes intégrés Appuyez sur MENU pour choisir un des programmes...

Page 8: ...101 150 Macro A3 151 200 Macro A4 201 255 Macro A5 210 255 Rouge Vert Bleu CH2 0 255 Couleur Macro CH3 0 255 Réglage de vitesse CH4 0 255 Variateur général CH5 0 255 Variateur rouge CH6 0 255 Variateur vert CH7 0 255 Variateur bleu CH8 0 255 Variateur blanc Nettoyage de l appareil Nettoyez régulièrement les lentilles internes et externes e ou miroirs afin d optimiser la puissance lumineuse La fréq...

Page 9: ...nwandfreiem Zustand sein Sofort die Transportfirma benachrichtigen und das Verpackungsmaterial aufbewahren wenn Teile Transportschäden aufweisen Verpackungsmaterial auch für späteren Transport des Geräts aufbewahren Sicherheitshinweise Diese Anleitung sorgfältig vor der ersten Inbetriebnahme lesen Sie enthält wichtige Informationen über Installation Gebrauch und Instandhaltung des Geräts Die Anlei...

Page 10: ...fen Sie sofort ärztliche Hilfe ACHTUNG Bei falsch eingesetzter Batterie besteht Explosionsgefahr Batterie nur durch eine gleichwertige ersetzen Dieses Zeichen bedeutet dass die Batterie nicht in normalen Hausmüll geworfen werden darf Sie muss zu einer Sammelstelle gebracht werden wo sie ordnungsgemäß entsorgt wird Technische Daten Versorgung 220 240V AC 50 60Hz Verbrauch 48W Leuchtmittel 12 x 1W R...

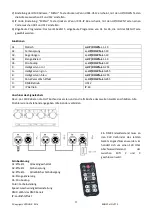
Page 11: ...chstehend angegeben miteinander verbinden Ein DMX Endwiderstand muss an den XLR Verbinder des letzten Geräts angeschlossen werden Es handelt sich um einen 120 Ohm Abschlusswiderstand der zwischen Stift 2 und 3 geschlossen wird Fernbedienung A1 Effekt 1 Alles eingeschaltet A2 Effekt 2 Farbensprung A3 Effekt 3 Allmählicher Farbübergang A4 Klangaktivierung A5 Stroboskop Color Farbeinstellung Speed Ge...

Page 12: ...Schmutz an Die Linsen mit einem weichen Tuch und normalem Glasreiniger abwischen Alle Teile sorgfältig trocknen Die Linsen mindestens einmal alle 3 Wochen reinigen Die Innenseite der Linsen alle 1 2 Monate Fehlerdiagnose Problem Lösung Kein Display 1 Netzanschluss prüfen 2 Steckdose prüfen Licht nicht steuerbar 1 DMX Adresse prüfen 2 DMX Anschlusskabel prüfen Licht geht nach einer Weile aus 1 Sens...

Page 13: ...icaties Gebruik het toestel niet in ruimtes met een temperatuur van meer dan 40 C In geval van een ernstig probleem stop het toestel direct Verzoek nooit het toestel zelfs te repareren Alle reparaties moeten van een ervarene technicus doorgevoerd worden Gebruik alleen onderdelen met dezelfde specificaties Zorg ervoor dat het netsnoer nooit wordt geplooid of beschadigd Nooit aan de kabel trekken No...

Page 14: ...heft 4 toetsen en een 4 digit led display Werking 1 Als het toestel wordt aangeschakeld verschijnt een rode punt op de display Als een DMX signaal wordt ontvangen verschijnt de punt helder 2 DMX adres instelling Druk de MENU toets Als d001 d512 verschijnt druk UP DOWN om het adres tussen 001 en 512 in te stellen 3 IP code instelling Druk de MENU toets Als IP 01 IP 64 verschijnt druk UP DOWN om de ...

Page 15: ...1 Alles aan A2 Effect 2 Snelle kleurwissel A3 Effect 3 Trage kleurwissel A4 Geluidsgeactiveerd A5 Stroboscoop Color Kleurinstelling Speed Snelheidsinstelling DMX Keuze van een DMX kanaal IP Looplichteffect DMX Kanalen Kanaal Waarde Omschrijving Reminder CH 1 0 10 Geen functie Macro functie 11 50 Macro A1 51 100 Macro A2 101 150 Macro A3 151 200 Macro A4 201 255 Macro A5 210 255 Rood Groen Blauw CH...

Page 16: ...especialiseerd inzamelpunt Raadpleeg de plaatselijke autoriteiten of uw verkoper over hoe de producten te recycleren Desembalaje Una vez reciba el equipo abra el embalaje y verifique que el contenido está completo y en perfecto estado Si no es así avise inmediatamente al transportista y conserve el embalaje si muestra signos de maltrato Conserve el embalaje y todos los materiales de embalaje para ...

Page 17: ...DVERTENCIA No ingiera la Pila Peligro de quemaduras químicas El control remoto suministrado incluye una de estas pilas Este producto contiene una pila de botón Si se traga la pila del botón puede provocar quemaduras internas graves y en solo 2 horas y puede provocar la muerte Mantenga las pilas nuevas y usadas fuera del alcance de los niños Si el compartimiento de la pila no se cierra correctament...

Page 18: ... indica apriete las teclas UP DOWN para ajustar la dirección Las direcciones van de 001 512 2 Ajuste del código IP Apriete en la tecla MENU Cuándo IP 01 IP 64 se indica apriete las teclas UP DOWN para ajustar el código de la dirección El código va de 001 512 3 Activación del programa integrado El efecto cuenta con 5 programas integrados Apriete en MENU para seleccionar uno de los programas Afectac...

Page 19: ...0 Macro A1 51 100 Macro A2 101 150 Macro A3 151 200 Macro A4 201 255 Macro A5 210 255 Rojo Verde Azul CH2 0 255 Color Macro CH3 0 255 Ajuste de velocidad CH4 0 255 Variador general CH5 0 255 Variador Rojo CH6 0 255 Variador Verde CH7 0 255 Variador Azul CH8 0 255 Variador Blanco Limpieza del equipo Limpie regularmente las lentes externas a fin de optimizar la potencia de la luz La frecuencia de li...

Page 20: ... elevada 3 Verifique que la alimentación funciona El haz es muy oscuro 1 Verifique si la temperatura es muy elevada y provoca un fundido muy rápido 2 Verifique si el cristal de la lámpara está limpio Este símbolo significa que este equipo no debe ser lanzado al a basura doméstica en ningún país de la comunidad Europea con el fin de evitar ensuciar el medio ambiente y no dañar la salud humana Para ...

Page 21: ... R C BOOST Type or model BOOST LIGHT70 Conforms to the essential requirements of the LVD directive 2014 35 EU EMC directive 2014 30 EU ROHS directive 2011 65 EU Based on the following specifications applied EN60598 2 17 1989 A2 1991 EN60598 1 2008 A11 2009 EN62493 2010 EN55015 2013 A1 2015 EN61547 2009 EN61000 3 2 2014 EN61000 3 3 2013 IEC62321 2008 IEC62321 2013 IEC62321 2015 Place and date of is...

Page 22: ...xquels se réfère cette déclaration sont conformes aux exigences essentielles et aux autres dispositions pertinentes des directives LVD 2014 35 EU EMC 2014 30 EU ROHS 2011 65 EU Les produits sont en conformité avec les normes et ou autres documents normatifs suivants EN60598 2 17 1989 A2 1991 EN60598 1 2008 A11 2009 EN62493 2010 EN55015 2013 A1 2015 EN61547 2009 EN61000 3 2 2014 EN61000 3 3 2013 IE...

Reviews: