

Contractor Quick Start Guide for
Vive Integral Fixture Controls
Part of the Vive System
Customer Assistance | 1.844.LUTRON1
USA, Canada, and the Caribbean
| +1.888.235.2910
Mexico
| +1.610.282.3800
Others
| www.lutron.com
Important Installation and Startup Notes
1.
If access to the fixture is required in order to supply power:
A.
Minimize the length of wires (incoming power) that can bundle up in close proximity to the Vive Integral
Fixture Control.
B.
Keep incoming power wires separated from the wires that run between the driver and the fixture control.
2.
Fixture will run through the self-test as described to the left.
A.
If at the end of that self-test the fixture control LED turns green and the fixture is ON,
the fixture passes the test. Proceed with commissioning.
B.
If at the end of that self-test the fixture control LED turns red and the fixture is OFF:
i. Adjust wiring as described in Step 1 above. Ensure incoming power wires and LED wires are
separated from the sensor wires. Wires may have shifted during shipping/installation or may have
been bundled together when closing up the driver channel.
ii.
Repeat the self-test by doing one of the following:
a. Toggle power to the fixture (at the breaker or fixture quick connects).
b.
With fixture powered, Reset Factory Defaults for fixture control. See the
Reset Factory Defaults
section.
iii.
If the self-test still results in a red LED the range of the fixture may be reduced in certain
installations.
Work with whomever is doing the commissioning of the system to test performance
(i.e. still able to control the fixture with a Pico remote? Still able to properly associate the fixture to the
Vive System? etc.)
a. If the above yields satisfactory results, the evaluation is done.
b. If the above yields unsatisfactory results, consult the fixture manufacturer and / or Lutron.
NOTE:
Lutron recommends as best practice that this information
be provided with the fixture to the electrical contractor.
Status LED
Important Notes about Initial Fixture
Power-up:
When power is applied to the fixture, the fixture will run through
a 10-second self-test described below before normal operating
mode commences unless the fixture was previously powered for
an hour or more continuously, or is associated to a Vive hub.
1.
While the self-test is in progress, the status LED alternates
between green and red. During the test, the Vive integral fixture
control will not respond to button presses or commands from
other Lutron Clear Connect devices.
2.
Fixture will turn ON to full intensity for 5 seconds and then will turn
OFF for 5 seconds.
3. Once the self-test is complete:
A. If the fixture passes, the status LED blinks green twice,
repeating every 2 seconds, and the fixture will turn ON.
B. If the fixture fails, the status LED blinks red twice, repeating
every 2 seconds, and the fixture will remain OFF. See
Important Installation and Startup Notes
section for
managing a self-test failure.
4.
The LED and load state will continue to display the self-test result
(from #3 above) for 5 minutes unless the button is pressed or until
the unit is associated to a Vive hub.
Note:
Do NOT disconnect power to the fixture until the pass/fail
determination has been made.
5.
See video at https://youtu.be/LS6MmjqhH2M
Reset Factory Defaults
Note:
In some instances, it may be necessary to reset
the Fixture Control back to factory default settings. Before
beginning, make sure the Fixture Control is connected and
powered.
A
Rapidly tap the button on the Fixture Control three times and
hold on the fourth until the green LED begins to flash rapidly;
release button.
B
Within 1 second of releasing the button, again rapidly tap the
button three times and the green LED will flash slowly indicating
that the unit has been reset to factory defaults.
Note:
Any associations or programming previously set up
with the Fixture Control will be erased and will need to be
re-programmed. Upon successful completion of Reset Factory
Defaults, the fixture control will commence with the self-test as
described above in
Important Notes about Initial Fixture
Power-up
.
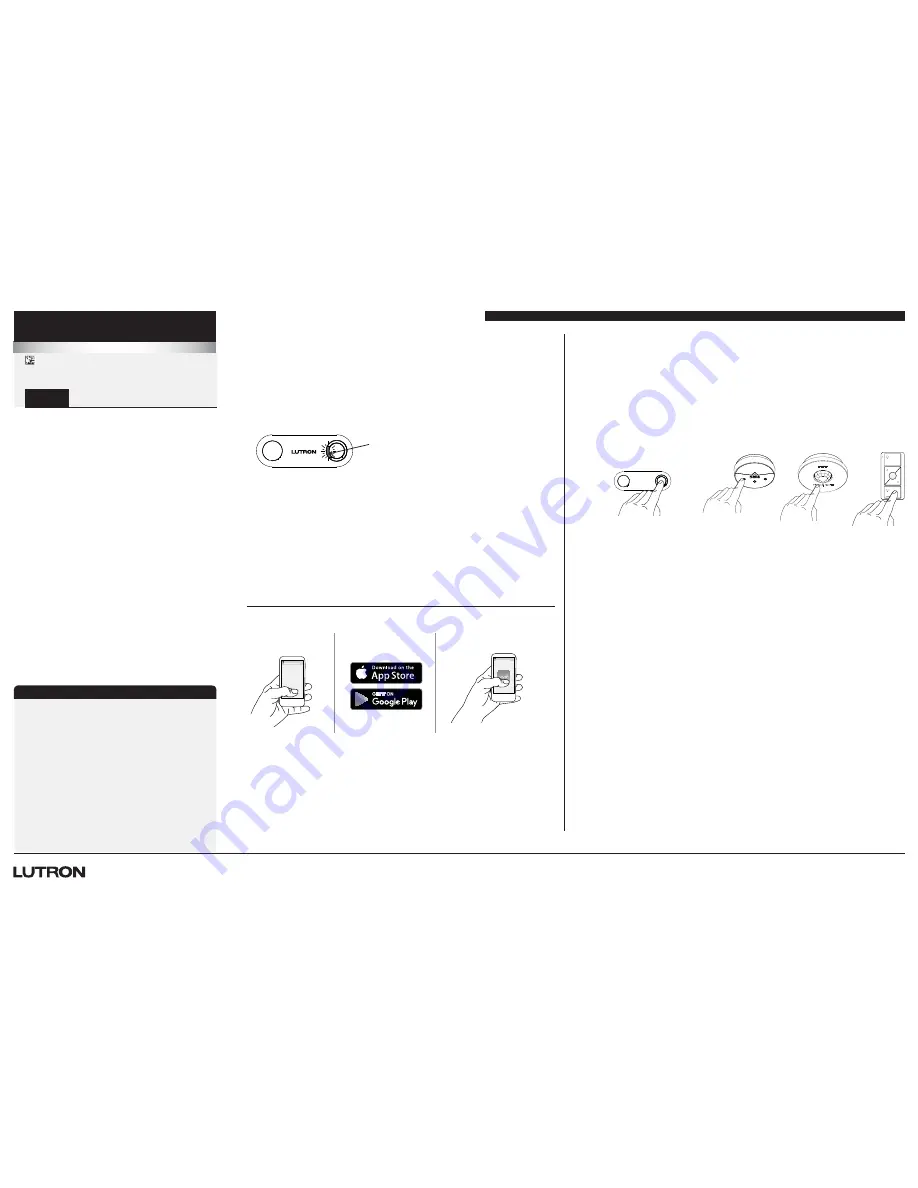
Programming without a Vive Hub
(Associating transmitters to Fixture Control)
1.
Press and hold the button on the Integral Fixture Control for 6 seconds until the load attached to the Fixture
Control starts flashing (every 2 seconds).
Note:
Multiple Fixture Controls can be placed into association mode by repeating Step 1 prior to moving to
Step 2.
2.
Hold the indicated button on each transmitter for 6 seconds. The fixture will flash at a different rate than in
Step 1 to show that wireless transmitters have been associated. Alternatively, for Radio Powr Savr occupancy/
vacancy and daylight sensors, the green laser pointer can be used. See the
Using a Green Laser to
Program Lutron Ceiling and Wall-Mounted Devices
App Note #407 (048407) on www.lutron.com for more
information. To associate another transmitter, repeat Steps 1 and 2 above.
Test
Link
Step 1
Step 2
Default Sensor Settings for DFCSJ-OEM-OCC (adjustable ONLY via the
Vive hub user interface unless otherwise noted)
• Occupancy sensor timeout: 15 minutes
• Occupancy sensor sensitivity: Medium
• Mode: Occupancy detection (auto-ON, auto-OFF)
•
Occupied light level: 100% (note this can also be changed with a Pico remote and Radio Powr Savr sensor. See
App Note #556 [048556] at www.lutron.com)
• Daylighting: Enabled
•
Daylighting dims lights to OFF from low light level when sufficient ambient light is present for
15 minutes or more
Lutron Electronics Co., Inc. 7200 Suter Road
Coopersburg, PA 18036-1299 USA
Please read before installing fixture
041657
Rev. B
07/2018
DFCSJ-OEM-OCC
Vive Integral Fixture Control with Sensor
DFCSJ-OEM-RF
Vive Integral Fixture Control (RF only)
9.5 – 20.5 V
-
250 mA max
IEC SELV / NEC
R
Class 2
UL2043 Plenum Rated
Programming with a Vive Hub
A
Use an iOS
R
or Android
R
compatible device.
B
Download the Lutron
Vive app.
C
Open the app and follow
the instructions.
Note:
For further information on set up, programming, and troubleshooting with a Vive system, please
refer to the installation instructions included with the Vive hub or visit www.lutron.com/vive
Note:
For programming the Vive Integral Fixture Control without a Vive Hub see section to the right.
vive.lutron.com
X
X
Vive