
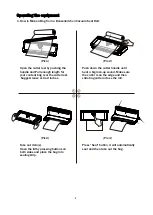

not be inserted further than the rear sealing ring and must lie between the front and
rear sealing ring. If the bag lies over one or both of the sealing rings, the bag cannot be
properly sealed.
5
The bag opening must lie
fl
at on the welding wire. Otherwise, welding will not work
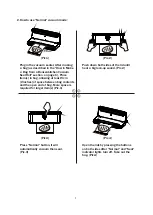
properly. Close the cover of the device. The seal presses the bag onto the sealing wire to
create a smooth seam. Make sure that both corners of the lid are closed. If necessary,
press the top cover again so that the lid clicks in audibly and
fi
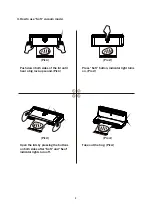
rmly. Select the mode
(Normal or Soft). When the selection is
, the
indicator lights up. When
Normal
Normal
Soft
Soft
is selected, the indicator
will light up.
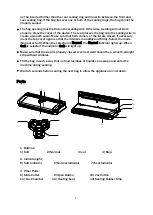
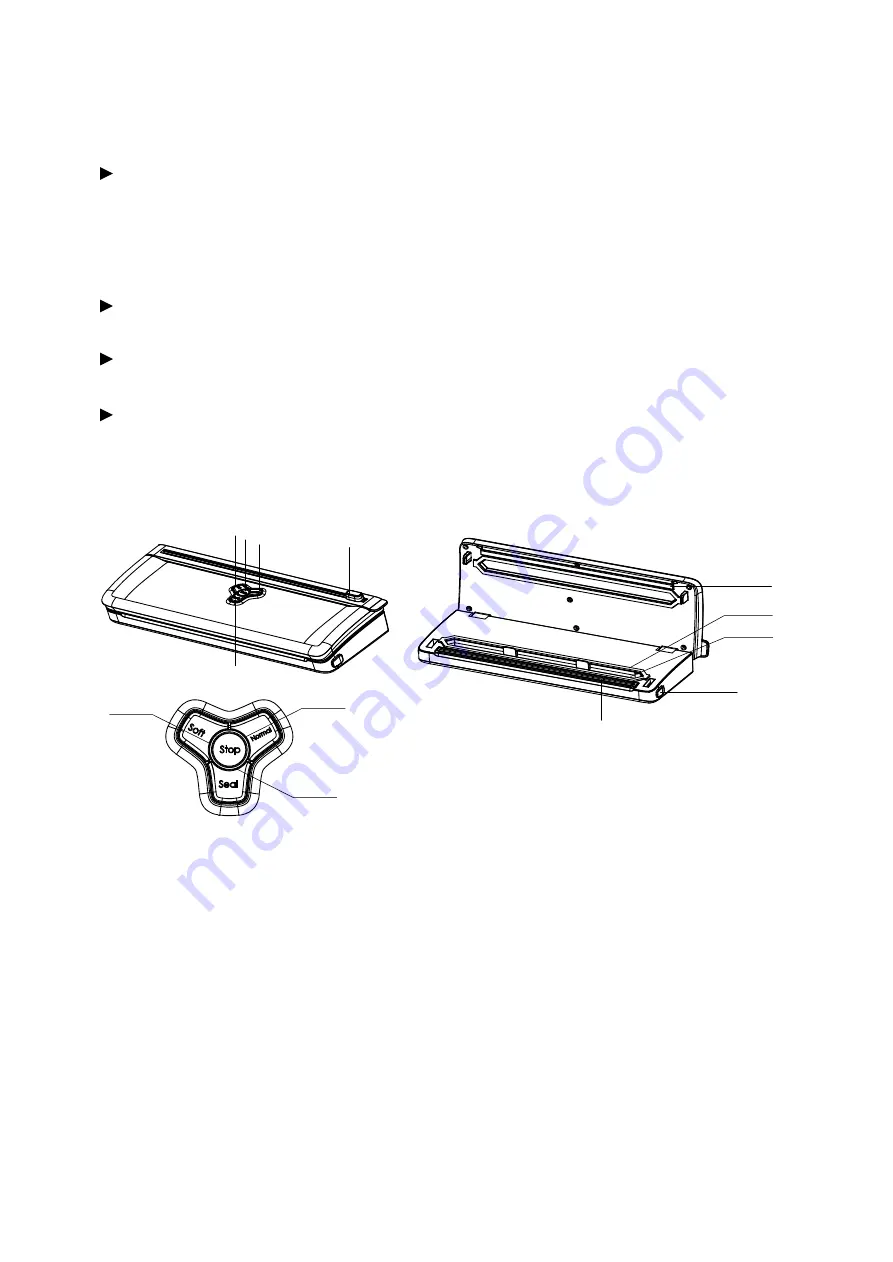
1. Buttons:
1) Soft 2) Normal 3) eal 4) Stop
2. Indicate Light:
5) Soft Indicator 6) Normal Indicator 7) Seal Indicator
3. Other Parts:
8) Slide Cutter 9) Open Button 10) Vac Cotton
11) Vac Chamber 12) Heating Seal 13) Sealing Rubber Strip
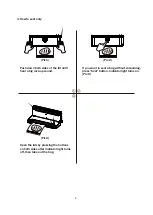
Make sure that the weld is properly closed. A correct weld should be a smooth, straight
strip without wrinkles.
Wait 15 seconds before sealing the next bag to allow the appliance to cool down.
Fill the bag in such a way that no food residues or liquids can escape and enter the
machine during sealing.
Parts
1
2
3
4
8
9
12
13
11
6
5
7
10
Summary of Contents for VS3905
Page 12: ......


