1. Product overview
This chapter explains Milestone
ʼ
s push buttons, connectors and other tactile parts.
1.1. Layout description
1.1.1. The operating surface
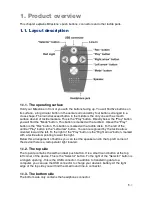
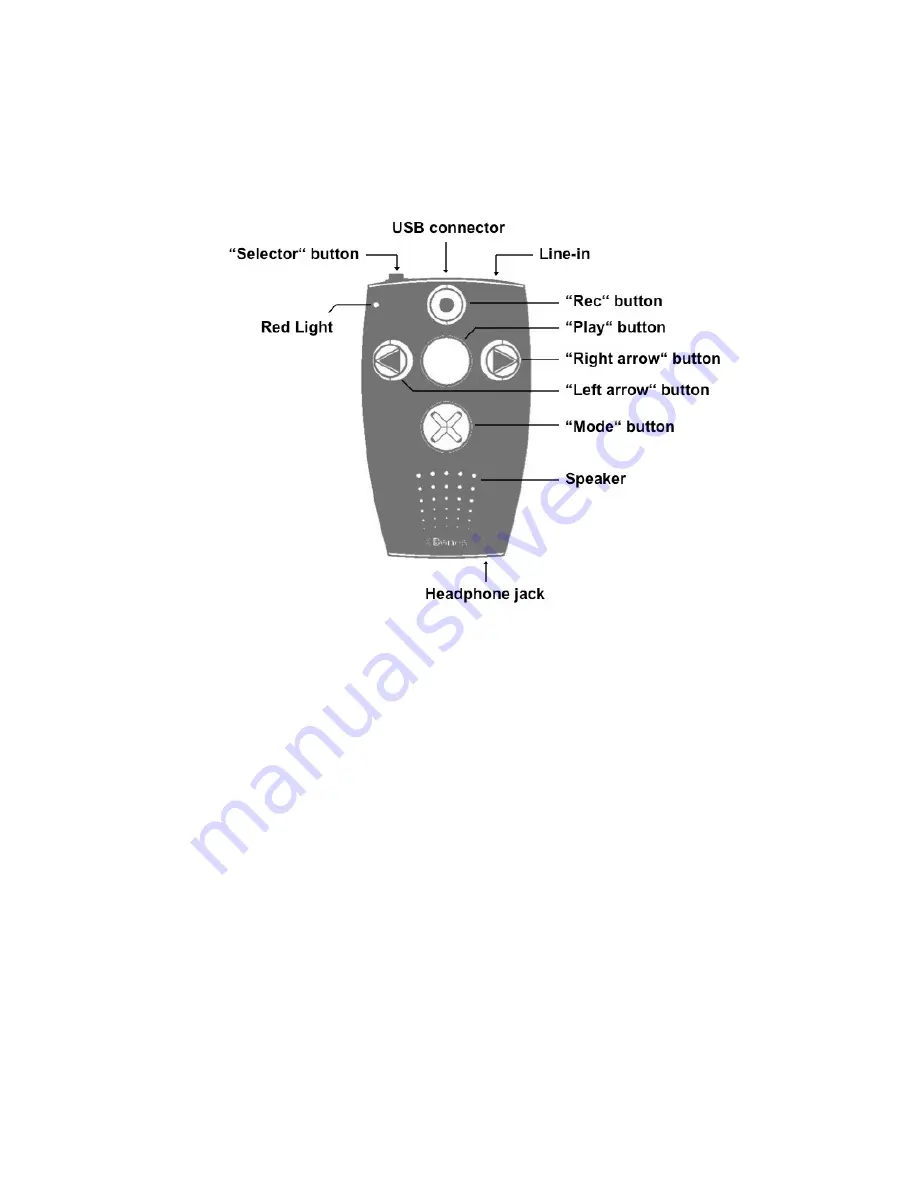
Hold your Milestone in front of you with the buttons facing up. You will find five buttons on
its surface - a big circular button in the center surrounded by four buttons arranged in a
cross shape. The round recessed button in the middle is the only one with a smooth
surface devoid of tactile markers. This is the “Play” button. Directly below the “Play” button
you will find the “Mode” button. This button is marked with a tactile X. Above the “Play”
button is the “Rec” button. This button is marked with a tactile circle. To the left of the
central “Play” button is the “Left arrow” button. You can recognize it by the tactile arrow
oriented toward the left. To the right of the “Play” button is the “Right arrow” button, marked
with a tactile arrow pointing toward the right.
Below this arrangement of buttons you can feel the speaker and in the top left corner of
the device there is a red operator light located.
1.1.2. The top side
The top side contains the sixth and last push button. It is a small round button at the top
left corner of the device. This is the “Selector” button. To the right of the “Selector” button is
a longish opening - this is the USB connector. In addition to transferring data to a
computer, you can use the USB connector to charge your device
ʼ
s battery. At the right
edge of the top side you will find the small round line-in connector.
1.1.3. The bottom side
The bottom side only contains the headphone connector.
!
1
/8


