8
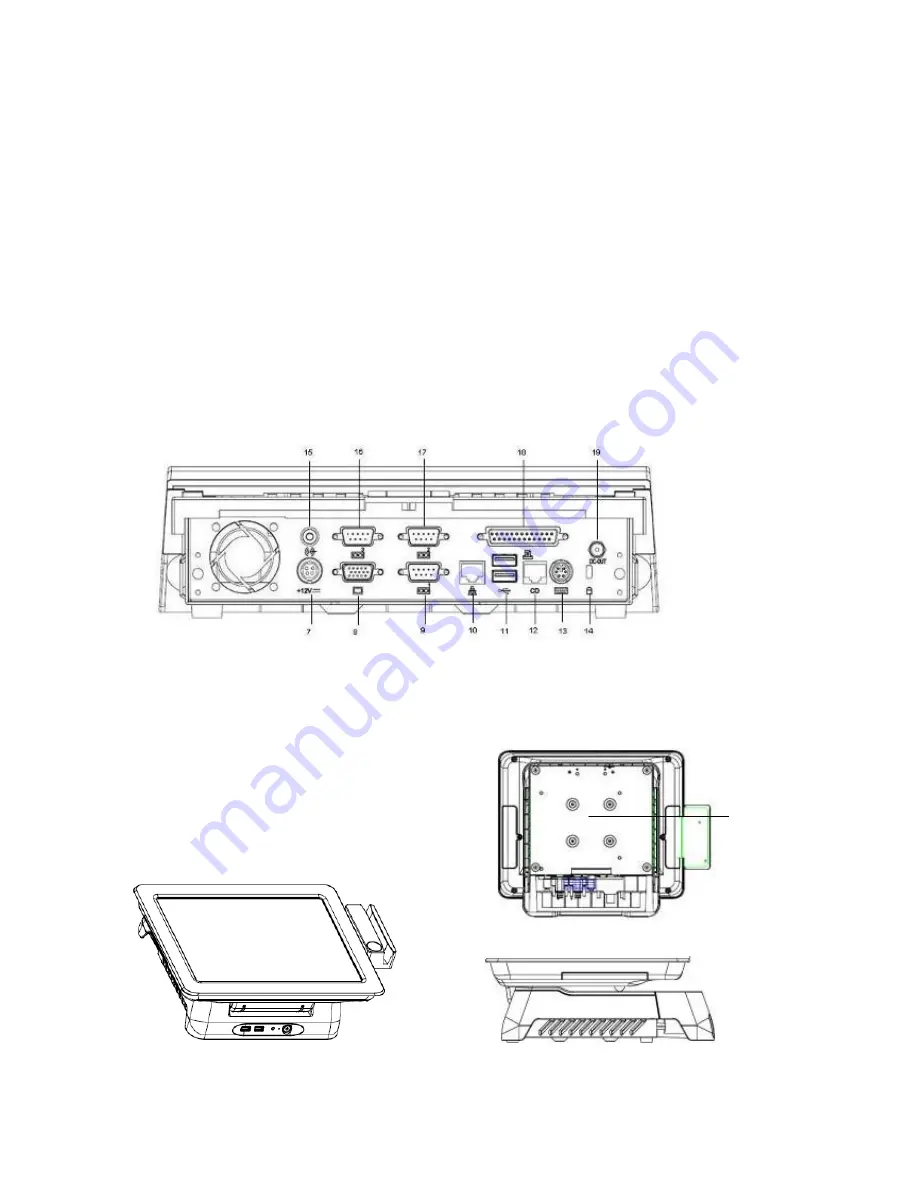
2.3 Rear View
2.4 Bottom view
Item
7. DC Jack
8. VGA port
9. COM1 port (5V/12V selection)
10. Lan port
11. USB ports
12. RJ11 port for Cash Drawer
13. PS/2 port
14. Kensington lock
15. Line-out
16. COM3 port (5V/12V
Selection)
17. COM2 port (5V/12V
selection)
18. Parallel port
19. DC out (option)
Item
21. VESA Mount Holes (100mm x 100mm)
20
Summary of Contents for Xterra-POS
Page 1: ......
Page 13: ...13 5 Rear I O Interface 1 COM RS232 port 2 Parallel port 3 VGA port 4 USB port ...
Page 14: ...14 5 PS 2 K B port 6 Lan port 7 RJ11 port for Cash drawer 8 DJ Jack 9 DC out option ...
Page 17: ...17 f Fasten the plate chassis on panel cover with 3 screws g Fasten the MSR cover ...
Page 19: ...19 c Fasten the HDD on HDD bracket with 4 screws d Connect SATA cable with HDD ...
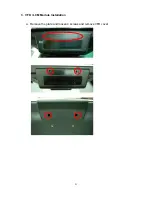
Page 21: ...21 3 VFD LCM Module Installation a Remove the plate and loosen 4 screws and remove VFD cover ...
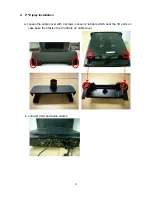
Page 26: ...26 j Manage the cables into the pole k Put the cable cover on the hinge of VESA bracket ...
Page 28: ...28 1 3 Click Next 1 4 Select None and click Next ...
Page 29: ...29 1 5 Click OK 1 6 Click Next ...
Page 30: ...30 1 7 Click Next 1 8 Click Next ...
Page 32: ...32 1 11 Follow the instruction to touch the four cross points 1 12 Calibration done ...
Page 34: ...34 1 3 Click I accept the terms of the license agreement Next 1 4 Click Next ...
Page 35: ...35 1 5 Click Install 1 6 Click Finish ...
Page 36: ...36 1 7 Click finish then click Install 1 8 Click finish then click OK ...
Page 39: ...39 1 13 Slip MSR then the screen will appear ID card s data Finish the test ...
Page 40: ...40 8 BIOS Utility setup Press DEL key to enter BIOS SETUP UTILITY when system boot up ...


