


7
04/2010
Assembling the water tray
Sliding-in the water tray along the track which is located below the unit. The tray should be slide from
the back of the unit.
Assembling the door handles
Note the existing hole positions on the door frame for installing the door handles.
Open the doors and take the door sealing at the door frame carefully aside.
Insert the screws (provided) in the below holes. Put the flat washers (provided) on
the respectively end of the screws.
Use a screw driver to mount the door handles. Align the handles and tighten the
screws. To avoid damages at the handles do not over-tighten the screws.
If needed, use the included stickers to cover the holes on the inner door frame.
Replace the door sealing to its original position.
Turning on the device
Turn on the device by connecting the plug to a wall socket.
Operate the temperature controls, which are located on the control panels at the front of the unit.
Both areas can be independently regulated and/or adjusted of each other.
Please also refer to the following chapter “Settings“.
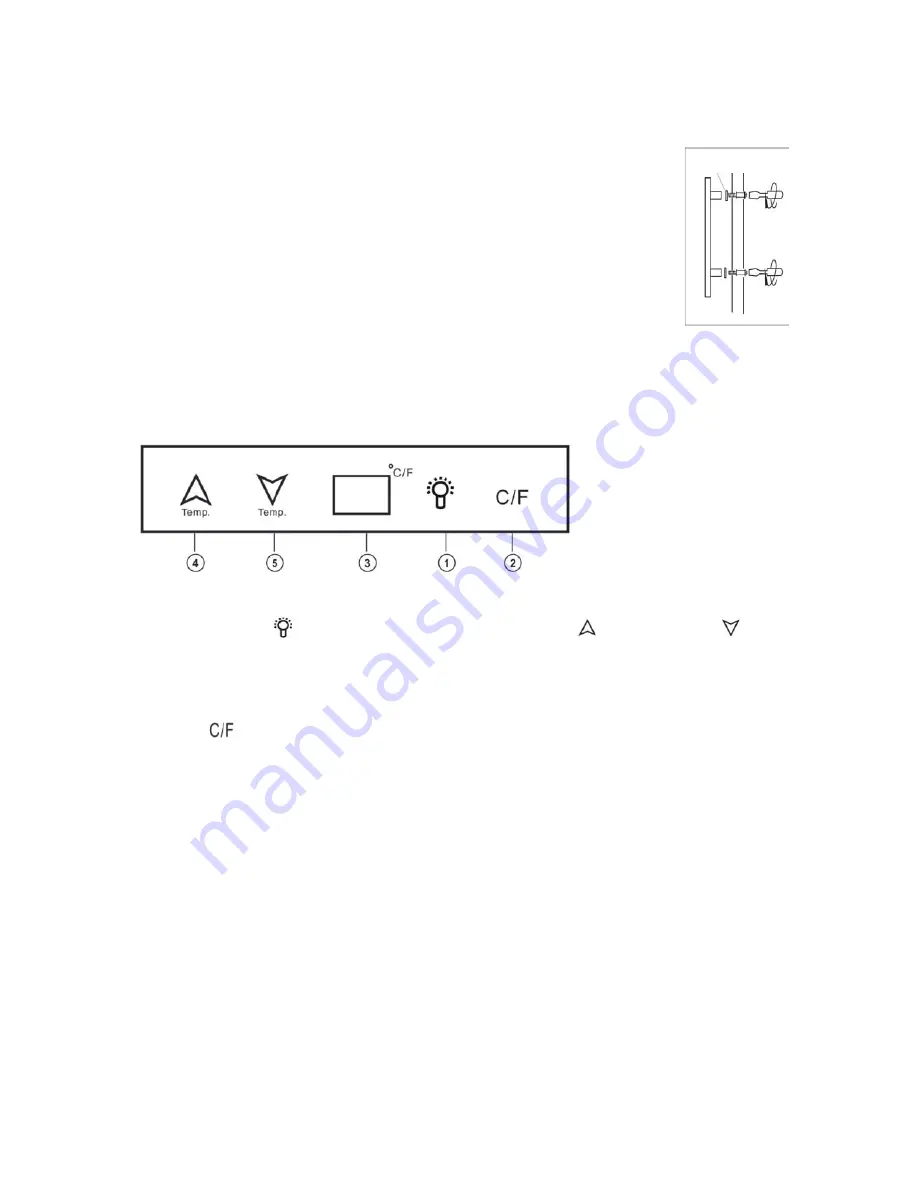
Settings
1. Light
The interior light is turning on and/or off by
pressing the button
. Pls. also refer to the
chapter „Interior light“.
2. Temperature unit
You can change the temperature indication
from Celsius „C“ to Fahrenheit „F“ by pressing
the button
.
3. LED-Display
The display indicates your temperature setting
and the actual internal temperature.
•
When the device turned on the LED always
shows the standard setting 10°C. Short time
after that the LED indicates the internal
temperature.
4 + 5. Temperature control
Regulate the internal temperature by pressing
the buttons 4
up (warmer) or 5
down
(cooler). The setting happens in one grad Cel-
sius and/or Fahrenheit steps. About 5 sec.
after the last button press the electronic switch
automatically and the actual internal tempera-
ture will be indicated.
•
The temperature range can be regulate
between 4°C and 22°C, max. 17°C below
the ambient temperature. The optimale
room temperature is approx. 20°C.
•
Is the ambient temperature 25°C, the lowest
internal temperature of 8°C can be reached.
When the ambient temperature is 21°C the
internal temperature falls to max. 4°C.
•
The thermostat recognizes an outside tem-
perature between 0°C and 70°C.
Is the outside temperature lower than 0°C
and higher than 70°C the display will show
„--“, until the device has warmed up and/or
cooled down.
Flat washers