background image

18 


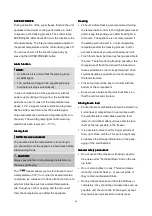
Place the appliance on a steady and safe surface. 
If the appliance is not horizontally leveled, adjust 
the feet accordingly.  


Avoid the installation:

Avoid the installation:

Avoid the installation:

Avoid the installation:    

-


near heaters, next to a stove, direct sunlight or 
any other heat sources; 

-


at locations with high humidity (e.g. outdoors, 
bathroom), as metal parts would be suscepti-
ble to corrosion under such circumstances; 

-


near volatile or flammable materials (e.g. gas, 
fuel, alcohol, paint, etc.), in rooms which may 
have poor air circulation (e.g. garages). 

-


Do not expose the appliance any weather. 


Assembling the door handle

Assembling the door handle

Assembling the door handle

Assembling the door handle    


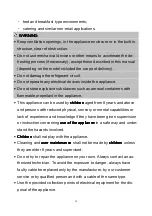
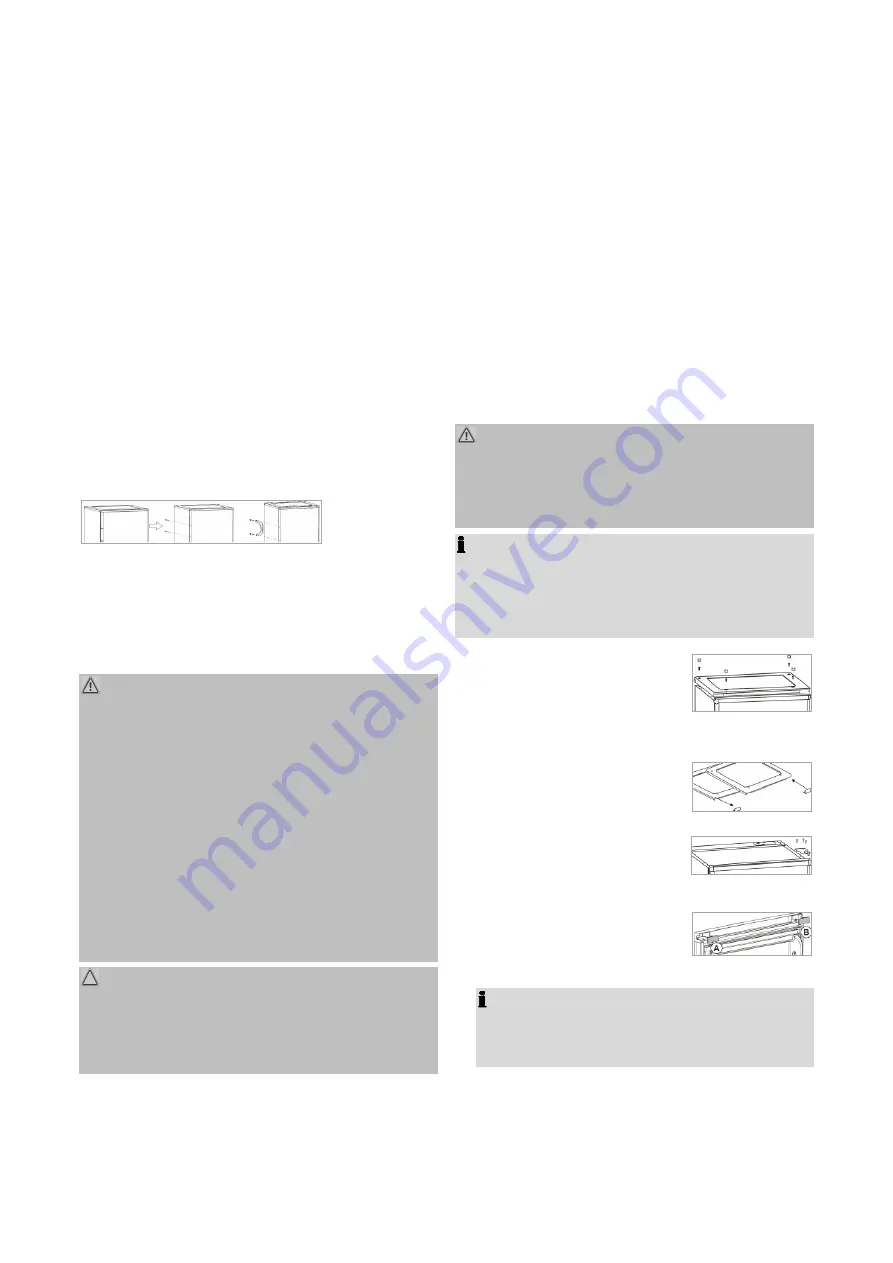
Remove the cover caps from the door outer side and 
tighten the handle with the delivered screws into the 
underlying holes. Put the included screw covers on. 


Electrical connect

Electrical connect

Electrical connect

Electrical connection

ion

ion

ion    

    WARNING:

WARNING:

WARNING:

WARNING:    


The installation to the mains supply must conform 
to the local standards and regulations. 


Improper connection may cause to an electric 

electric 

electric 

electric 

shock

shock

shock

shock! 


Do not modify the appliance plug. If the plug does 
not fit properly to the outlet, let install a proper 
outlet by an authorized specialist. 


The accessibility of the power plug must be en-
sured to disconnect the appliance from the power 
supply in case of emergency. 


    CAUTION

CAUTION

CAUTION

CAUTION::::    

In case of disconnection or power failure: 


-


Wait for approx. 5 minutes before restarting.


-


Check the operation settings.


Ensure that your mains power corresponds with 
the specifications of the appliance. The specifica-
tions are printed on the rating label. 


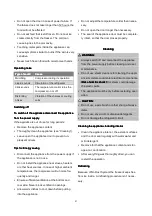
Connect the mains cable to a properly installed 
and earthed wall outlet. 


If the plug after installation is not accessible, a 
corresponding disconnect device must be availa-
ble to meet the relevant safety regulations. 


Reverse the 

Reverse the 

Reverse the 

Reverse the door o

door o

door o

door opening

pening

pening

pening    

If required, the door openings can be moved from the 
right (supplied condition) to the left side. 


    WARNING:

WARNING:

WARNING:

WARNING:    

When replacing the door stops, the appliance must 
be disconnected from the power supply. Always un-
plug the appliance first.


    NOTE

NOTE

NOTE

NOTE:::: 


When installing, ask another person to assist. 


You possibly need:

 screw wrench, Phillips screw-

driver as well as a thin-blade screwdriver. 


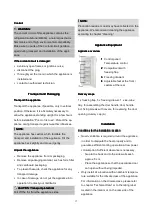
Remove the cover caps on 
the top cover. Loosen the 
screws underneath and re- 


move the top cover. 


Transfer the blind cap of the 
appliance cover at the oppo-
site side. 


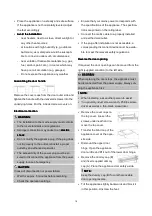
Dismount the upper door 
hinge. Open the appliance 


door a little and lift it out of the lower door hinge. 


Remove the dummy cap (B) 
and insert supplied dummy 


cap (A). Place the appliance door safely aside. 


    NOTE

NOTE

NOTE

NOTE::::  

Keep the dummy cap (B) for another possible 
door opening reverse. 


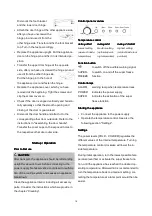
Tilt the appliance slightly backwards and block it 
in this position. Unscrew the feet. 

Summary of Contents for GS 184

Page 1: ...184 GS 184 GS 184 NoFrost NoFrost NoFrost NoFrost F F F FREEZER REEZER REEZER REEZER Bedienungsanleitung Garantie Bedienungsanleitung Garantie Bedienungsanleitung Garantie Bedienungsanleitung Garantie...

Page 2: ...8 Reinigung Seite 10 St rungsbehebung Seite 11 Technische Daten Seite 11 Garantie Kundendienst Seite 13 Entsorgung Seite 14 ENGLISH ENGLISH ENGLISH ENGLISH Contents Contents Contents Contents Introdu...

Page 3: ...EIS HINWEIS HINWEIS Die Darstellungen in dieser Bedienungsanleitung k nnen vom Originalger t abweichen Benutzen Sie das Ger t ausschlie lich f r den privaten und den daf r vorgesehenen Zweck Dieses Ge...

Page 4: ...uchen Sie keine mechanischen Einrichtungen oder sonstigen Mittel um den Abtauvorgang falls notwendig zu beschleunigen au er den in der Anleitung beschriebenen Hilfsmitteln Modellabh ngig im Lieferumfa...

Page 5: ...des K hlkreislaufs des K hlkreislaufs offenes Feuer Z ndquellen unbedingt vermeiden den Netzstecker ziehen Raum in dem das Ger t steht durchl ften und einen Fachmann kontaktieren Transport und Verpack...

Page 6: ...en Sie unter Technische Daten und auf dem Typenschild welches sich im Innenraum oder auf der Ger ter ckseite befindet Stellen Sie das Ger t nur auf einer stabilen und sicheren Standfl che auf Falls da...

Page 7: ...ubendreher sowie Schlitzschraubendreher Entfernen Sie die Abdeck kappen auf der Ger teabde ckung L sen Sie die darun terliegenden Schrauben und entnehmen Sie die Abdeckung Versetzen Sie die Blindkap p...

Page 8: ...ste Stufe w rmste In nentemperatur mittlere Stufe optimale Be triebstemperatur h chste Stufe k l teste Innentempe ratur Funktionstasten Funktionstasten Funktionstasten Funktionstasten zum Ausschalten...

Page 9: ...h chste Leistungs stufe zu stellen und diese Stellung auch nach dem Einfrieren noch einige Stunden zu belassen Das Ger t wird nicht beeintr chtigt wenn nach dem Einfriervorgang die Einstellung nicht...

Page 10: ...eeinsparung Tipps zur Energieeinsparung Tipps zur Energieeinsparung Tipps zur Energieeinsparung Trennen Sie das Ger t von der Stromversorgung wenn Sie das Ger t nicht in Gebrauch haben Stellen Sie das...

Page 11: ...frei r umen Ger t frei aufstellen Eingelagerte Lebensmittel sind zu warm Pr fen Sie die Temperatureinstellung Lassen Sie die T r nur so lange wie notwendig ge ffnet berpr fen Sie den Aufstellort Das...

Page 12: ...h 4 K hlschrank mit einem Ein Sterne Fach 5 K hlschrank mit einem Zwei Sterne Fach 6 K hlschrank mit einem Drei Sterne Fach 7 K hl Gefrierger t 8 Gefrierschrank 9 Gefrier truhe 10 Mehrzweck K hlger te...

Page 13: ...s Aufstellen oder Aufbewahren durch un sachgem en Anschluss oder Installation sowie durch h here Gewalt oder sonstige u ere Einfl sse entstehen fallen nicht unter die Garantieleistung Wir behalten uns...

Page 14: ...ht mehr benutzen werden Sie helfen damit die potenziellen Auswirkungen durch falsche Entsorgung auf die Umwelt und die menschliche Gesundheit zu vermeiden Sie leisten damit Ihren Beitrag zur Wiederver...

Page 15: ...This appli ance is not fit for commercial use The appliance is only to be used as described in the user manual Do not use the appliance for any other purpose Any other use is not intended and can res...

Page 16: ...and persons with reduced physical sensory or mental capabilities or lack of experience and knowledge if they have been given supervision or instruction concerning use of the use of the use of the use...

Page 17: ...t the appliance into operation Contact your distributor CAUTION Transport protection CAUTION Transport protection CAUTION Transport protection CAUTION Transport protection Pull off the foil from the a...

Page 18: ...from the power supply in case of emergency CAUTION CAUTION CAUTION CAUTION In case of disconnection or power failure Wait for approx 5 minutes before restarting Check the operation settings Ensure th...

Page 19: ...ncluding all accessory parts Consider the instructions which we provide in the chapter Cleaning Control panel ove Control panel ove Control panel ove Control panel overview rview rview rview Temperatu...

Page 20: ...ing and the amount of food the temperature can affect the appliance Freezing Freezing Freezing Freezing 24 hours before freezing we recommend turning the temperature control to the highest power level...

Page 21: ...tall the appliance near stoves heaters or other heat sources In case of higher ambient temperatures the compressor will run more fre quently and longer Ensure sufficient ventilation at the bottom and...

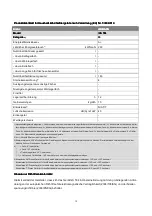
Page 22: ...tion Mains voltage 220 240 V Mains frequency 50 Hz Power consumption 100 W Dimension H x W x D Weigh Dimension H x W x D Weigh Dimension H x W x D Weigh Dimension H x W x D Weight t t t Appliance siz...

Page 23: ...r than 18 C and a min freezing capacity in 24 h 5 Climate class SN ambient temperature of 10 C up to 32 C Climate class N ambient temperature of 16 C up to 32 C Climate class ST ambient temperature of...

Page 24: ...24 C Bomann GmbH C Bomann GmbH C Bomann GmbH C Bomann GmbH www bomann de www bomann de www bomann de www bomann de Stand 11 15...

Reviews: