Menu Adjustments
Setup Settings
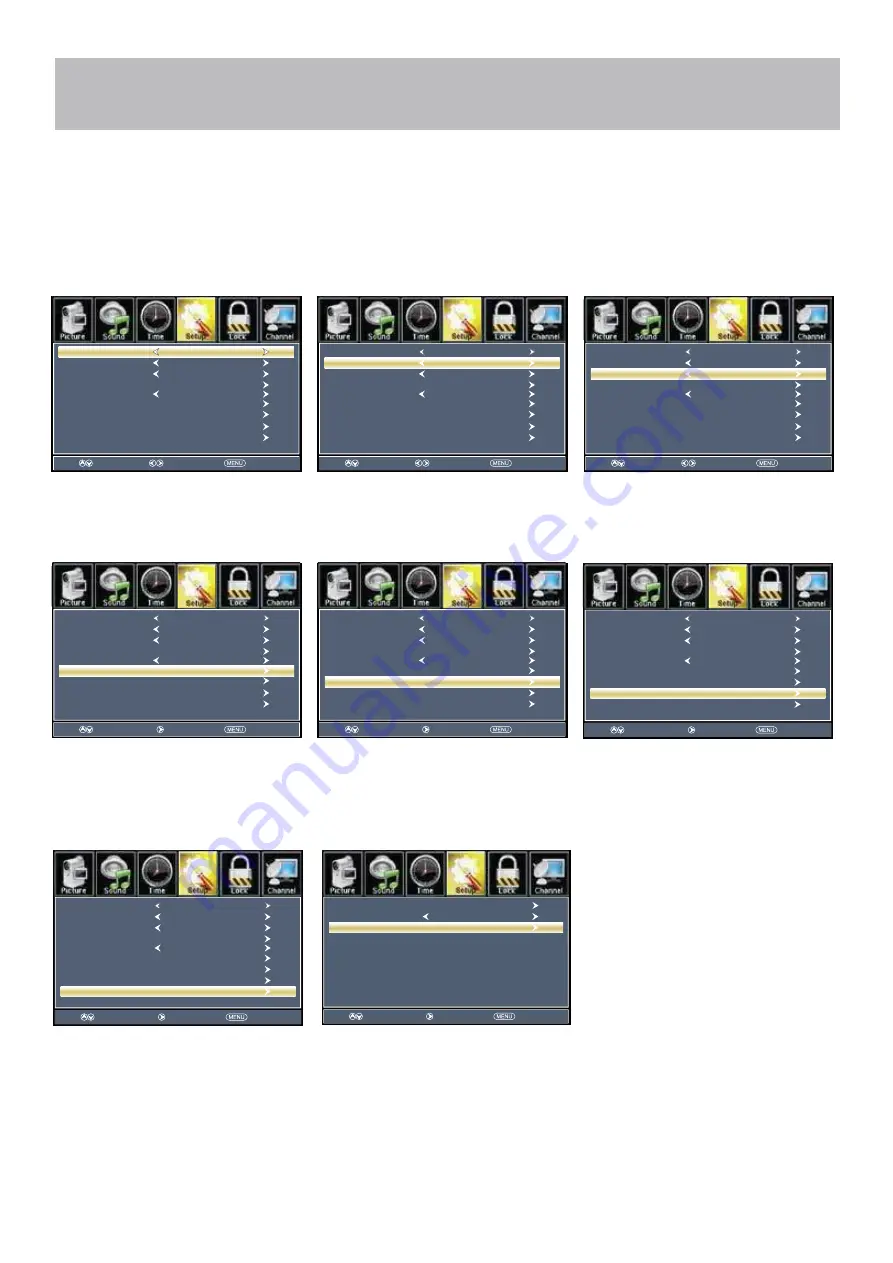
In the
Setup
menu you may change the initial set up of preferences that include settings for language, menu display,
computer monitoring, closed captions, enhancement of black detail in the picture and resetting your TV back to its
factory default status.
How to Navigate:
Press the
MENU
button on the remote control. Navigate using arrow
buttons to select
Setup
. Gain access to
display options by pressing the down
arrow button to highlight
Menu Language
or other options, then press
arrow button on your remote to select.
NOTE: Closed Caption and Advanced are features described on the following pages.
Select
Move
Exit
Menu Language
Transparent
Closed Caption
Over Scan
OSD Time out
Other Settings
Input Label
Restore Default
Setup Wizard
English
25%
30Sec.
Move
Next
Return
Menu Language
Transparent
Closed Caption
Over Scan
OSD Time out
Other Settings
Input Label
Restore Default
Setup Wizard
English
On
25%
30Sec.
Move
Return
Menu Language
Transparent
Closed Caption
Over Scan
OSD Time out
Other Settings
Input Label
Restore Default
Setup Wizard
English
On
25%
30Sec.
Select
Move
Exit
Menu Language
Transparent
Closed Caption
Over Scan
OSD Time out
Other Settings
Input Label
Restore Default
Setup Wizard
English
25%
30Sec.
CEC
Select
Move
Exit
Menu Language
Transparent
Closed Caption
Over Scan
OSD Time out
Other Settings
Input Label
Restore Default
Setup Wizard
English
25%
30Sec.
CEC
Select
Move
Exit
Menu Language
Transparent
Closed Caption
Over Scan
OSD Time out
Other Settings
Input Label
Restore Default
Setup Wizard
English
25%
30Sec.
CEC
Select
Move
Exit
Menu Language
Transparent
Closed Caption
Over Scan
OSD Time out
Other Settings
Input Label
Restore Default
Setup Wizard
English
25%
30Sec.
CEC
Select
Move
Exit
Menu Language
Transparent
Closed Caption
Over Scan
OSD Time out
Other Settings
Input Label
Restore Default
Setup Wizard
English
25%
30Sec.
CEC
Select
Move
Exit
Menu Language
Transparent
Closed Caption
Over Scan
OSD Time out
Other Settings
Input Label
Restore Default
Setup Wizard
English
25%
30Sec.
CEC
Other languages include English,
Français, Español.
Navigate using the
arrow but-
tons to adjust the transparency of the
Adjust the duration of the
OSD (on screen display) menu.
Press
button to select.
• Menu Languages
• Transparent
• OSD Time Out
on screen display menu.
Create labels for the devices
connected to your TV.
Press
ENTER
/
button to enter.
Adjust the settings for Audio Only,
and No Operation Power Off.
Press
ENTER
/
button to enter.
Press the
arrow button to
automatically reset all adjustments
back to their original factory settings.
• Input Label
• Other Settings
• Restore Default
• Setup Wizard
Set the first time installation.
Press
ENTER
/
button to enter.
The TV will request confirmation.
Move
Return
Menu Language
Transparent
Closed Caption
Over Scan
OSD Time out
Other Settings
Input Label
Restore Default
Setup Wizard
English
On
25%
30Sec.
Move
Next
Return
Menu Language
Transparent
Closed Caption
Over Scan
OSD Time out
Other Settings
Input Label
Restore Default
Setup Wizard
English
On
25%
30Sec.
Move
Next
Return
Menu Language
Transparent
Closed Caption
Over Scan
OSD Time out
Other Settings
Input Label
Restore Default
Setup Wizard
English
On
25%
30Sec.
Move
Next
Return
Menu Language
Transparent
Closed Caption
Over Scan
OSD Time out
Other Settings
Input Label
Restore Default
Setup Wizard
English
On
25%
30Sec.
Move
Next
Return
Menu Language
Transparent
Closed Caption
Over Scan
OSD Time out
Other Settings
Input Label
Restore Default
Setup Wizard
English
On
25%
30Sec.
Move
Return
Menu Language
Transparent
Closed Caption
Over Scan
OSD Time out
Other Settings
Input Label
Restore Default
Setup Wizard
English
On
25%
30Sec.
Select
Select
Select
23
• Voice Guidance
Press
button to enter.
Move
Next
Return
CEC
Video Description
Voice Guidance
Off
Summary of Contents for 40BL00H7-02
Page 2: ......
Page 11: ...Remote Control Overview 9...
Page 30: ...Next Next Next Next Next Return Return Return Return Return 28...
Page 33: ...MEDIA MEDIA in the 31 Source Select TV AV Component HDMI1 HDMI2 HDMI3 HDMI4 Media...
Page 38: ......
Page 39: ......
Page 40: ......


