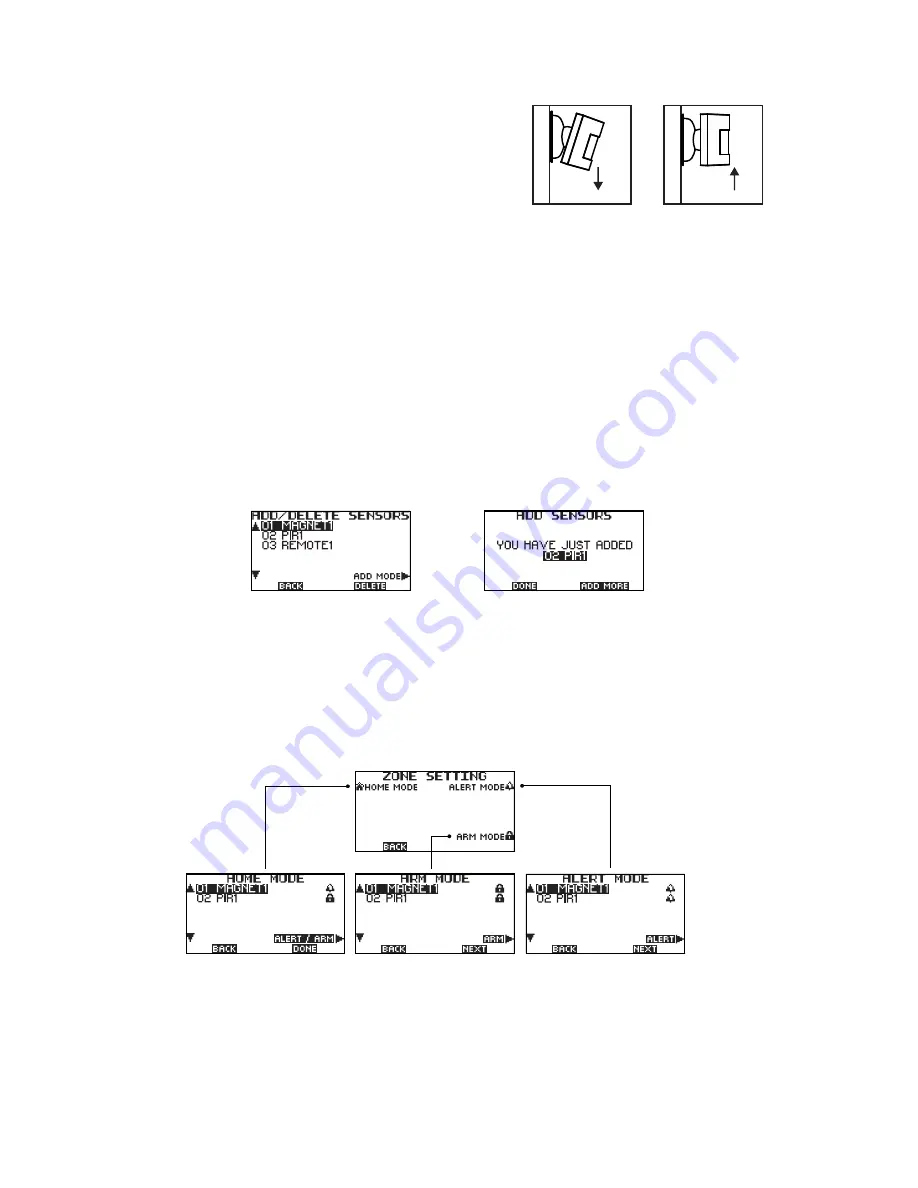
Move the sensor
downward to reduce
the range.
Move the sensor
upwardto maximize
the range
* Tips: The sensor should not face towards direct
sunlight, be placed near heat or cold producing
devices (i.e. air conditioning, radiators, fans, ovens,
heaters etc.) that may cause false triggers. Also
perform the walk test in areas which the sensor is
not intended to cover, to ensure movement cannot
be detected.
. 3 .
4. Enroll and Delete Sensors
• Operated on the BOLTEK control panel under the “SETTINGS”, by entering 4-digit default code
”0000” (or the set code) and then press “DONE” button for logo-in.
• Then select the "ADD/ DELETE SENSORS" under "SETTINGS" and the sensors are ready to be
enrolled or deleted (Fig. 3)
• Press the "ADD MODE" button and the page showing "ADD SENSORS". Trigger the sensor and the
sensor name will be appeared on screen together with the "DING DONG" sound (Fig.4). Press "ADD
MORE" button again if you want to add sensors or press "DONE" to complete the sensor enrollment.
• Sensors can also be deleted on the "ADD/ DELETE SENSORS" screen. Select the sensor name on
panel and then press the "DELETE” button. The sensor name will be disappeared and deleted.
• Install the sensors to desired location for the home protection.
5. Customize sensors
• Once enrolling the sensors, continuing to customize the sensors status into the three different modes-
ALERT, ARM and HOME Mode.
• Go the “SETTINGS” on panel and select the “ZONE SETTING” section. There will be three different
modes: "HOME", "ALERT and "ARM" (see Fig. 5). You can activate or disarm the sensors in these
modes.
A. ALERT Mode
• Press the "ALERT" button to activate or turn off the sensors under this mode. Once the setting is
completed,please press the "DONE" button.
B. HOME Mode
• Press the "ALERT/ARM" button to turn the sensors into alert, ARM or off status under this mode. Once
Fig. 5 Zone Setting
Fig. 3
Fig. 4


