25
2.
IR Remote Controller ID Setting
B7
B8
IR Remote Controller ID
OFF
OFF
1
ON
OFF
2
OFF
ON
3
Adjusting and Setting with Menus
About On-Screen Menus
You can change various settings, such as shooting conditions and system setup of the camera, while observing menus
displayed on a connected computer screen.
This section explains how to read the on-screen menus before starting menu operations.
The menu parameters may vary according to the different product model numbers.
For a complete configurations menu, see “Menu Configuration” (page 25).
Note
You cannot perform pan/tilt operations while the menu is displayed.
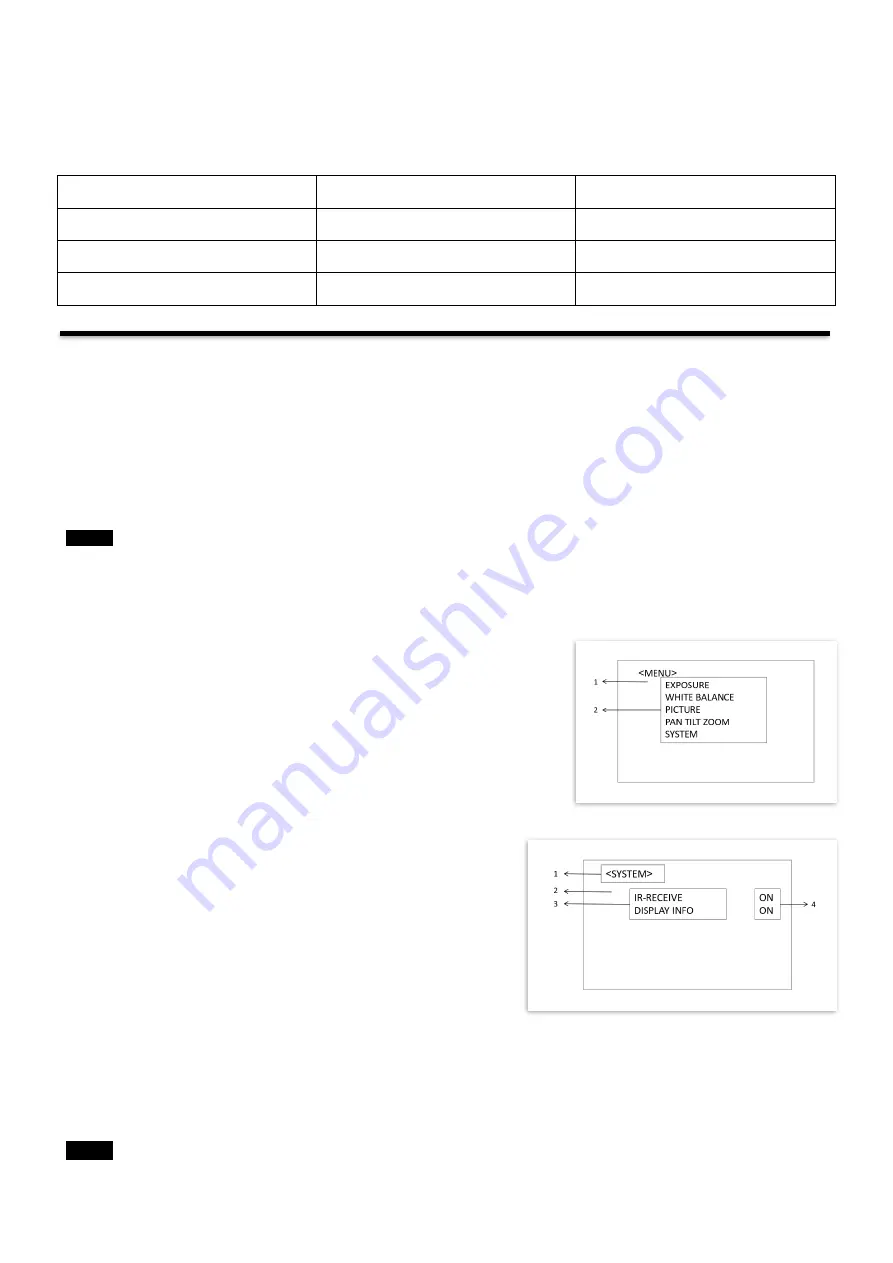
Main Menu
To display the main menu, press the DATA SCREEN button on the supplied infrared remote controller.
1.
Selected Items
Selects a setting menu.
The selected item is shown by the cursor. The cursor moves up or down by
pressing the “
↑, ↓”
button on the infrared remote controller.
2.
Menu Items
To display a setting menu, select one using the “
↑, ↓”
button on the infrared
remote controller and press the HOME button on the infrared remote
controller.
Setting Menus
The setting menu selected on the main menu is displayed.
1.
Setting Menu
The name of the setting menu currently selected is displayed here.
2.
Selected Item
Selects a setting item.
The selected item is shown by the cursor.
Move the cursor up or down by pressing the “
↑, ↓”
button on the
infrared remote controller.
3.
Setting Items
The setting items for this setting menu are displayed. Select the setting item using the “
↑, ↓”
button on the infrared remote
controller.
4.
Set Value
The currently set values are displayed.
To change a set value, use the “
←, →”
button on the infrared remote controller.
In some product models, only use
“
←” button
on the infrared remote controller to change the value. To confirm the value,
you can use either “
→” button or HOME button.
Note


