Treadmill
Model No:
1
Retain this owner’s manual for future reference
Read and follow all instructions in this owner’s manual
Version A
JX150HR
BODY WORX
Page 1: ...Treadmill Model No 1 Retain this owner s manual for future reference Read and follow all instructions in this owner s manual Version A JX150HR BODY WORX BODYWORX ...
Page 2: ... 1 INDEX 1 OVERVIEW DRAWING 2 2 IMPORTANT SAFETY INSTRUCTIONS 3 3 GROUNDING INSTRUCTIONS 4 4 PRE ASSEMBLY CHECK LIST 5 5 ASSEMBLY STEPS 6 6 CAUTION 8 7 MAINTENANCE 9 8 COMPUTER OPERATION INSTRUCTIONS 10 ...
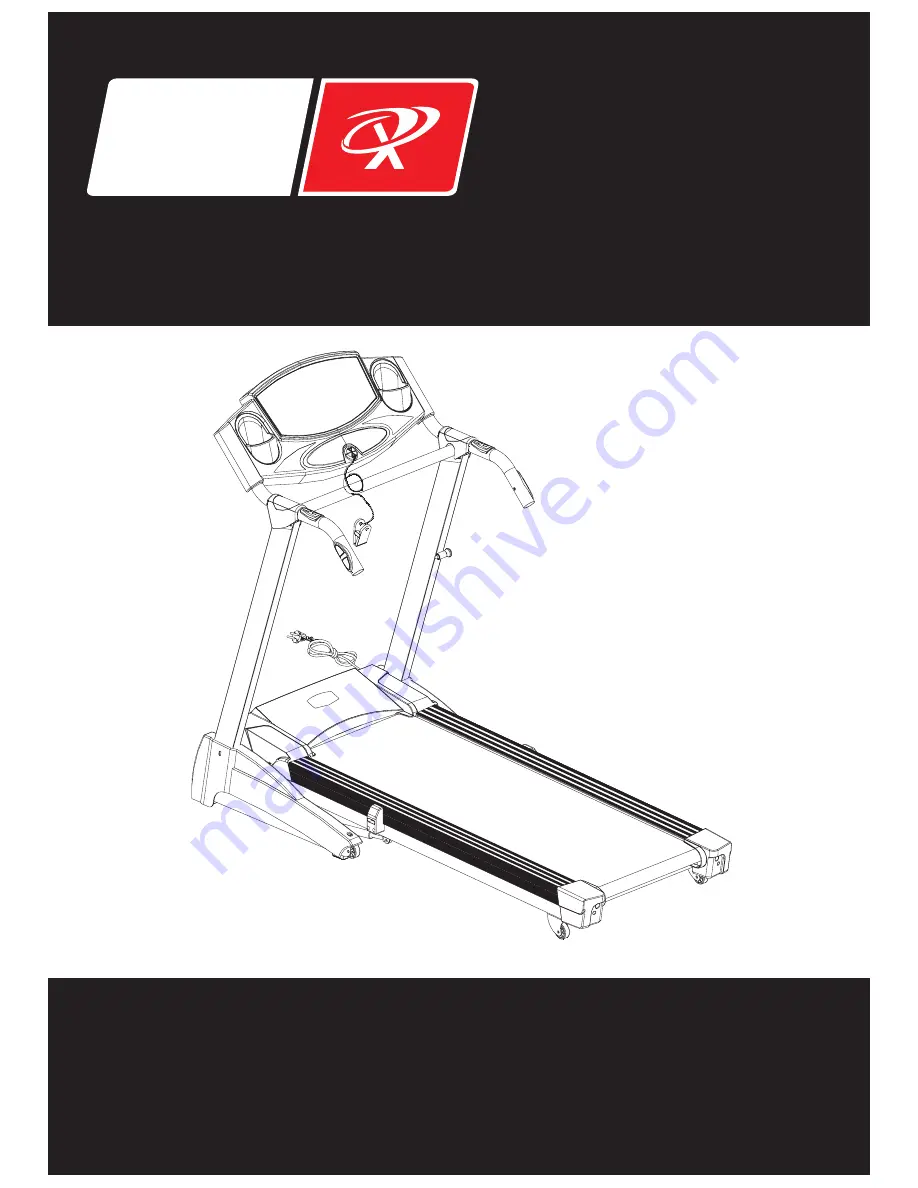
Page 3: ... 2 1 OVERVIEW DRAWING 電源線 機台主架 後調整盒 底座 電源開關 電源線 電子錶 Computer Safety Key Clip Power Switch Circuit Breaker Power Cord Power Cord Frame Base Rear End Cap ...
Page 4: ...nual Do not use any attachment s not recommended by the manufacturer in order to avoid any danger or accidents 4 Never operate the product if it has a damaged cord or plug if it is not working properly if it has been damaged or dropped into water Please return the product to the service center or seller for examination and repair 5 Do not carry this product by the supply cord or use the cord as a ...
Page 5: ...that looks like the one illustrated in the figure Make sure that the product is connected to an outlet having the same configuration as the plug No adapter should be used with the product Figure Grounding methods GROUNDED OUTLET GROUNDED PIN The product must be grounded first If malfunction or breakdown occurs grounding will provide a path of least resistance for electric current to reduce the ris...
Page 6: ...w M8xP1 25x40 2 B Left Decoration Cover 1 b Truss Hex Screw M8xP1 25x15 4 C Right Decoration Cover 1 c Truss Philips Screw M5xP0 8x20 6 D Bottle 1 d Plastic Washer Ø8xØ22x6t 4 E Cover Left 1 e Hex Wrench Screwdriver 5mm 70mmX70mm 1 F Cover Right 1 f Safety Key Clip 1 G Cup Holder 2 g SLILCON 1 Description Qty ...
Page 7: ...es of Frame A as shown in the right drawing and tighten with hex screw a PS To avoid danger always assemble the treadmill with two or more persons do not assemble by yourself a a 2 Then put up the left and right uprights as shown in the right drawing and tighten with hex screw b PS To avoid danger always assemble the treadmill with two or more persons do not assemble by yourself b b ...
Page 8: ...ght decoration covers B C onto frame respectively as the right drawing shows and tighten with Philips Screw c and Plastic Washer d C c c c d d B c c c d d 4 Wedge cup holder G left and right covers E F onto the corresponding position as shown in the right drawing E F G ...
Page 9: ...folding fixing mechanism as the direction shown in the drawing and then lift up the frame until the POP Pin inserts into the frame On the contrary if you want to use the treadmill pull out the POP Pin of the folding mechanism as the arrow shows in the drawing and put down the frame slowly PS 1 To prevent from danger be careful if the kids are around PS 2 If you want to move the treadmill fold the ...
Page 10: ... precisely in the center with slightly towards the left and right sides and the situation varies with how end users use and the weight of end users No need to adjust the belt if it doesn t rub against the parts aside 2 Depending on the usage of the product please apply SILICON on the board according to the below chart Use the Hex Wrench to unscrew the bolt inside the Rear Roller Then pull the belt...
Page 11: ...tion 3 Under the common Start Ready status PULSE window will display HP picture if you don t grip the pulse sensor If you grip the pulse sensor you will see PULSE window starting to display pulse value II Operation Instruction 1 Under Start Ready position you can press Mode directly to enter the program edit 2 Under Start Ready position press Start to enter directly the start up of Manu run 3 If t...
Page 12: ...ircle is 0 4KM 0 25MIL 2 Speed STEP is 0 1 you can press SPEED UP DOWN key to select the speed UP DOWN step is 0 1 or press speed instant key 1 2 4 6 8 10 to select 3 Incline STEP is 1 you can press INCLINE UP DOWN key to select incline UP DOWN step is 1 or press incline instant key 2 4 6 8 10 12 to select 4 When TIME can set or can t set 1 When TIME can set the window will display the countdown v...
Page 13: ...o different ages Refer to the chart below the manual for the values and select a suitable one then press or to adjust the pulse value If you don t make any changes press and the programwill change according to the de fault values and enter into the next setting 3 At this time the TIME window flashes program will ask you to input the time value press or to set the d esired ex ercise time or press d...
Page 14: ...43 90 16 193 122 17 122 35 176 111 111 53 159 100 100 71 142 90 18 121 192 121 36 175 110 110 54 158 100 100 72 141 90 191 19 121 37 174 110 110 55 157 99 99 73 140 90 121 20 120 190 120 38 173 109 109 56 156 98 98 74 139 90 119 39 172 109 109 57 155 98 98 75 138 90 119 21 189 22 188 119 119 40 171 108 108 58 154 97 97 76 137 90 118 41 170 107 107 59 153 97 97 77 136 90 23 187 118 24 186 118 118 4...
Page 15: ...System The operations are Press ENTER key and hold it for more than 10 seconds under start ready status after starting the treadmill At this time the window will blink 0 British System 1 Metric System Press key to select After selected press ENTER key to confirm as following ...
Page 16: ......
Page 17: ......
Page 18: ......
Page 19: ......
Page 20: ...BODY WORX BODY WORX ...