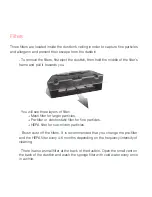


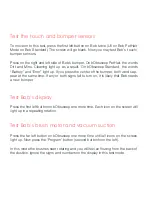


Test the touch and bumper sensors
To move on to this test, press the first left button on Bob twice (UV on Bob PetHair,
Mode on Bob Standard). The screen will go blank. Now you may test Bob’s touch/
bumper sensors.
Press on the right and left side of Bob’s bumper. On bObsweep PetHair, the words
Dirt and Mins. Cleaning light up as a result. On bObsweep Standard, the words
“Battery” and “Error” light up. If you press the center of the bumper, both words ap-
pear at the same time. If any or both signs fail to turn on, it is likely that Bob needs
a new bumper.
Test Bob’s display
Press the first left button on bObsweep one more time. Each icon on the screen will
light up in a repeating rotation.
Test Bob’s brush motor and vacuum suction
Press the far left button on bObsweep one more time until all icons on the screen
light up. Now press the ‘Program’ button (second button from the left).
In this mode the brushes start rotating and you will feel air flowing from the back of
the dustbin. Ignore the signs and numbers on the display in this test mode.
Summary of Contents for PetHair
Page 1: ...Owner s Manual...
Page 2: ...How to employ your intelligent floor cleaner...
Page 9: ...Bob s anatomy Top view Bumper Head sensor IR receiver Display Cover buttons...
Page 11: ...Charging station bObsweep PetHair s display Remote bObsweep Standard s display...
Page 13: ...Get bObsweep Ready for Cleaning...
Page 22: ...Auto Cleaning and Scheduling...
Page 27: ...bObsweep s Maintenance...
Page 34: ...Troubleshooting bObsweep...
Page 40: ...bObsweep s Checkup Guide...
Page 45: ...Support and Warranty...
Page 55: ...bObsweep sealed with care...