background image

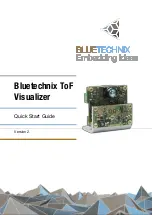
Quick Start Guide - Bluetechnix ToF Visualizer 

Last change: 7 May 2015 


Version 2


© Bluetechnix 2015 


Page | 12


Image  mode:  These  buttons  are  shortcuts  for  setting  frame  modes.  They  best  show  how  different 
data  can  be  displayed.  Note:  The  image  mode  also  affects  the  other  window  ‘Bluetechnix  ToF 
Visualizer’ -> different channels are being displayed there as well. 


Show sensor field of view: The sensor’s field of view is indicated by a pyramid, showing the opening 
angles of the sensor. The opening angles are read from the sensor’s corresponding registers. 


Show coordinate system: Activating this switch shows three white lines representing the coordinate 
system. 


You can adjust the colour- or brightness scale for the cloud’s points. Distance and coordinates are 
painted  in  red-green-blue,  where  ‘Colour  map  min’  represents  the  value  which  is  painted  red  and 
‘Colour map max’ is the data to be painted in blue. Amplitude data is painted in grey values, where 
‘Colour map min’ is painted in black and ‘Colour map max’ is painted in white. 


If you lose track of your point cloud, feel free to safely press “Front view”. It will take you home. 


The window controls can be shown and hidden by double clicking on the image. 

For more detailed help, please click  on  one  of the  many question mark buttons  or contact  Bluetechnix 
support. 

3.4


Bluetechnix ToF Downloader 

For flash update instructions, please visi

http://support.bluetechnix.com


Summary of Contents for ToF Visualizer

Page 1: ...Bluetechnix ToF Visualizer Quick Start Guide Version 2 ...

Page 2: ...00 308 A Publication date May 7 2015 Subject to change without notice Errors excepted This document is protected by copyright All rights reserved No part of this document may be reproduced or transmitted for any purpose in any form or by any means electronically or mechanically without expressly written permission by Bluetechnix GmbH Windows is a registered trademark of Microsoft ...

Page 3: ... included 5 3 Using the Software 6 3 1 Bluetechnix ToF Suite 6 3 1 1 Ethernet connection 6 3 1 2 USB connection 7 3 2 Bluetechnix ToF Visualizer 9 3 3 Bluetechnix ToF Model3d 11 3 4 Bluetechnix ToF Downloader 12 4 Recommended Documents 13 5 Appendix 14 5 1 Support 14 5 1 1 General Support 14 5 2 Software Packages 14 6 Document Revision History 15 ...

Page 4: ... or in any communication with you Bluetechnix specifically disclaims any implied warranty of merchantability or fitness for a particular purpose Bluetechnix takes no liability for any damages and errors causing of the usage of this board The user of this board is responsible by himself for the functionality of his application He is allowed to use the board only if he has the qualification More inf...

Page 5: ...camera products from Bluetechnix GmbH referred to as sensor throughout this document Follow this guide chapter by chapter to set up and understand your product This document is focused on the Application BltTofSuite Please refer to the appropriate manuals of your device before installing and powering any device This document applies to version 3 5 1 and above of the software ...

Page 6: ... device with your PC Power the sensor device as described in the manual 2 2 Setup for USB modules Install the driver as described in the device s quick start guide Power the sensor device as described in the manual 2 3 Files included The software package includes the following files This Quick Start Guide BltTofSuite exe BltTofSuite exe config BltTofApi dll BltTofDownloader dll BltTofModel3d dll B...

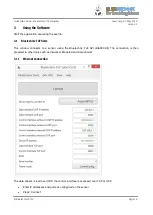
Page 7: ... 3 1 Bluetechnix ToF Suite This window connects to a sensor using the Bluetechnix ToF API BtaXXX dll The connection is then provided to other tools such as Visualizer Model3d and Downloader 3 1 1 Ethernet connection The data stream is read over UDP the control interface is accessed over TCP or UDP Enter IP addresses and ports as configured on the sensor Press Connect ...

Page 8: ... wiki 3 1 2 USB connection Enter a PON and or a serial number if more than one device is plugged to the computer For more information on configuration parameters please refer to the BltTofApi documentation on our support wiki 3 1 3 Menu Bluetechnix Tools Open another Visualizer Open the point cloud view Model3d Dev Utils Start grabbing of frames The raw sensor data is stored to a file It can then ...

Page 9: ...ge Some cameras allow to enable a CRC in the control interface protocol Set keep alive messages interval Some BtaXXXLibs send keep alive messages Downloader The Bluetechnix tool mainly used for firmware updates View There are different simplifications and limitations between Demo mode Simple mode and Expert mode Feel free to use your preferred mode Help Help Get some information about the differen...

Page 10: ...hannel displayed see Display Distance data is visualized in a red green blue scale Amplitude data is visualized in a monochrome scale You can adjust the scale see Display Basic registers By clicking the first Get you can read if the sensor is set to auto exposure by default it is not By checking unchecking the box you can turn on off auto exposure in the sensors corresponding register ...

Page 11: ...he above picture boxes The sensor sends a data stream consisting of various channels The default configuration is Distance Amplitude which means that a channel with radial distance data and a channel with amplitude data brightness is transmitted The image mode can be changed by using the Image menu or by writing register ImageDataFormat please consult the sensor s Software User Manual You can adju...

Page 12: ...view denoted by camera instead of turning or moving the point cloud Use w a s and d in order to move the camera yourself sideways forwards and backwards like in a first person video game Click somewhere doesn t matter where in the frame hold the mouse button and move the mouse in order to look around you i e change the camera s pitch and yaw Right click somewhere and move the mouse up and down in ...

Page 13: ...ee white lines representing the coordinate system You can adjust the colour or brightness scale for the cloud s points Distance and coordinates are painted in red green blue where Colour map min represents the value which is painted red and Colour map max is the data to be painted in blue Amplitude data is painted in grey values where Colour map min is painted in black and Colour map max is painte...

Page 14: ... 2015 Version 2 Bluetechnix 2015 Page 13 4 Recommended Documents BltTofApi Quick Start Guide available here https support bluetechnix at wiki BltTofApi_Quick_Start_Guide Description of the Interface to the camera by which the BltTofSuite accesses all the functions ...

Page 15: ...pendix 5 1 Support 5 1 1 General Support General support for products can be found at Bluetechnix support site Support Link https support bluetechnix at wiki 5 2 Software Packages Software packages and software downloads are for registered customers only Software Package https support bluetechnix at software ...

Page 16: ...nge 7 May 2015 Version 2 Bluetechnix 2015 Page 15 6 Document Revision History Version Date Document Revision 1 2015 04 30 First preliminary of the document 2 2015 05 05 Correction of typos Correction of images Minor text changes Table 6 1 Revision history ...

Reviews: