USER
Manual
PREMIUM ENTERPRISE TABLET
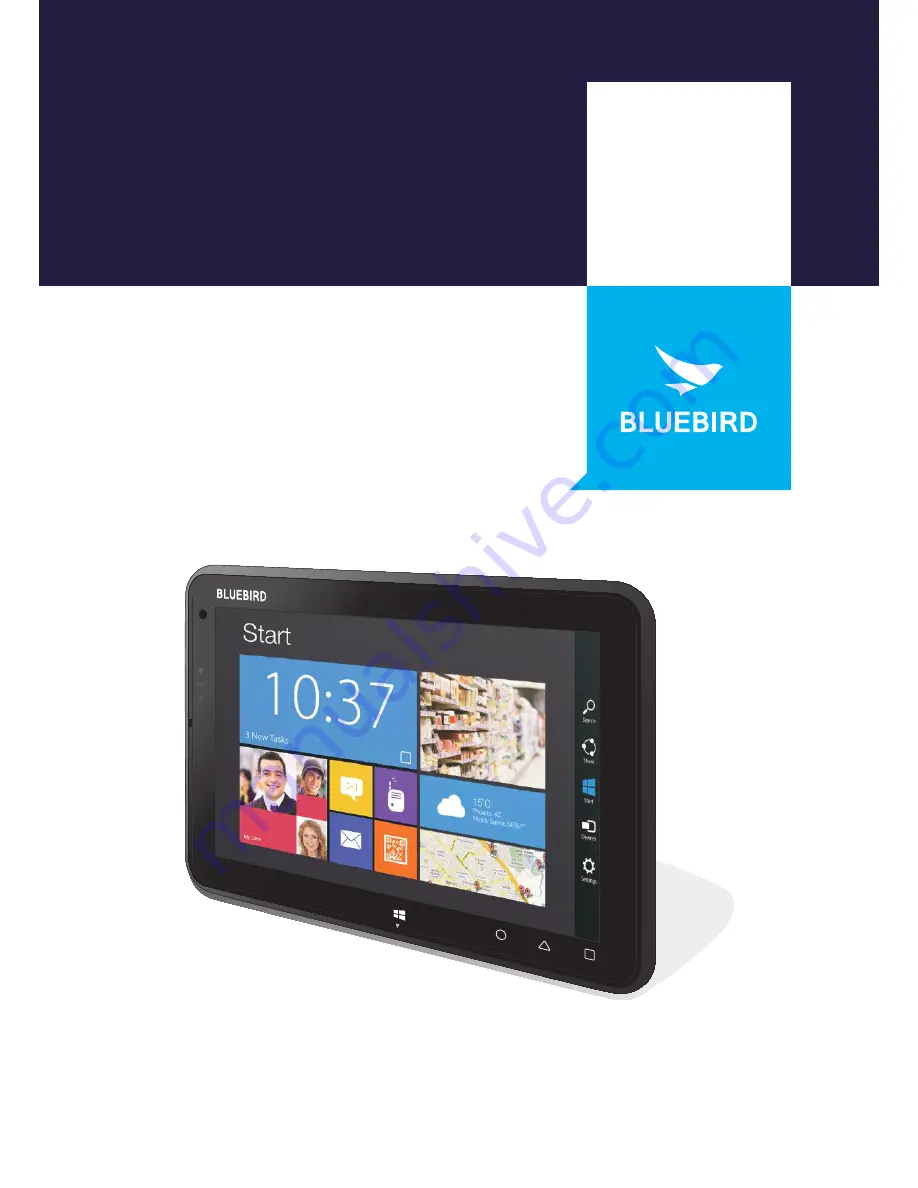
ET100
Page 1: ...USER Manual PREMIUM ENTERPRISE TABLET ET100 ...
Page 2: ...tand if there are any inconveniences Registered Trademark BLUEBIRD is an emerging global brand striving to lead the market in performance and mobility Their products represent reliability innovation and innovative technology Pidion is a registered trademark from the global brand of Bluebird Inc and is copyright protected User s guidance Device type User s guidance Class B Device Household Informat...
Page 3: ... the Device 11 4 Windows 8 1 Tutorials 4 1 Start Screen 12 4 2 Desktop 13 4 3 Charms Menu 14 4 4 Switching between the Start screen and desktop 16 4 5 Apps Screen 16 4 6 Switching Between Apps 17 4 7 Viewing Two Apps at Once 18 4 8 Closing Active Apps 19 4 9 Turning Off the Device 19 5 Connecting to Networks 5 1 Connecting to a Wi Fi Network 20 5 2 Connecting to a Mobile Network 20 5 3 Sharing a M...
Page 4: ...MicroSD Cards 37 9 Using the Camera 9 1 Installing the Camera App 38 9 2 Opening the Camera App 39 9 3 Taking Pictures 39 9 4 Recording Video 40 9 5 Viewing Photos 40 9 6 Viewing Videos 40 10 Maintenance and Troubleshooting 10 1 Cleaning the Touchscreen 41 10 2 Extending the Battery Life 41 10 3 Troubleshooting 42 10 4 Updating Windows 43 10 5 Backing Up Windows 44 10 6 Recovering Windows 45 11 He...
Page 5: ...mpt to repair remodel or disassemble the device Doing so voids the warranty on the device Do not attempt to dry the device using a heater microwave or other tool Doing so may cause the device to explode or malfunction Do not paint the device Doing so may damage the screen or the exterior of the device Do not expose the device to severe impacts or vibrations Doing so may damage the device Do not us...
Page 6: ... Package Components The device includes the following components If any of these components are missing please contact the retailer who sold you the device ET100 tablet Power adapter AC power cord The images in this manual may not reflect the color and shape of the actual device These illustrations are intended for descriptive purposes only ...
Page 7: ...ged The battery LED blinks red and white alternately at 1 second intervals when the battery has a problem such as it being too hot or too cold 4 Status LED Indicates the status of the device The Status LED turns on to indicate that the device is operational 5 Microphone Captures sound for video conferencing voice recording and speech recognition 6 Screen Displays programs and acts as a multi touch...
Page 8: ...side air Blocking the air intake may cause the device to overheat 5 Speaker Emits sound 6 Power button Turns on the device For more information see 3 3 Turning On the Device on page 08 7 Reset button Restores the OS to its original state 8 Lock button Locks the device You must log in to continue using the device after locking it 9 Audio jack Connects to the 3 5 mm adapter on headphones or computer...
Page 9: ...universal subscriber identity module cards For more information see 3 1 Inserting USIM Cards on page 06 3 SAM slot Allows you to insert SAM secure access module cards For more information see 8 3 Inserting SAM Cards on page 33 4 MicroSD slot Allows you to insert removable memory cards up to 32 GB For more information see 8 5 Inserting MicroSD Cards on page 35 ...
Page 10: ... device for the first time and configure basic settings 3 1 Inserting USIM Cards USIM cards allow the device to connect to mobile networks 1 Open the cover on the bottom of the device 2 Insert the USIM card into the top slot on the left until you hear a click Do not insert the USIM card into an incorrect slot Check the shape and orientation of the slot to ensure that it is designed for a USIM card...
Page 11: ...radle follow these steps 1 Plug the adapter into an outlet 2 Open the cover on the left side of the device 3 Plug the adapter into the port on the left The battery LED turns red when the battery is charging The battery LED turns white when the battery is fully charged The battery LED blinks red and white alternately at 1 second intervals when the battery has a problem such as it being too hot or t...
Page 12: ...on to indicate that the device is operational To turn off the device see 4 9 Turning Off the Device on page 19 The power button is also used To turn off the screen without turning off the device To turn the screen back on press the power button again To turn off the device manually by pressing and holding the power button for about five seconds ...
Page 13: ...h apps interact with buttons and select options Zoom Touch two points on the screen and move your fingers together to zoom out or move them apart to zoom in Press and hold Continue touching an item to open context menus and display other options Swipe Flick your finger across the screen to switch between apps and display additional menus Drag Move your finger across the screen to move apps and pag...
Page 14: ...er 3 Read and consider the license terms and then tap I accept if you agree to the terms 4 When the Personalize screen appears select a color theme and name for the device and then tap Next The PC name cannot contain spaces 5 On the Get online screen tap an available Wi Fi or mobile network or tap Skip this step to perform this step later 6 On the Settings screen tap Use express settings to use th...
Page 15: ...ck screen appears the device is locked You can also press the power button on the top left edge of the device to turn off the display and lock the device 3 7 Unlocking the Device 1 Place your finger in the center of the lock screen and swipe upward 2 Tap the desired profile and then type in your password 3 Tap OK ...
Page 16: ...omfortable in this new environment 4 1 Start Screen The Start screen provides easy access to the apps and information most important to you From the Start screen you can see your calendar email and favorite websites search for apps or content on the web or log in and out of the device You can customize the Start screen by re sizing the tile or adding a new tile For more information see Configuring...
Page 17: ...des a familiar experience to those who have used previous versions of Windows It is also where you will use certain apps such as the File Explorer and Office applications If you want to boot directly into the desktop see 7 5 Booting to the Desktop on page 29 ...
Page 18: ... provides quick access to frequently used functions from any screen The functions in the Charms menu may differ based on the current app To open the Charms menu follow these steps 1 Swipe in from the right edge of the screen Search Share Start Devices Settings ...
Page 19: ...evice or the web Share Shares files photos or links from the current app Start Opens the Start screen or desktop Devices Allows you to play print or project from peripheral devices Settings From apps Changes the settings for the current app From the Start screen and desktop Changes Windows settings ...
Page 20: ...n the left side of the Apps screen The other apps are grouped by publisher To show all of the apps installed on the device follow these steps 1 Place your finger in the center of the Start screen and swipe upwards 2 On the Apps screen swipe to the left or right to show more apps You can swipe up from the bottom of the screen to display the context menu The context menu allows you to pin apps to th...
Page 21: ...etween Apps 1 Drag your finger inwards from the left edge of the screen 2 Drag the app to the center of the screen and release the app thumbnail You can swipe in repeatedly from the left side of the screen to quickly cycle through all open apps ...
Page 22: ...two apps at the same time 1 From any app drag your finger inwards from the left edge of the screen 2 When the second app appears drag it to the left or right side of the screen 3 Release the app You can press and drag the dividing line in the center to resize the apps ...
Page 23: ... screen release it If the app appears in the window tap the close button in the top right corner of the window 4 9 Turning Off the Device 1 In the top right corner of the Charms screen tap the button 2 Tap Shut Down If the device is not responding press and hold the power button on the top left edge of the device for about five seconds to turn off the device manually ...
Page 24: ... 1 Swipe in from the right edge of the screen 2 In the Charms menu tap Settings 3 In the Settings sidebar tap the icon 4 Tap the Wi Fi toggle to enable Wi Fi connections 5 When the list of Wi Fi networks appears tap an available network 6 Tap Connect 7 Type in the password to connect to the network After you connect to a Wi Fi network the device will automatically connect to that network whenever ...
Page 25: ...etwork 5 Under Mobile broadband tap the name of the network to share 6 Under Share this connection tap the toggle switch to turn on network sharing 7 Specify the name of the network and the password 8 On the other device locate the network and enter the password to log in 5 4 Disconnecting from a Network 1 Swipe in from the right edge of the screen 2 In the Charms menu tap Settings 3 In the Settin...
Page 26: ...and devices menu tap Bluetooth 6 Tap the Bluetooth toggle to enable Bluetooth 7 Tap the device that you want to pair with If the desired device does not appear in this list then confirm that Bluetooth is enabled in the Settings menu of that device 8 Tap Pair 9 Follow the instructions on the screen to finish pairing the device After you pair a Bluetooth enabled device the tablet will automatically ...
Page 27: ... connect a USB device make sure that the connector is oriented correctly and that it can physically fit into the port 3 When the notification appears in Windows the device is ready to use The USB port supports USB 2 0 and 3 0 devices such as mice keyboards and portable hard disks However the USB device may not function properly if it requires a current of more than 0 9 A ...
Page 28: ...reen The Start screen is where it all begins so you should add your own flair to make it your own In this section you ll learn how to change the background and color scheme of Windows add delete and resize tiles and arrange the Start screen to suit your preferences Changing the Background To change the background of the Start screen 1 Swipe in from the right edge of the screen 2 In the Charms menu...
Page 29: ...the Start screen 1 Place your finger in the center of the Start screen and swipe upwards 2 On the Apps screen press and hold an app until the context menu appears at the bottom of the screen To add multiple apps at the same time tap the desired apps while the context menu is open 3 In the context menu tap Pin to Start ...
Page 30: ...ext menu appears at the bottom of the screen 2 Tap the tiles that you wish to delete 3 In the context menu tap Unpin from Start Resizing Tiles 1 On the Start screen press and hold the app until the context menu appears at the bottom of the screen 2 In the context menu tap Resize 3 Tap the desired size ...
Page 31: ...ved to another group or removed from the Start screen 1 On the Start screen press and hold an app until the context menu appears at the bottom of the screen 2 Drag the app to the desired group or drag the app to a blank area of the screen to create a new group 3 Release the app 4 After grouping all of the desired apps tap the Name group textbox above the group to name the group ...
Page 32: ...p Camera to take a new photo using the camera on the device 7 3 Personalizing the Lock Screen 1 Swipe in from the right edge of the screen 2 In the Charms menu tap Settings 3 In the Settings menu tap Change PC settings 4 In the PC settings menu tap PC and devices 5 In the PC and devices menu tap Lock screen 6 Change options that you want to personalize 7 4 Setting the Date and Time 1 Swipe in from...
Page 33: ...indow on the Navigation tab select When I sign in or close all apps on a screen go to the desktop instead of Start 6 Tap OK 7 6 Assigning Function Buttons Function buttons allow you to access frequently used keys and apps quickly without having to open the virtual keyboard or Charms menu To assign a key or action to a function button follow these steps 1 Tap in the tray If the icon does not appear...
Page 34: ...ct a key Select Etc to specify a key in the Key code field If you selected Run app as the Type then specify the file path to the app 5 Tap Apply to apply the changes 7 7 Using Quick Settings Quick settings allow you to enable or disable device features directly from the desktop To enable or disable a quick setting feature 1 Tap in the tray If the icon does not appear in the tray tap to see more pr...
Page 35: ...onment Compass Detects the direction that the device is facing Gyroscope Measures the rate of rotation of the device along the x y and z axes GPS Detects the location of the device NFC Allows the tablet to share information using near field communication NFC Bluetooth Allows the device to connect to Bluetooth devices Wi Fi Detects available Wi Fi networks and automatically connects to saved Wi Fi ...
Page 36: ...ce 8 1 Inserting USIM Cards See 3 1 Inserting USIM Cards on page 06 8 2 Removing a USIM Card 1 Open the cover on the bottom of the device 2 Press the card into the slot until it clicks U S I M 3 Release the card to allow it to partially eject U S I M 4 Remove the card from the slot ...
Page 37: ...r secure transactions such as credit and debit card payments 1 Open the cover on the bottom of the device 2 Insert the SAM card into the bottom slot on the left until you hear it click Do not insert the SAM card into an incorrect slot Check the shape and orientation of the slot to ensure that it is designed for a SAM card 3 Replace the cover ...
Page 38: ...lots 34 8 4 Removing a SAM Card 1 Open the cover on the bottom of the device 2 Gently press the card into the slot until it clicks U S I M 3 Release the card to allow it to partially eject 4 Remove the card from the slot ...
Page 39: ...f the device 1 Open the cover on the bottom of the device 2 Insert the microSD card into the slot on the right until you hear it click Do not insert the microSD card into an incorrect slot Check the shape and orientation of the slot to ensure that it is designed for a microSD card 3 Replace the cover ...
Page 40: ... Slots 36 8 6 Removing a MicroSD Card 1 Open the cover on the bottom of the device 2 Gently press the card into the slot until it clicks 3 Release the card to allow it to partially eject 4 Remove the card from the slot ...
Page 41: ...device see 8 5 Inserting MicroSD Cards on page 35 2 Swipe in from the right edge of the screen 3 In the Charms menu tap Search 4 In the Search box type File Explorer 5 In the search results tap File Explorer 6 In the pane on the left tap This PC 7 Under Devices and drives tap the microSD card drive ...
Page 42: ...stored on the device 9 1 Installing the Camera App 1 Swipe upward on the Start screen to display the list of apps 2 Tap Camera App Install to open the link to the Windows Store 3 Tap Install to install the app When you tap the Install button you must enter your ID email address and password if you haven t logged in to your Microsoft account The device must be connected to a network in order to ins...
Page 43: ...hat the icon appears in the top right corner of the screen If the appears instead tap the icon to switch to photo mode Tap the Capture button to take the picture Capt ure Tap the resolution button in the lower right corner of the screen to change the resolution of the image Tap to reverse the image horizontally Tap to switch between the front and rear cameras on the device ...
Page 44: ...s on the device 9 5 Viewing Photos To view photos taken using the cameras on the device follow these steps 1 In the Charms menu tap Search 2 In the Search box type File Explorer 3 In the search results tap File Explorer 4 On the left side of the File Explorer under This PC tap the Pictures folder 5 Double tap a photo in the folder to view it 9 6 Viewing Videos To view videos recorded using the cam...
Page 45: ...entire screen in small circles 3 Use a dry portion of the cloth to dry the screen 10 2 Extending the Battery Life The battery in the device provides all day power However certain settings and apps can quickly drain the battery To improve the battery life of the device observe the following practices Always charge the battery fully Mute unnecessary sounds and vibrations such as those related to key...
Page 46: ...ice center The device won t power on Reset the device The battery won t charge Ensure that the power adapter is properly connected to the device and an outlet Clean the charging terminals with a dry rag If the device still doesn t charge then contact your local service center for support The battery drains very quickly Check the Bluetooth Wi Fi and brightness settings of the device If the battery ...
Page 47: ... in lost or damaged data 2 Swipe in from the right edge of the screen 3 In the Charms menu tap Settings 4 In the Settings menu tap Change PC settings 5 In the PC Settings menu tap Update and recovery 6 In the Update and recovery menu tap Windows Update 7 Tap Check now 8 When Windows finishes searching for updates tap View details 9 In the list of updates select all of the updates that you want to ...
Page 48: ...OneKey Recovery Partition to store the backup image on the device Select Backup system to other location to store the backup image on an external hard drive or network drive 4 On the Select Partition screen highlight the partition on which to create the recovery partition and then click Next 5 On the Preview and Confirm screen examine the proposed changes to the partition allocations and then clic...
Page 49: ...Confirm screen highlight the partition on which to install the backup image and then tap Start Restore During recovery the partition is formatted make room for the backup image All data stored on the highlighted partition will be lost 4 When the dialog window appears to warn you that system recovery requires the computer to reboot tap Yes 5 When the system restarts and the Choose an operating syst...
Page 50: ...or servicing The repair process may require formatting or replacing the hard disk drive in the device resulting in the loss of all data stored on the device 11 2 Bluebird Customer Service Customers Service Center Telephone 82 70 7730 8000 Fax 82 2 548 0870 Email RMA bluebird co kr Address Customer Service Center B 704 SSang young IT Twintower 442 5 Sangdaewon dong Joongwon gu Seongnam si Gyeonggi ...
Page 51: ...e symptoms The label must not be damaged 11 4 Charged Service You must pay for service in the following cases Damage due to misuse of the product including the following Use of programs that could affect the hardware or core software in the device such as programs to over clock hardware components force inputs into the system or user created software Loss of a required password or pin number Carel...
Page 52: ...t Micro SDXC up to 64 GB SIM SAM Slots 1 SIM slot 1 SAM slot additional SAM slot available via Smart plug Audio Speaker and microphone Cameras Rear 5 0 megapixel autofocus camera with LED flash Front 2 0 megapixel webcam Interfaces Docking connector Power jack Headset jack USB 3 0 GPS S GPS A GPS Glonass BeiDou Sensors Accelerometer Ambient light sensor E Compass Gyroscope Performance Characterist...
Page 53: ...Contact Suggested Disinfectants 91 Isopropyl Alcohol 9 Water Alcohol Prep Pads Anios D D S H CaviWipes Hexanios G R Iodophors Sani cloth HB Sani Cloth Plus Super Sani Cloth Wireless WWAN HSPA HSPA UMTS EDGE GPRS GSM LTE WLAN 802 11 a b g n Wi Fi 802 11n 2 4 GHz and 5 GHz with support for the following security measures WPA WPA2 802 1X WEP AES CCMP and TKIP WPAN Bluetooth v4 0 LE NFC Supports all t...
Page 54: ...plug Keypad type Keypad and MSR module Cradles One Slot Cradle Charging only One Slot Ethernet Cradle Charging port 3 USB ports 1 Ethernet port 1 Micro HDMI port POS cradle Charging port 3 USB ports 1 Ethernet port 1 Micro HDMI port 3 RS232 ports Cash Drawer DC24V Output A power adapter 80001144 and a country specific AC power cord 80001133 80001140 are required to use the charging feature Vehicle...
Page 55: ...C Power Cord Vehicle Charger Rugged Plug Shoulder Strap Blue Pen Tether for the Blue Pen Leather Case HDMI Cable Screen Guard Use only the adapter listed below Manufacturer Borasen Fuyuang Electronic Co Ltd Model FY1206000 Input 100 240 V 50 60 Hz Output 12V 6A ...
Page 56: ...he equipment into an outlet on a circuit different from that to which the receiver is connected Consult the dealer or an experienced radio television technician for help Caution Any changes or modifications not expressly approved by the party responsible for compliance could void the user s authority to operate this equipment FCC RF Exposure Information This device meets the government s requireme...
Page 57: ...esignated after the date that the defect notice is received Bluebird assumes no responsibility for repairing replacing or refunding a product until it receives the defective product from the customer All replacement products shall be equal to the original product in terms of performance Bluebird products may contain recycled components or materials that are equal to new components or materials in ...
Page 58: ...30 A M 6 30 P M GMT Time 9 Hours The center is closed on Saturdays Sundays and national holidays B 703 SSang young IT twintower 442 5 Sangdaewon dong Joongwon gu Seongnam si Gyeonggi do 13216 Republic of Korea Bluebird constantly strives to bring utmost satisfaction to all our customers ...