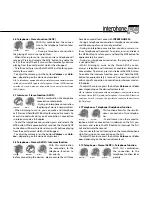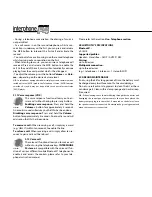
NOTES ON POSITION
Although it can be mounted on either side of the helmet,
IN-
TERPHONE F4 stereo
has been designed to be fixed on the
left: this allows the motorcyclist to give commands with his
left hand, keeping the right on the accelerator.
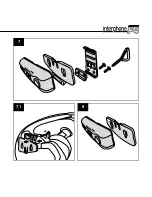
ASSEMbLY OF THE SLIDE SUPPORT WITH REMOVAbLE CLIP (7)
Take the support and note the best place to fasten it to the
side of the helmet. Insert the rear part of the clip into the
helmet and couple the other part on the outside.
Insert the screws and tighten gently. Check position and
move the support if necessary, by sliding it along. Tighten
the screws with the screwdriver supplied.
N.B.: the support also includes an adaptor to offset any possible diffe-
rences in thicknesses that there can be between helmets.
Mount the adaptor between the two parts comprising the slide support,
using the longer screws supplied with the kit.
ASSEMbLY OF THE ADHESIVE SLIDE SUPPORT (8)
Take the adhesive support and look for the best side and pla-
ce to position it. Clean and de-grease the part of the helmet
where you are going to stick the support (do not use any de-
tergents that could damage the helmet’s finish). Remove the
protective film from the bi-adhesive, and apply the support
to the helmet.
As the support will not be able to be moved once stuck
onto the helmet, take great care with its positioning, when
applying.
FIXING THE CONTROL PANEL (9)
After having assembled the support onto the helmet, take
the Bluetooth® control panel, and insert into the guide, from
top to bottom.
Check that the Bluetooth® control panel is correctly locked in
its casing by trying to remove it, pulling upwards.
The control panel must always be inserted from top to bot-
tom, regardless of whether the kit is positioned to the right
or left of the helmet. The connector for the speaker with mi-
crophone must always be beneath the Bluetooth® control
panel.
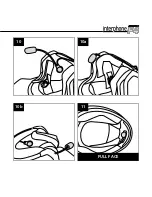
SPEAkER WITH MICROPHONE ASSEMbLY (10)
Take the piece of Velcro and apply to the inside of the helmet
with the bi-adhesive, positioning it at your ear.
N.B.: before positioning the Velcro, it is a good idea to try it out. Put the
helmet on and check the most suitable position for fixing.
Apply the speaker with microphone to the Velcro you have
just installed in the helmet.
Connect the speaker with microphone connector to the so-
cket on the Bluetooth® control panel (the connector can only
be inserted in one position).
Any excess wire must be gathered up into the helmet, be-
neath the padding.
ONLY FOR
INTERPHONE F4 FULL FACE
(11): position the
microphone Velcro into the chin guard, at the level of the
mouth. Gather up any excess wire beneath the padding.
REMOVING THE bLUETOOTH® CONTROL PANEL FROM
THE HELMET
To remove the Bluetooth® control panel, press the locking
lever against the helmet shell and, keeping it pressed, allow
the Bluetooth® control panel to slide upwards.
1.3 Turning on / Turning off
TURNING ON
Press and hold the MFB button for approximately 3 seconds.
The speaker will sound an acoustic warning and the LEDs will
begin flashing quickly for around 3 seconds.
Subsequently, in stand-by mode, the LED will flash approxi-
mately once every 5 seconds.
TURNING OFF
Press and hold the MFB button. The speaker will sound a
prolonged acoustic warning and the LED will flash red prior
to turning off.
2 PAIRING
INTERPHONE F4
is a Bluetooth® device that is compatible
with TELEPHONE – INTERCOM – STEREO (A2DP) profiles.
2.1 Telephone
Pairing
INTERPHONE F4
can be used with a mobile telephone.
Summary of Contents for interphone F4 stereo
Page 1: ...INSTRUCTION MANUAL ...
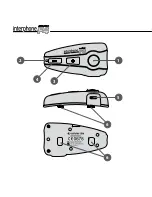
Page 2: ...1 5 3 4 2 6 6 ...
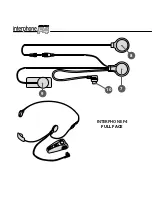
Page 3: ...10 7 9 8 INTERPHONE F4 UNIVERSAL ...
Page 4: ...10 9 8 7 INTERPHONE F4 FULL FACE ...
Page 5: ...7 8 7 1 ...
Page 6: ...9a1 9a2 9a3 9a4 9a 9 9b3 9b4 9b1 9b2 9b ...
Page 7: ...11 FULL FACE 10 10b 10a ...


