


8
FAxM Series
Instruction Manual
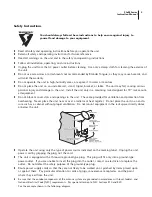
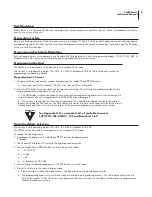
Unit Mounting
Mount the unit in a standard 19” EIA rack, ensuring access to rear connections and front controls. Make sure adequate ventilation
exists in the vicinity of the unit.
Preparation for Use
Plug in the 3-prong connector of the AC power cord into a suitable 117 Volt, 60 Hz AC outlet of adequate current carrying capacity.
Use appropriate cables (75 Ohm coaxial) to connect the program source to the video and audio input connectors and the RF output
of the unit to the system input.
Programming Each Agile Modulator
Each unit comes factory set to operate in the Standard CATV Mode. Each unit has 4 valid operating modes, STD CATV, IRC, HRC &
Broadcast UHF/VHF. If you wish to change the operating mode skip to the next section.
Programming the Unit
The AMCM unit comes factory set to operate in the Standard CATV mode.
The unit has 4 valid operating modes: STD CATV, IRC, HRC & Broadcast UHF/VHF. (Skip to the next section for
programming the operating mode)
Programming a Channel
1. Navigate to the desired channel number by depressing the CH
p
UP and
q
DN buttons.
a. Continuous past 99 for channels 100-135, the +100 red LED will illuminate.
2. Press the ENT button when you reach the desired channel setting. This will tune the modulator output to the
corresponding channel frequency for this entry.
a. The LED display will blink continuously during the channel programming process and will not change the
output frequency the unit is programmed until the ENT button is depressed.
b. The unit has a special feature that alerts an operator of an inadvertent or desired change to the channel
display by flashing the LED readout. The LED display will continue to flash for 30 seconds if the ENT button is
not depressed and then will return to the display of the previously programming channel entry setting.
Operating Mode Selection
The unit has 4 valid operating modes: STD CATV, IRC, HRC & Broadcast UHF/VHF.
The AMCM unit comes factory set to operate in the Standard CATV mode.
To change the operating mode:
1. Simultaneously depress the CH
p
UP and
q
DN buttons for approximately
5 seconds.
2. The Channel LED display will switch to the operating mode selection.
3. Use the CH
p
UP and
q
DN buttons to select the desired mode:
a. C = STD CATV
b. H = HRC
c. I = IRC
d. U = Broadcast (VHF/UHF)
4. After selecting the desired mode depress the ENT button to set the mode.
5. The unit will return to the channel display mode.
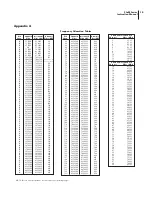
a. Programming will reflect the mode chosen – See Appendix A for a detailed frequency plan.
b. The programming mode will also flash continuously during the programming process. The LED display will continue to
flash for 30 seconds if the ENT button is not depressed and then will return to the display of the previously programming
channel & mode entry setting.
ATTENTION!
See Appendix A For a complete list of available channels -
CATV STD; IRC & HRC 1-135 and Broadcast 2-69
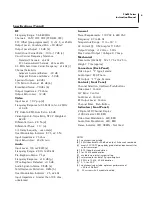
Summary of Contents for FA1M-50-860
Page 11: ...Notes ...


