WineEasy™ V2
© Blichmann Engineering, LLC 2018
For replacement parts, visit: blichmannengineering.com/genuine-replacement-parts
8
Installing the press piston:
IMPORTANT:
Do not punch down your cap within 12 hours of pressing. This will allow your pomace to remain more permeable
thereby increasing the efficiency of the press and reduce the chances of plugging the false bottom. If your cap has fallen, simply
proceed without stirring within 12 hours.
When the level in the fermentor has reached the half way point stop draining and close the valve on the fermentor and turn off
the pump. Use a sanitized rubber spatula to wipe any skins or residue off the interior sidewall of the fermentor. Then spray the
sidewalls with sulfites which will act as a lubricant for the wiper seal of the press piston. Loosen the wing nuts on the white plastic
guide bars and move them in as far as possible.
After sanitizing the surfaces of the piston, spray a sulfite solution on the seal of the press piston and place it on the top of the
fermentor and press down firmly – try to keep the piston as level as possible at all times. Do NOT install the solid stopper at this
time so air can escape through the piston. When the top of the piston is even with the top of the fermentor, or it has reached the
surface of the wine and pomace, move the white guide bars so they contact the wall of the fermentor and tighten the wing nuts.
IMPORTANT:
The purpose of the guide bars is to ensure that the piston remains horizontal at all times. Make sure the face of the
piston is not tilted and is as level as possible and then tighten the guide bars. Continue to slide the piston down until it is resting
on the surface of the pomace. Install the solid stopper firmly into the hole in the plate at this time.
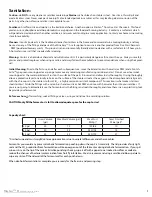
Connect the vacuum pump kit as shown on page 7 (
Figure 21
) if you
have not already done so. Open the valve on the fermentor and turn
on the vacuum pump.
At this time you will notice the piston slowly moving down as the
carboy fills.
Note:
Initially (and when free-running), the pressure gauge on the
vacuum pump will move wildly, but as you begin pressing the pomace
it will stabilize and gradually increase.
IMPORTANT:
Wet the top of the seal with sulfite spray and press it
against the wall of the fermentor periodically with the tip of your finger
to ensure a tight seal. Spray the seal with sulfites occasionally to help
maintain the seal. If at any time you hear a hissing sound check that
the piston is not tilted at an angle and that the seal is pressed firmly
against the wall of the fermentor.
Note:
It is normal during pressing for bubbles to be in the hose, partic-
ularly as the vacuum increases. This is not air entering the system – it is
carbon dioxide coming out of solution (your wine is degassing).
When the pump has reached 450-550 mm of mercury and the wine
flow has slowed to a slow trickle, the pressing is complete and the valve
on the tank can be closed and the pump turned off. Some additional
wine may be extracted by waiting 15-20 min for additional wine to
permeate through the pomace as the pressure from the vacuum is
still applied inside the tank. After this wait, the vacuum pump can be
turned back on (wait for the gauge to read 450-550 mm Hg) and then
open the valve on the tank.
Optional Double Press Process:
To improve efficiency by a few
additional percentage points, stop the pressing operation at 300-350
mmHg and then close the valve and remove the piston. Then using a
sanitized scoop, loosen and gently mix the pomace bed particularly
where it has pressed against the perforated false bottom. Level the bed
with the scoop and replace the piston. This will allow the remaining
wine to flow more freely through the pomace.
Figure 22
Figure 23
Figure 24


