2
Fig. 2
Fig. 3
Fig. 4
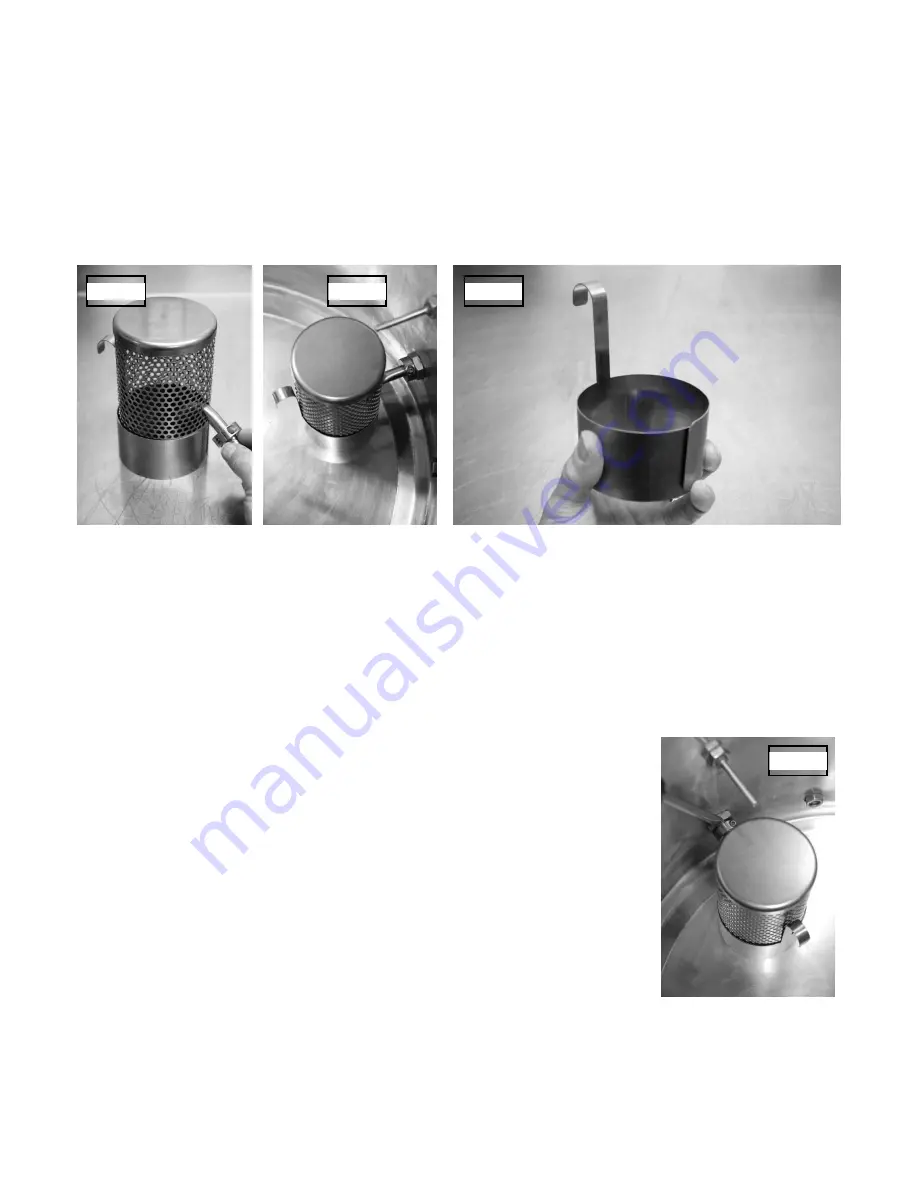
Installation in a BoilerMaker
tm
brew pot:
To install the HopBlocker
tm
in your BoilerMaker
tm
brew pot, simply remove the dip tube and place it in
the hole in the side of the HopBlocker
tm
as show in Fig 2. Note that the gap in the shield faces the drain
fitting (the finger pull faces the center of the pot). Then simply insert the tube into the drain fitting as
shown in Fig 3. It is helpful to lubricate the tube with a bit of water to make insertion easier.
Important:
ensure that the shield grips the sides of the screen sufficiently so that it will hold itself up
when moved to the top of the screen. If it does not, gently bend the shield in slightly so it grips more
firmly as shown in Fig 4.
Installation into a non-Blichmann Engineering
TM
pot:
You will need to provide a ½” diameter dip tube in your pot with a fairly sharp 90 degree bend 3” above
the bottom of the pot. The bottom of the dip tube should sit above the bottom of the pot about
3/8”
to
½”.
Since you cannot rotate the tube to install it, you will need to provide a compression or flare fitting
adapter on the inside of the pot to accommodate installation of the HopBlocker
TM
. The closer you can
get the HopBlocker
TM
to the sidewall of the pot the better the performance will be. For kegs, you will
need to center the HopBlocker
TM
in the middle of the keg so that it sits flat. However, this will negatively
affect the performance of the filter.
Removal in a BoilerMaker
TM
brew pot:
To remove the HopBlocker
TM
in your BoilerMaker
TM
brew pot we recommend
using a flat blade screw driver between the shaft collar and the drain fitting
(ref Fig 5) to get the tube out of the o-ring seat. You only need to open a gap
of about 1/8” to pop the t
ube out of the grip of the o-ring and from there it
can be removed by hand by pulling straight out.
Fig. 5


