5
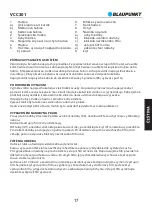
1.
Nozzles:
a)
Multi-purpose brush nozzle
b)
Crevice tool
c)
Dust brush
2.
Telescopic tube
3.
Hose handle
3a. Suction power control on the hose
handle
4.
Hose
5.
Button: a) cord reel, b) power switch
PREPARATION OF THE VACUUM CLEANER FOR WORK
Make sure that the dust container of the vacuum cleaner is empty and the motor inlet filter is properly
installed. Insert the hose connector into the vacuum cleaner inlet and lock it. Connect the hose handle
with the telescopic tube or the nozzle. Put the appropriate nozzle on the telescopic tube. Grabbing the
plug unwind the power cord. The yellow band on the cord signals the end of the cord.
Connect the power plug to the wall socket. Turn on the vacuum cleaner with the switch button (6b).
WHEN THE VACUUM CLEANING IS DONE
Unplug the power cord from the wall socket. It is recommended that the cord be rewound by pressing
the cord reel button (6a). Make sure that the cable is loose, it is not blocked by anything and gently
hold the cord to prevent it from tangling and to avoid the strong impact of the plug on the housing.
Disconnect the nozzle, tube and hose. Clean these parts.
The vacuum cleaner may be stored in a vertical or horizontal position.
Be careful not to bend the hose excessively, this may result in its deformation or damage.
EMPTYING THE DUST CONTAINER
To remove the container, press the release button of the container (9b), while pulling the container
upwards and holding the handle of the container (9a).
Remove the inlet filter (9d) and clean it.
Holding the cover (9f ) and the container, press the opening lever (9e). Then open the cover (9f ) and
remove dirt from the container.
To re-install the container, the above steps must be performed in a reverse order. When re-installing
the air inlet filter (9d), pay attention to the position of the "no filter" safety blockade (9c).
CLEANING AND MAINTENANCE
Regularly clean the nozzles, the tube and the hose.
The body may be wiped with a slightly damp cloth, then it should be immediately wiped dry.
Whenever emptying the dust container, remove dirt from the inlet filter. It is recommended that the
filter be thoroughly washed under running water at regular intervals. After washing the filter, install it
only if it is completely dry.
It is recommended that the exhaust filter be replaced every 6-12 months depending on the intensity of
the use of the vacuum cleaner. To do this, open the exhaust filter cover and remove the old filter. Then
insert a new filter in place and close the cover of the exhaust filter by engaging the lower fastening
items and blocking the upper hook. The inlet filter must be replaced twice as often as the exhaust filter.
6.
Exhaust grille
7.
Hose connector
8.
Holder
9.
Dust container:
a)
Container handle
b)
Container release button
c)
No filter safety blockade
d)
Motor inlet filter
e)
Container opening lever
f)
Cover
VCC301
Summary of Contents for VCC301
Page 2: ...VCC301 7 ...
Page 8: ...6 VCC301 ...
Page 20: ...18 VCC301 ...
Page 26: ...24 VCC301 ...
Page 32: ...30 VCC301 ...
Page 38: ...36 VCC301 ...
Page 44: ...42 VCC301 ...
Page 62: ...60 VCC301 ...
Page 68: ...66 VCC301 ...
Page 74: ...72 VCC301 ...
Page 75: ......
Page 76: ......


