8
PRODUCT ASSEMBLY
1
Install the brushes. Make the left side-brush (L) and the right-
side brush (R) correspond to L and R on the bottom casing,
keep pressing the side brushes.
They are installed when you hear a “click” sound.
2
Place the 2-in-1 combi watertank in the robot.
3
Fully charge the robot (before 1st time use)
4
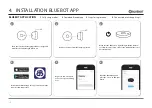
Connect with Bluebot app (optional)
5
Start cleaning
NOTE
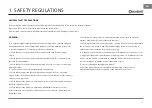
• Please do not move the auto station without reason and keep it
out of direct sunlight.
• If the auto station is relocated, the robot may fail in positioning
and lose the map. When restarted, the robot will rebuild and
memorise the map. In the rebuilt map the cleaning information for
forbidden areas and other areas may have been lost.
• Direct sunlight will interfere with the recharging signal and
consequently, the robot may be unable to return to the charging/
auto station.
• The robot cannot be used to remove liquids.
• If the battery level is less than 20% the machine will not work.
Please charge it.
• The machine will return to the auto station automatically if the
battery level is less than 20% when in use and will be powered
o
ff
and then start cleaning automatically after the battery level
reaches 80%.
• Please clear various wires (including the power line of the auto
station
) from the ground before use to avoid outage and damage
of objects or wires when wires are dragged by the robot.
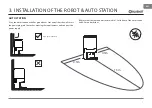
INSTALLATION OF THE ROBOT & AUTO STATION


