background image

English

19

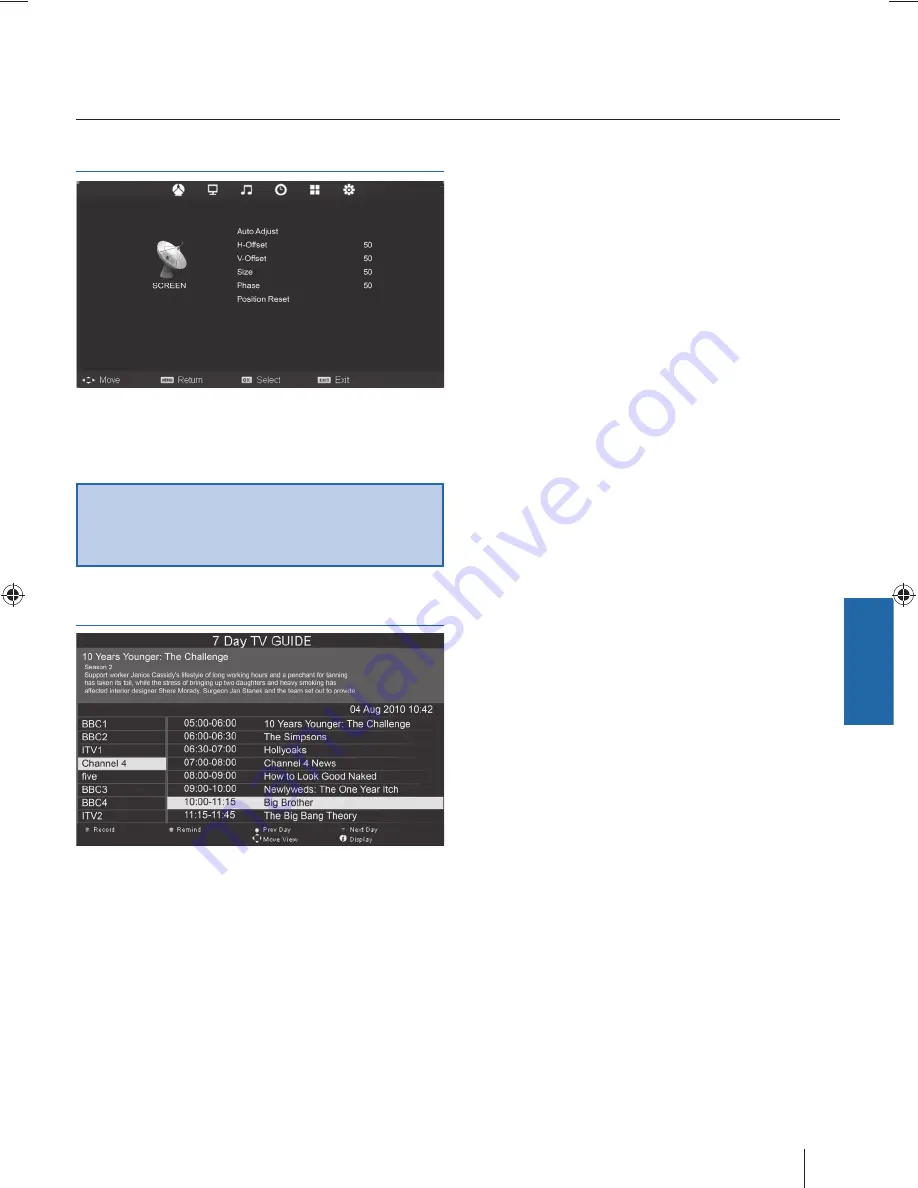
PC Settings

Auto Adjust 

- Lets you automatically confi gure the television 

to be used as a computer monitor.

H Off set 

- Changes the horizontal position of the picture.

V Off set 

- Changes the vertical position of the picture.

Size 

- increase picture size.

Phase 

- To adjust delay time of phase in order to reduce the 

noise of picture

Position Reset 

- Changes back to the original settings

Tip: If the computer is left in-active for a period of time, 
the television will switch into a ‘sleep’ state (the screen 
will power off  to save power). To switch back on press the 
standby button.

7 Day TV Guide 

TV Guide is available in Digital TV mode. It provides 
information about forthcoming programmes (where supported 
by the Digital channel). You can view the start and end time of 
all programmes and on all channels for the next 7 days and set 
reminders.

TV Menu operation

PC Settings | 7 Day TV Guide

User Guide - Blaupunkt - 42-63G-3B-F3TCU-UK.indd   19

User Guide - Blaupunkt - 42-63G-3B-F3TCU-UK.indd   19

19-Jun-12   3:45:03 PM

19-Jun-12   3:45:03 PM

Summary of Contents for 42-63G-GB-3B-F3TCU-UK

Page 1: ...42 63G GB 3B F3TCU UK Full HD 3D LCD TV with Freeview USB Media Player Model No User Guide...

Page 2: ...fetime of the appliance In order to ensure the safety ask the quali ed person to remove the dirt from the appliance Try to prevent the mains cable or if it is part of delivery mains adapter damage The...

Page 3: ...f you have a headache or otherwise feel fatigued or drowsy stopwatching the TV and take a rest Pregnant woman seniors persons with heart problems or persons who experience frequent drowsiness should r...

Page 4: ...9 TV buttons source menu 10 Remote control 11 Connections 12 TV Menu Operation 14 Channel menu 14 Picture menu 14 3D settings 15 Sound menu 16 Time menu 16 Feature menu 16 Setup menu 17 Using the tele...

Page 5: ...tand neck 1x Remote control 1x RF cable 1x User guide 1x Warranty card 4x 3D glasses 2x AAA bateries 1x Quick Start Guide 1 x TV stand instalation packet VOL CH REPEAT 1 2 3 4 5 6 7 8 0 9 OK STANDBY M...

Page 6: ...les on the rear of the TV These holes are indicated in the picture below Attaching Detaching the Stand g 1 g 2 TV TV Viewing angle Viewing angle INCORRECT CORRECT 1 1 1 2 3 6 x ST 4x16 4x14 4x12 4 4 x...

Page 7: ...and re tuning the TV g A g B Getting started initial set up As part of our ongoing development to reduce power consumption we have added an extra function to this Television called Ecohome you will s...

Page 8: ...the Television 1 Press SOURCE 2 Scroll up down using CH CH buttons to the input source you require 3 Press Vol to change input source to the one selected DVD HDMI 1 HDMI 1 HDMI 2 HDMI 3 TV buttons Sou...

Page 9: ...adjust the system settings to your preference MENU To display OSD menu EXIT To exit all menus NUMBER BUTTONS 0 9 to select a TV channel directly To return to the previous channel viewed FAV To display...

Page 10: ...output 2 x 3 HDMI in HDMI input 8 Video CVBS Video input 3 VGA PC VGA PC input 9 Audio L R Audio L R input for component Composite CVBS 4 VGA PC Audio In 3 5mm PC audio input 10 Component Component i...

Page 11: ...HDMI to HDMI cable A HDMI cable can output both video and audio and enables you to enjoy digital quality video and audio with minimal loss of quality TVs Input Source should be set to HDMI Option 2 v...

Page 12: ...alogue signal Programme Edit Allows you to delete skip and add favourite channels Picture menu Picture Mode Choose from the following presets Standard Default settings Dynamic Recommended settings for...

Page 13: ...ept that it halves the vertical resolution instead Available primarily up to 720p resolution top and bottom 3D o ers 1 280 pixels horizontally The higher pixel count is generally considered more suita...

Page 14: ...nalogue signal AD Volume Increase or decrease the overall volume Time menu Clock Set the date and time O Time Allows you to set a speci c time for your TV to turn o On Time Allows you to set a speci c...

Page 15: ...s the correct proportion but zoomed in to ll the screen 4 3 Displays the 4 3 picture in its original size Side bars are shown to ll the 16 9 screen 16 9 Fills the screen with a regular 16 9 signal and...

Page 16: ...n to that of the television move the slider 5 Left click your mouse on Advance Advanced Settings and left click on Monitor 6 Left click on the drop down for Screen refresh rate and select 60 Hertz if...

Page 17: ...Reset Changes back to the original settings Tip If the computer is left in active for a period of time the television will switch into a sleep state the screen will power o to save power To switch bac...

Page 18: ...pear The content will be divided into Photo Music Movie and Text based on le type 1 You can navigate through the menus using the scroll buttons To con rm the item you wish to play view press OK button...

Page 19: ...ddition to connecting via SCART you should connect the aerial cable from the wall socket to your VCR DVD Recorder and another aerial cable from the VCR DVD Recorder to the TV Game Consoles I have conn...

Page 20: ...C 1 x SCART 1 x USB 1 x Composite Video 1 x Component YPbPr Sound Inputs 1 x shared audio for Composite Video and YPbPR 1 x 3 5mm jack for PC audio input Sound Outputs 1 x COAX audio output 1 output f...

Page 21: ...tial set up 9 Channel menu 14 Important safety instructions 4 5 Index 23 PC Settings 19 Picture menu 14 Remote control 11 12 Setup menu 17 Sound menu 16 Technical speci cation 22 Time menu 16 TV butto...

Page 22: ...24...

Page 23: ...English 25...

Page 24: ...Universal Media Corporation Slovakia s r o Mickiewiczova 7104 14 811 07 Bratislava 1 Slovakia Assembled in Europe BLA MAN 0045...

Reviews: