www.blaubergventilatoren.de
13
VENTO Ergo A25-1 Pro/A25-1 S Pro
The unit maintenance involves periodic cleaning of the unit surfaces and
cleaning or replacement of the filters.
1. Fan maintenance (once a year).
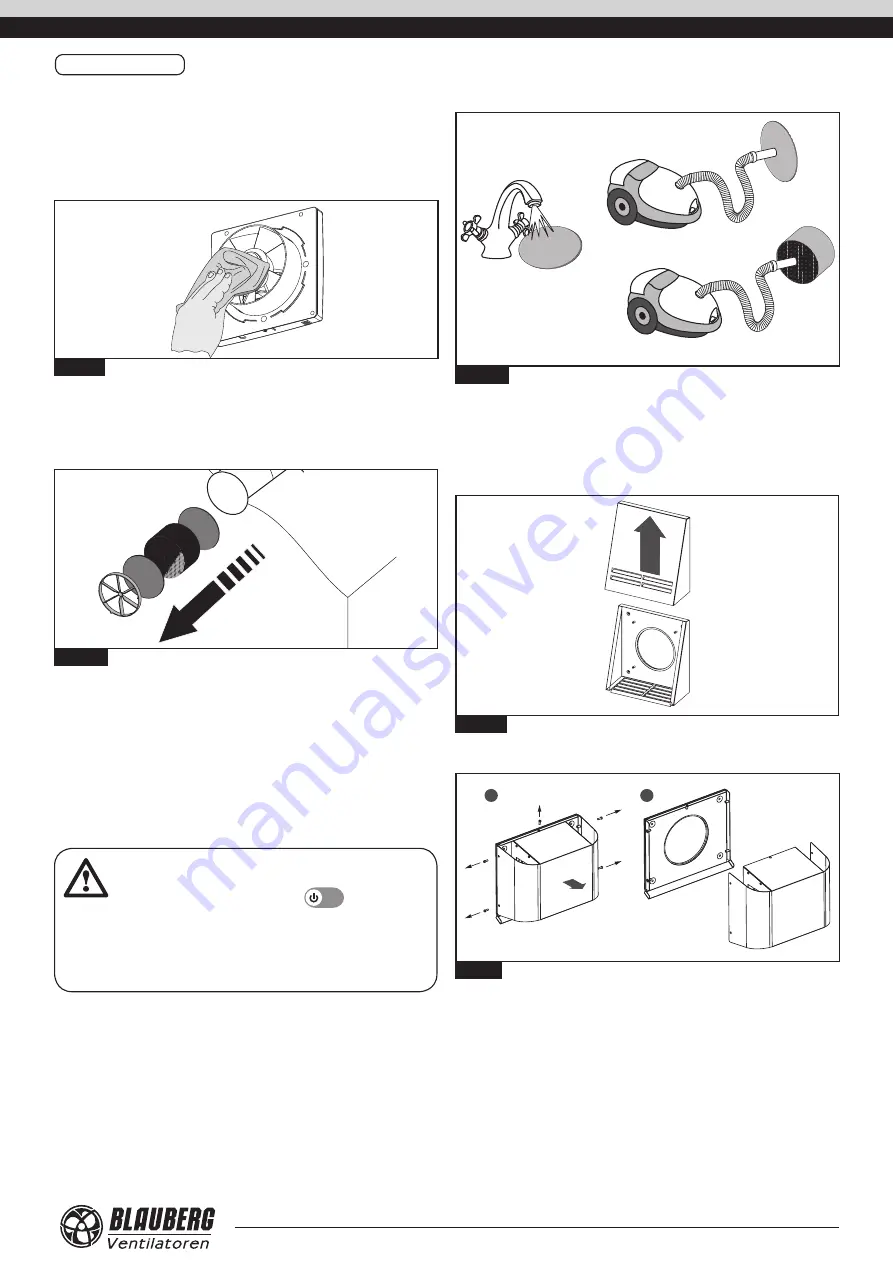
Take off the ventilation unit and clean the fan blades, fig. 20. Remove dust
with a soft brush, cloth or a vacuum cleaner. Do not use water, abrasive deter-
gents, solvents, sharp objects. Clean the impeller blades once in a year.
Fig. 20.
2. Heat exchanger and filter maintenance (4 times per year).
Pull out the air flow rectifier, fig. 21. Remove the filter in front of the heat ex-
changer. Pull the cord to remove the heat exchanger from the air duct sup-
porting it with the hand to avoid its damage. Remove the filter behind the
heat exchanger.
Fig. 21.
Clean the filters as often as required, but at least once in three months. After
90 days of non-stop operation the sound signal reminds of the need to clean
or replace the filter. The signal is repeated every 5 minutes. In this case turn
the unit off and clean or replace the filters.
To clean the filters flush those with water or use a vacuum cleaner, fig. 22.
Install the dry filters into the air duct. Contact a local distributor for the new
filters stated above in the section „Technical data”.
Even regular filter maintenance may not completely prevent dust accumula-
tion on the heat exchanger unit. Clean the heat exchanger with a vacuum
cleaner at least once a year to maintain its high heat recovery efficiency.
Fig. 22.
3. Outer ventilation hood maintenance (once a year).
The outer ventilation hood grill may get clogged with leaves and other
objects that reduce the unit performance. Check the outer ventilation hood
twice a year and clean it as often as required.
Cleaning of the outer ventilation hood:
•
remove the upper part of the outer ventilation hood:
Fig. 23 for VENTO Ergo A25-1 Pro.
Fig. 23.
Fig. 24 for VENTO Ergo A25-1 S Pro.
•
clean the outer ventilation hood and the air duct.
1
2
Fig. 24.
MAINTENANCE
ATTENTION
After installation of the filters and the heat exchanger in
the unit, press and hold the button
on the remote
controller to reset the motor meter. A long sound signal
confirms reset of the motor meter.


