9
EN
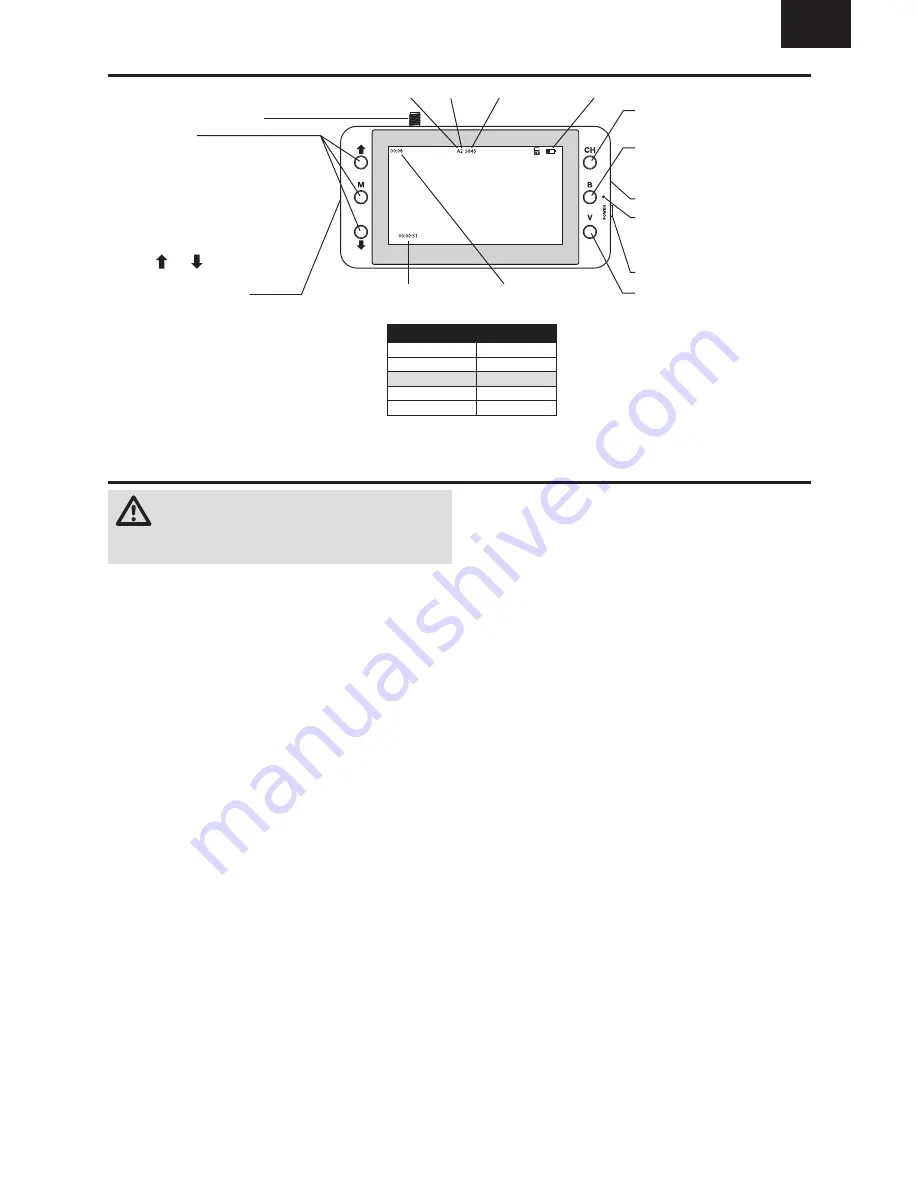
4.3 inch Video Monitor with DVR Features
5.8GHz Antenna connector
Menu Buttons:
Press and hold the M button
to change to playback mode
Single push the M button to select options:
Brightness
Contrast
Color
Language
Backlight
Reset
Use the and buttons to modify the
selected option
Micro Memory Card Slot
Channel Selection Button
Single push to change channel
Band Button
Single push to change band
Press and hold for frequency scan
5V Micro USB Charge Port
Charge Status LED
Red = charging
Off = charged
Power Switch
DVR Start/Stop Button
Band Channel
Clip Timer
Total Time
Frequency
Battery Level
* The video transmitter on the quadcopter does not operate in the E band.
Monitor Band
FPV Band
A
A
B
B
C
E*
D
FS/IRC
E
Race
CAUTION:
Do not power on the monitor without
the antenna attached. Doing so will damage the
video receiver amplifi ers. Amplifi er damage is not covered
by warranty.
1. Before using the 4.3 inch video monitor, make sure
the monitor is fully charged. Connect the micro USB
connector to a 5V USB power source. The charge indicator
LED will glow red while charging and will go off when the
monitor is fully charged.
2. Open the sun shade, if installed.
3. Insert a micro memory card (not included) in the slot on
the side of the video monitor. Press the card in until it
locks. To remove the card, press in slightly and release
until the card is released. Always insert the memory card
before powering on the video monitor.
4. Power on the video monitor and look for a clear channel.
Clear channels will have a consistent static background.
Channels with interference will display horizontal static
lines. Select one of the clear channels.
5. Once you have chosen a clear channel on the monitor,
select the same channel on the video transmitter.
6. Place the monitor in the transmitter cradle or in the
goggle mount.
Using the Video Monitor


