background image

Using the Built In Switcher

Using the Built In Switcher

Blackmagic Web Presenter features a built in 2 input live switcher. However, to take advantage 
of this feature you need to install the Teranex Mini Smart Panel. This panel adds an LCD screen 
and pushbutton controls that you can use to control the built in switcher. Once the Teranex Mini 
Smart Panel is installed, the switcher feature will be enabled.

When both SDI and HDMI video sources are connected, the HDMI input will be resynchronized 
so that both inputs can be transitioned without glitches. This is what makes the Web Presenter 
able to do live switching.

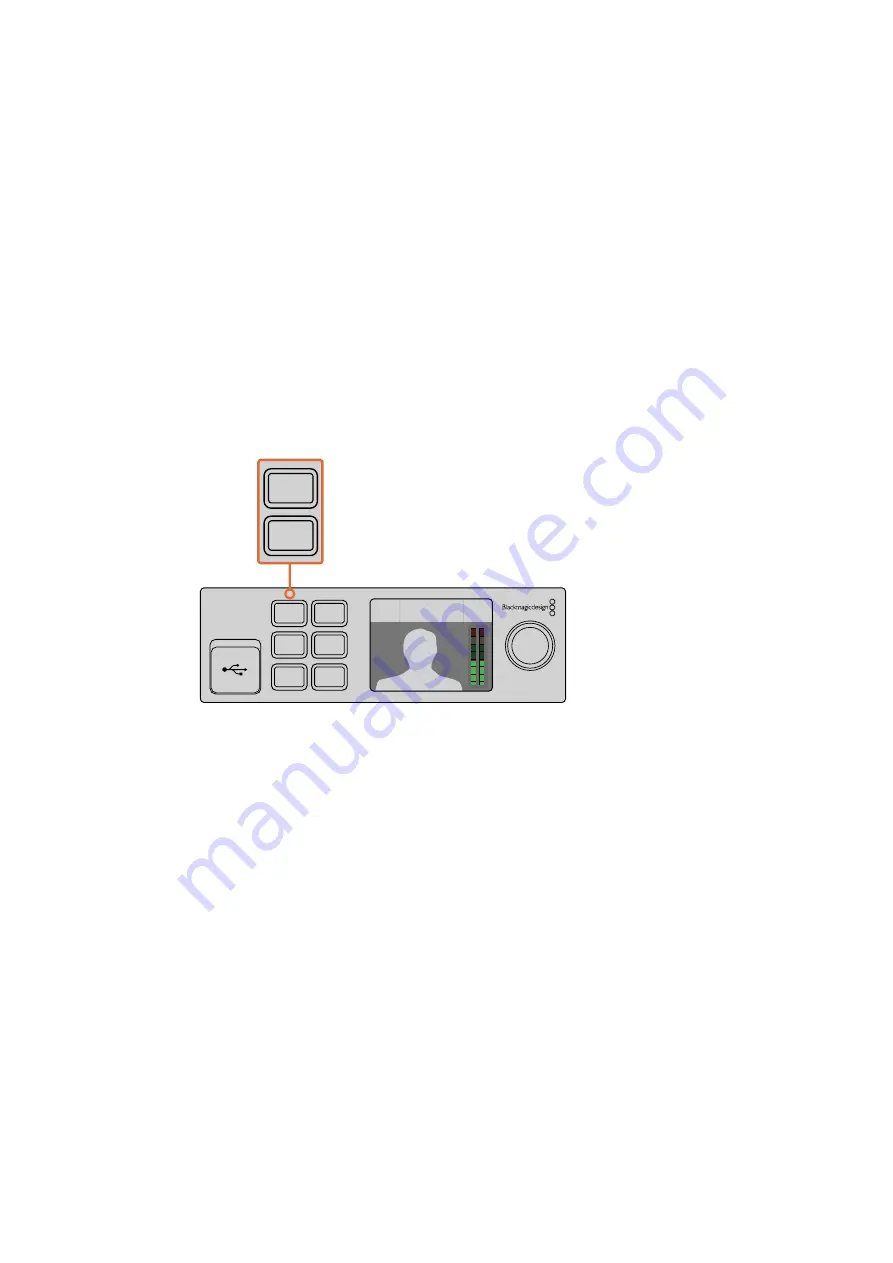
To operate the built in switcher, simply press the 1 on the front panel to select SDI as the video 
source or the button marked 2 to select the HDMI video source. Once selected, the Web 
Presenter will do a short half second cross dissolve. You could connect a computer with a slide 
show to the HDMI input and a camera to the SDI source and do very professional live 
presentation shows for your audience, simply by switching using the 1 and 2 buttons. You can 
also confirm the current input, the video preview and audio levels on the LCD screen.

When switching a live broadcast using Blackmagic Web Presenter 
with a Teranex Mini Smart Panel attached, press the 1 and 2 buttons 
to switch between the SDI and HDMI inputs

Using Camera Tally

Blackmagic Design studio cameras and ATEM switchers include a tally feature where the tally 
information is sent from the switcher to the camera via the program return feed from the 
switcher to the camera. Your Blackmagic Web Presenter also includes this tally feature so you 
can see which camera is “on air” when you are using the switcher feature on the web presenter.

Using tally is quite simple and all you need to do is connect the SDI output of a Blackmagic 
Design Studio Camera to your web presenter as an SDI video source and then connect the 
program output of the web presenter back to the camera progam SDI input. Now when you 
select the program button on the camera you can see the web presenter’s program video on the 
camera. But what’s even more exciting is the tally information is now being sent to the camera.

The SDI video input is tally “camera 1” and the HDMI input is tagged as “camera 2”. So what this 
means is that in your camera’s settings, you will need to set the camera number. In this case we 
are using the SDI input for the camera, then the camera should be set to camera 1. Once this 
has been set, and you press the 1 button on the front panel of the web presenter, you should 
see the tally illuminate on the camera.

1

MENU

2

VIDEO

SET

AUDIO

Video Format

525i59.95 NTSC

Source

HDMI

USB

25 fps

1

MENU

2

VIDEO

SET

AUDIO

Video Format

525i59.95 NTSC

Source

HDMI

USB

25 fps

13

Summary of Contents for Web Presenter

Page 1: ...Installation and Operation Manual February 2017 Blackmagic Web Presenter...

Page 2: ...he video frame rate down to 20 15 10 or 5 frames per second when directed to by the software This means you get very high quality HD video in 16 9 aspect ratio but you also get the lowest data rate to...

Page 3: ...Using Blackmagic Web Presenter with Skype 6 Using Blackmagic Web Presenter to Stream with YouTube Live 7 To set your Web Presenter as a new device 7 Setting up a YouTube Live streaming channel 9 Usin...

Page 4: ...ipment For example you could loop the SDI output to a deck or monitor or you could connect Web Presenter in between a computer s HDMI output and the HDMI input of a video projector There is also a pro...

Page 5: ...connect your Blackmagic Web Presenter to your computer via its USB port Your computer will instantly recognise the unit as a USB webcam video source Connect your Blackmagic Web Presenter to your comp...

Page 6: ...kype com 1 Once installed on your computer launch Skype 2 Open the preferences under Skype Preferences and select audio video 3 If your computer has a webcam it will be selected by default and the Sky...

Page 7: ...to YouTube Live and can be downloaded from https obsproject com To set your Web Presenter as a new device Once installed on your computer launch the software 1 Click on the button in the sources box...

Page 8: ...tton in the sources box to add a source and select audio input capture Select create new in the pop up dialog box and click ok In the properties window for the new device select Blackmagic Web Present...

Page 9: ...a YouTube Live streaming channel Now you need to create a YouTube live streaming channel In your browser go to www youtube com live_dashboard and sign in or create a new Google account 1 Select live...

Page 10: ...nto the Open Broadcaster software 4 In the Open Broadcaster software go to preferences and select the stream tab Select YouTube as your service and paste the stream key into the stream key text field...

Page 11: ...rear of the Smart Panel with the adjoining connector on the face of your Blackmagic Web Presenter and gently push the Smart Panel towards the unit until the connectors are firmly seated The Smart Pan...

Page 12: ...tudio Minis gives you one unit to play back your video sources and provides another unit for recording the program output from your Web Presenter This modular design lets you build your own custom vid...

Page 13: ...e 1 and 2 buttons to switch between the SDI and HDMI inputs Using Camera Tally Blackmagic Design studio cameras and ATEM switchers include a tally feature where the tally information is sent from the...

Page 14: ...they are on air This makes it easy for them to know when they are live Imagine having a Blackmagic URSA Mini with Blackmagic URSA Studio Viewfinder combination and the presenter can see that big red t...

Page 15: ...atus so that monitor devices connected to that individual output may display tally status without knowledge of the device id they are monitoring Assumptions Any data alignment padding is explicit in t...

Page 16: ...bit 2 3 reserved 0b00 bit 4 slave device 4 program tally status 0 off 1 on bit 5 slave device 4 preview tally status 0 off 1 on bit 6 7 reserved 0b00 Byte 7 MSB 6 5 4 3 2 1 0 LSB 0 Version 0b0 Version...

Page 17: ...an visit for more information and creative ideas This can also be a faster way of getting help as there may already be answers you can find from other experienced users and Blackmagic Design staff whi...

Page 18: ...nt This equipment generates uses and can radiate radio frequency energy and if not installed and used in accordance with the instructions may cause harmful interference to radio communications Operati...

Page 19: ...an Blackmagic Design representatives to install repair or service the product b to repair damage resulting from improper use or connection to incompatible equipment c to repair any damage or malfuncti...

Reviews: