background image


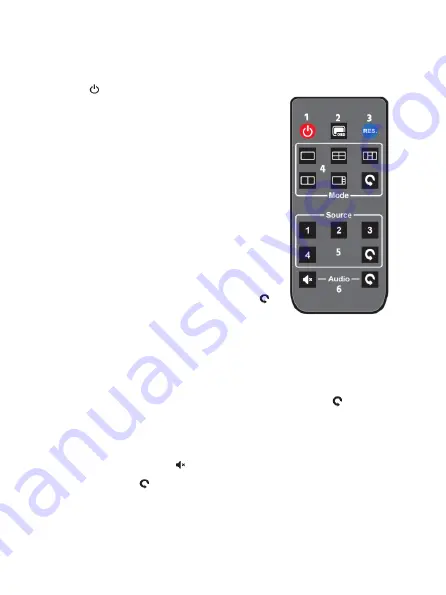
Remote Control 

1.


: Press the button to turn the 

unit on or to put it into standby 
mode. 

2.


OSD: Press the button to open or 
close the display window frame. 

3.


RES: Press the button to cycle 
through the supported output 
video resolutions. 

4.


Mode: Press one of the five 
"window" buttons to select one of 
the five display modes. Press the   
button to start automatic cycling 
of the five display modes. Refer to the 

DISPLAY MODES


section for more details. 

5.


Source: Press one of the four numbered buttons to select 
an input source. When using MODE 1, press the   button 
to automatically cycle through the input sources. Refer to 
the 

DISPLAY MODES

 section for more details. 

6.


Audio: Press the   button to turn audio muting on or off. 
Press the   button to automatically cycle the audio 
through the four input sources.


Summary of Contents for MP24740

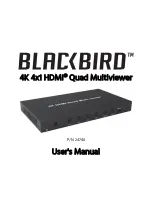
Page 1: ...4K 4x1 HDMI Quad Multiviewer P N 24740 User s Manual...

Page 2: ...n the device immediately remove it from its power source and allow it to fully dry before reapplying power Do not touch the device the power cord or any other connected cables with wet hands Do not ex...

Page 3: ...ome tangled with other cords Ensure that the power cord does not present a tripping hazard Never unplug the unit by pulling on the power cord Always grasp the connector head or adapter body Ensure tha...

Page 4: ...resolutions up to 4K 30Hz and VGA resolutions up to 1920x1200 It can be controlled using the front panel buttons or the included IR remote control FEATURES 4x HDMI video inputs 1x HDMI and 1x VGA vid...

Page 5: ...ice representative through the Live Chat link on our website www monoprice com or via email at support monoprice com Check the website for support times and links PACKAGE CONTENTS Please take an inven...

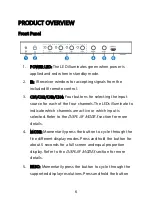
Page 6: ...annels The LEDs illuminate to indicate which channels are active or which input is selected Refer to the DISPLAY MODES section for more details 4 MODE Momentarily press the button to cycle through the...

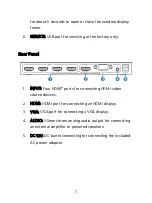
Page 7: ...INPUT Four HDMI ports for connecting HDMI video source devices 2 HDMI HDMI port for connecting an HDMI display 3 VGA VGA port for connecting a VGA display 4 AUDIO 3 5mm stereo analog audio output for...

Page 8: ...the five display modes Press the button to start automatic cycling of the five display modes Refer to the DISPLAY MODES section for more details 5 Source Press one of the four numbered buttons to sele...

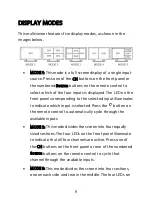
Page 9: ...illuminates to indicate which input is selected Press the button on the remote control to automatically cycle through the available inputs MODE 2 This mode divides the screen into four equally sized...

Page 10: ...channels 1 and 2 are active Press the CH1 or CH2 buttons on the front panel or the Source 1 or Source 2 buttons on the remote control to cycle that channel through the available inputs MODE 5 This mod...

Page 11: ...11 SAMPLE CONNECTION DIAGRAM...

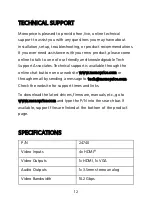
Page 12: ...ssociates Technical support is available through the online chat button on our website www monoprice com or through email by sending a message to tech monoprice com Check the website for support times...

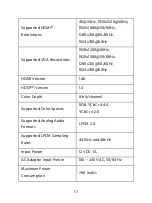
Page 13: ...x1080 50 60Hz 1280x720 50 60Hz 1024x768 60Hz HDMI Version 1 4b HDCP Version 1 4 Color Depth 8 bit channel Supported Color Spaces RGB YCbCr 4 4 4 YCbCr 4 2 0 Supported Analog Audio Formats LPCM 2 0 Sup...

Page 14: ...rules Operation is subject to the following two conditions 1 this device may not cause harmful interference and 2 this device must accept any interference received including interference that may caus...

Page 15: ...e instructions may cause harmful interference to radio communications However there is no guarantee that interference will not occur in a particular installation If this equipment does cause harmful i...

Page 16: ...lackbird the Blackbird logo and all Monoprice logos are trademarks of Monoprice Inc HDMI the HDMI Logo and High Definition Multimedia Interface are trademarks or registered trademarks of HDMI Licensin...

Reviews: