Page 6
No.
Name
Description
10
In playback mode, press to play/pause the footage.
11
Press to open the SETUP menu.
12
Enable/disable the automatic sequence of display of channels in full screen, quad, 9-split display
mode.
13
Press to control Pan/Tilt/Zoom operations.
14
Press to capture video in jpeg format in live or playback mode.
15
(
LEFT)
Press to move left or to change the values in Setup mode. It is also used as the number 4 when
entering password.
16
(
UP)
Press to move up the menu in Setup mode. It is also used as the number 1 when entering password.
17
(
RIGHT)
Press to move right or to change the values in Setup mode. It is also used as the number 2 when
entering password.
18
(
DOWN)
Press to move down the menu in Setup mode. It is also used as the number 3 when entering
password.
19
Press to select desired menu item or to store the setup value.
20
Press for temporary storage of the changed value or to return to the previous menu screen.
21
USB port
To save a snapshot image or video clip on a USB flash drive, or upgrade firmware with a USB flash
drive, first connect the USB flash drive to the USB port.
22
OPEN/CLOSE
Press to open or close the disk tray.
23
DVD drive
To save video, insert a CD-R/DVD-R
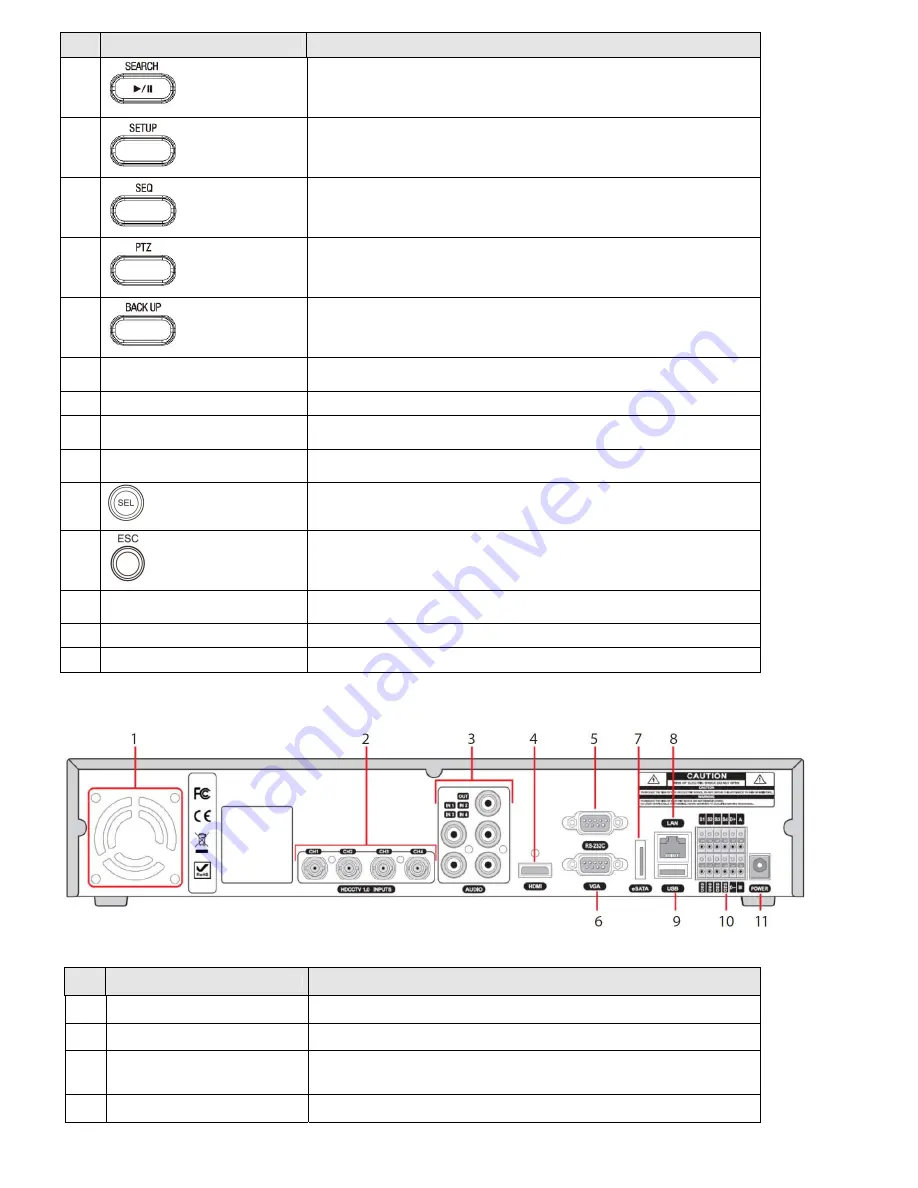
BLK-HD4D back panel connectors
BLK-HD4D back panel connectors
No.
Name
Description
1
Fan
Airflow outlet
2
HDCCTV / 1.0 INPUTS
HD-SDI video inputs
3
AUDIO IN / AUDIO OUT
4 RCA connectors for audio input
1 RCA connector for audio output
4
HDMI
HDMI video out.


