background image

6

ENGLISH

(Original instructions)

Features

AF150-B5 & AF150A-B5 

1. Temperature control 

2. Timer 

3. Food basket release button with cover 

4. Cool touch handle 

5. Food basket 

6. Pan 

AF220-B5 & AF220A-B5 

7. Temperature control 

8. Timer 

9. Food basket release button with cover 

10. Cool touch handle 

11. Food basket 

12. Pan 

AF350-B5 & AF350A-B5 

13. Temperature control 

14. Timer 

15. Food basket release button with cover 

16. Cool touch handle 

17. Food basket 

18. Pan 

AF150A-B5, AF220A-B5 & AF350AB5 Only 

19. Skewer rack with skewers 

Instructions for use

Introduction

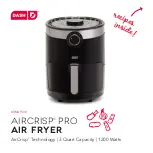
A healthier way to fry without losing any of the flavors, hot air 

fryer is extremely versatile and is perfect for low fat cooking. 

Utilizing hot air, it cooks delicious food using little or no oil, 

meaning that treats can still be enjoyed, even whilst 

maintaining a healthier lifestyle 

Before first use

STEP 1:

 Check that the air fryer is switched off and 

unplugged from the mains power supply.

STEP 2

: Wipe the air fryer main unit with a soft, damp cloth 

and dry thoroughly.

STEP 3: 

Clean the non-stick coated cooking basket in warm, 

soapy water, then rinse and dry thoroughly.

Do not immerse the air fryer main unit in water or any other 

liquid.

Never use harsh or abrasive cleaning detergents or scourers 

to clean the air fryer or its accessories, as this could cause 

damage. 

STEP 4

: Place the air fryer main unit onto a stable, 

heat-resistant surface, at a height that is comfortable for the 

user.

Note

: When using the air fryer for the first time, a slight 

smoke or odor may be emitted. This is normal and will soon 

subside. Allow for sufficient ventilation around the air fryer 

during use. It is advised to run the air fryer without food for 

approx. 10 minutes before first use; this will prevent the initial 

smoke or odor from affecting the taste of the food.

Assembling Air Fryer

STEP 1: 

Fit the non-stick coated cooking basket into the 

cooking compartment, until it is secure. Check that the plastic 

cover is concealing the release button to avoid it being 

pressed during use.

STEP 2: 

Slide the cooking compartment into the air fryer main 

unit to close it.

Note

: The air fryer comes pre-assembled. The cooking 

compartment should be closed securely before use, as not 

doing so will prevent it from working.

Using the Air Fryer

STEP 1: 

Plug in and switch on the air fryer at the mains power 

supply.

STEP 2

: Preheat the air fryer for approx. 5 minutes by using 

the timer control and temperature control dials. The orange 

power and heat indicator lights will illuminate, signaling that 

the air fryer is heating up. Once it has reached the required 

temperature, the orange heat indicator light will automatically 

switch off.

STEP 3: 

Remove the cooking compartment by pulling it out of 

the air fryer using the handle. Place the cooking compartment 

onto a flat stable, heat-resistant surface.

STEP 4: 

Place the ingredients into the non-stick coated 

cooking basket and then slide the cooking compartment back 

into the air fryer main body to close it.

STEP 5: 

Use the temperature control dial to set the air fryer to 

the required heat setting,

STEP 6: 

Determine the cooking time required for the 

ingredients and use the timer control dial to set the time 

accordingly; the timer will begin to count down once released.

STEP 7: 

Some ingredients may require shaking halfway 

through the cooking time. Remove the cooking compartment 

by pulling the cooking basket handle out of the air fryer. Check 

that the plastic cover is covering the cooking basket release 

button, taking care not to release the hot non-stick coated 

cooking basket. Shake the cooking compartment gently and 

then slide it back into the air fryer main unit to close it and 

continue to cook.

STEP 8: 

Once cooking is complete and the preset time has 

elapsed, the timer will sound. Check whether the ingredients 

are ready by carefully opening the cooking compartment. If the 

ingredients are not cooked, close the cooking compartment 

and use the timer control dial to adjust the cooking time 

accordingly. If the food is cooked, remove the non-stick coated 

cooking basket from the cooking compartment and then empty 

the contents into a bowl or onto a plate. Use a pair of 

heat-resistant tongs (not included) if the food is large or fragile.

Summary of Contents for AF150-B5

Page 1: ...www blackanddecker ae AF150 B5 AF220 B5 AF350 B5 AF150A B5 AF220A B5 AF350A B5 FR EN AR...

Page 2: ...2 AF150 AF350 AF220 1 3 4 5 6 9 10 11 17 18 19 12 16 15 2 7 8 13 14...

Page 3: ...mage for illustration purpose only Design of actual unit may vary from the image Image titre d illustration uniquement La conception de l appareil r el peut varier de celle de l image Removing the bas...

Page 4: ...escape from the vents during use Caution Care must be taken when opening the basket as hot steam may escape Only cook with the accessories provided Leave adequate space around the appliance for venti...

Page 5: ...ge corresponds to the voltage on the rating plate Appliance plugs must match the outlet Never modify the plug in any way Do not use any adapter plugs with earthed Class 1 appliances Unmodi ed plugs an...

Page 6: ...use STEP 2 Slide the cooking compartment into the air fryer main unit to close it Note The air fryer comes pre assembled The cooking compartment should be closed securely before use as not doing so w...

Page 7: ...ed as this could cause injury only press it once the cooking compartment has been placed onto a at stable surface Using skewer rack AF150A AF220A AF350A Only For use in baked meat kebabs chicken wings...

Page 8: ...ake the chips following the instructions in the section fries entitled Using the Air Fryer Home made 300 800g 18 25 mins 200 C Follow the full instructions in the section entitled french fries A Step...

Page 9: ...upply cord is damaged it must be replaced by the manufacturer or an authorised BLACK DECKER Service Centre in order to avoid a hazard Mains plug replacement If a new mains plug needs to be tted Safely...

Page 10: ...professional or hire purposes The product has been subjected to misuse or neglect The product has sustained damage through foreign objects substances or accidents Repairs have been attempted by person...

Page 11: ...touchez jamais l int rieur de l appareil pendant qu il fonctionne Attention De l air et de la vapeur chauds risquent de s chapper des ori ces d a ration pendant l utilisation de l appareil Attention S...

Page 12: ...t lectrique Avant d utiliser l appareil v ri ez que la tension secteur correspond celle de la plaque signal tique Cet appareil doit tre reli la terre V ri ez toujours que la tension secteur correspond...

Page 13: ...our de la friteuse air pendant l utilisation Il est conseill de faire fonctionner la friteuse air sans aliments pendant environ 10 minutes avant la premi re utilisation ceci emp chera la fum e ou l od...

Page 14: ...nier de cuisine rev tement anti adh sif en l installant dans le compartiment de cuisine jusqu ce qu il soit s curis TAPE 4 Faites glisser le couvercle en plastique en position a n qu il masque le bout...

Page 15: ...ique Utiliser la friteuse air Frites maison 300 800g 18 25 mins 200 C Suivez toutes les instructions dans la rubrique intitul e Un Guide pas pas pour faire des frites Grosses frites 300 700g 16 18 min...

Page 16: ...yage pour liminer tout r sidu d aliments Rallonges lectriques et produit de classe 1 Vous devez utiliser un c ble 3 conducteurs car l appareil est dot d une mise la terre et est de construction de cla...

Page 17: ...des objets substances ou accidents trangers des tentatives de r paration ont t effectu es par des personnes autres que les agents de r paration agr s ou le personnel d entretien de BLACK DECKER Pour s...

Page 18: ...18 BLACK DECKER BLACK DECKER 24 BLACK DECKER BLACK DECKER BLACK DECKER BLACK DECKER www 2helpU com GmbH Black and Decker 17164...

Page 19: ...G e h M J CG a EGh a Lh f CG e cC J NBG F S CG hCG A G R G Z j J d SG b ke L R G WC G d Z d U I eh b A Yh WC G d Z d eBG i NCG AG LCG L J dG A Yh b hCG I G ShC G dG d M J I G V dG F S e Hh N S A dG A...

Page 20: ...700 300 VCG f dG I G dG S EG 18 16 I b dG I G W dG F bQ WG d dG I G bO 20 18 I dG I G W dG F bQh bO a VEG e e IQG G LQO j dG dG eR R dG G dG 200 18 20 bCG hCG G Z 300 700 e W H I 200 18 25 bCG hCG G Z...

Page 21: ...mh e H f e CGh Gh j dG e A Y dG dG V f dG I G jQh V i NCG SC G dG NOCG d dG I G S dG V K SC G Q Y SC G V HG dG I G FG dG I G eG SG b hCG J EG FG dG I G M e SC G Q G fG Y d e Z GR b k FGO SG j FG dG I...

Page 22: ...dG I G G SG bh F H dG Q d H F H dG I G UhCG hC G I G H k j J F bO 5 I k F e F H dG I G S f dG I G S IQG G dG eh bD G e G SG SG H CG EG j d J dG b dGh IQG G TD e H e A J IQG G LQO EG U dG O IQG M OGO J...

Page 23: ...dG I LC G e j e HG b CG J S eh d G Zh UC G HG dG G SG 1 dG F H c e d V dG W fl e j A H dG H dG hCG dG J F H c e d V dG N d NBG F S CG hCG A G R G hCG G S G H A H dG NC e e H dG fGh R G J jE H b AG LC...

Page 24: ...e N dG Q dGh AG dG j b J G S G A KCG IOQ G d dG G S H d H b a j d R G M a c M e J j hCG dG YCG AG LEG b F H dG Q dG Y R G H b f dG e e e dG Y d e Z dG GR b SG N S SC G Y h R G Y fG G h WC G HCG WC G...

Page 25: ......

Page 26: ...968 24560232 24560255 npservice omasco com om Behind Honda Showroom Wattayah Oman ashok balan omasco com om OMAN Oman Marketing Service Co Omasco Al Ohi Sohar Oman 968 26846379 sooraj neeran omasco co...

Page 27: ......

Page 28: ...350 B5 AF150A B5 AF220A B5 AF350A B5 WARRANTY REGISTRATION CARD YOUR NAME VOTRE NOM YOUR ADDRESS VOTRE ADRESSE POSTCODE CODE POSTAL DATE OF PURCHASE JOUR D ACHAT DEALER S NAME ADDRESS NOM ET ADRESSE D...

Reviews: