background image

Page 16

724-746-5500   |   blackbox.com


LGB616A

Chapter 3: Configuration and Monitoring

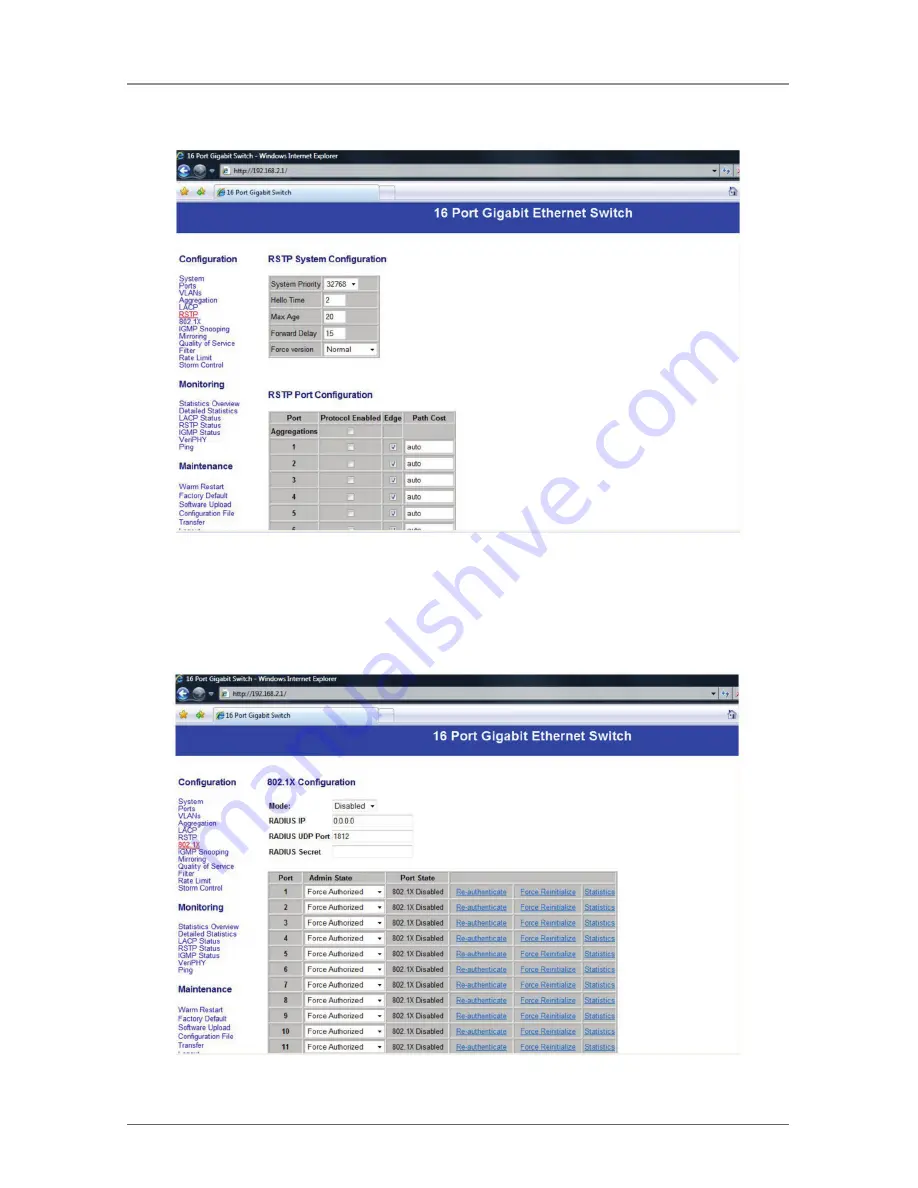
3.6 Configuration: RSTP Configuration

Figure 3-8. RSTP Configuration screen.

Select the port number for which you want to enable/disable its protocol.

3.7 Configuration: 802.1x Configuration

Figure 3-9. 802.1x Configuration screen.

Summary of Contents for LGB616A

Page 1: ...Switch Order toll free in the U S Call 877 877 BBOX outside U S call 724 746 5500 FREE technical support 24 hours a day 7 days a week Call 724 746 5500 or fax 724 746 0746 Mailing address Black Box C...

Page 2: ...d on the user is encouraged to try to correct the interference by one of the following measures Reorient or relocate the receiving antenna Increase the separation between the equipment and receiver Co...

Page 3: ...fabricante 7 El aparato el ctrico debe ser montado a la pared o al techo s lo como sea recomendado por el fabricante 8 Servicio El usuario no debe intentar dar servicio al equipo el ctrico m s all lo...

Page 4: ...5 En caso de existir una antena externa deber ser localizada lejos de las lineas de energia 16 El cable de corriente deber ser desconectado del cuando el equipo no sea usado por un largo periodo de ti...

Page 5: ...x and the Double Diamond logo are registered trademarks of BB Technologies Inc Internet Explorer is a registered trademark of Microsoft Corporation UL is a registered trademark of Underwriters Laborat...

Page 6: ...iguration 16 3 8 Configuration IGMP Configuration 17 3 9 Configuration Port Mirror Configuration 18 3 10 Configuration QoS Configuration 19 3 11 Configuration Filter Configuration 19 3 12 Configuratio...

Page 7: ...BASE T IEEE 802 3x flow control Transmission Media 10BASE T CAT3 4 5 UTP STP 100BASE TX CAT5 UTP STP 1000BASE T CAT 5E UTP STP Connectors 16 RJ 45 1 power connector Indicators 33 LEDs Per port 1 LINK...

Page 8: ...cable This rackmountable switch is specifically designed for medium to large workgroups It provides smooth network migration and makes it easy to increase network capacity 2 2 Features Supports real...

Page 9: ...hould contain the following items If anything is missing or damaged contact Black Box Technical Support at 724 746 5500 or info blackbox com 1 16 Port Web Smart Gigabit Ethernet Switch 1 U S power cor...

Page 10: ...16 1000M LEDs Light when a port is operating at 1000 Mbps 3 16 LINK ACT LEDs Light solid when link is up blink when data is present and are off when there is no link 4 16 RJ 45 connectors Connect to 1...

Page 11: ...steps to configure the Web Smart switch Step 1 Use a twisted pair cable to connect this switch to your PC Step 2 Set your PC s IP to 192 168 2 xx Figure 3 1 IP screen Step 3 Open a Web browser for ex...

Page 12: ...the icon Configuration Monitoring Maintenance Logout 3 1 Configuration System Configuration Figure 3 3 System Configuration screen This will show system status such as MAC address system firmware ver...

Page 13: ...nfiguration Port Configuration Figure 3 4 Port Configuration screen You can enable or disable jumbo frames by clicking the checkbox Configure the modes listed below for the port number you select Auto...

Page 14: ...VLAN Configuration Figure 3 5 VLAN Configuration screen There are 16 VLAN groups Select and add a group into VLAN ID and then click the port number that you want to put into the selected VLAN group 3...

Page 15: ...en click the port number you want to include into the same group There are eight groups to choose from and the maximum number of ports for one group is 16 3 5 Configuration LACP Port Configuration Fig...

Page 16: ...onfiguration and Monitoring 3 6 Configuration RSTP Configuration Figure 3 8 RSTP Configuration screen Select the port number for which you want to enable disable its protocol 3 7 Configuration 802 1x...

Page 17: ...ort number for which you want to configure the mode below Auto Force Authorized Force Unauthorized 3 8 Configuration IGMP Configuration Figure 3 10 IGMP Configuration screen You can enable or disable...

Page 18: ...nfiguration Port Mirror Configuration Figure 3 11 Port Mirror Configuration screen Port mirroring is used to mirror the traffic from the source port to the destination port Select the destination port...

Page 19: ...g 3 10 Configuration QoS Configuration Figure 3 12 QoS Configuration screen You can enable or disable QoS by clicking the checkbox If you enable QoS you can select the class of service for each port 3...

Page 20: ...oring Select the port number for which you want to configure the mode to enable dis able filtering IP address 3 12 Configuration Rate Limit Configuration Figure 3 14 Rate Limit Configuration screen Se...

Page 21: ...and Monitoring 3 13 Configuration Storm Control Configuration Figure 3 15 Storm Control Configuration screen You can set up storm control by configuring the modes 3 14 Monitoring Statistics Overview f...

Page 22: ...iguration and Monitoring You can read statistics for all ports 3 15 Monitoring Detailed Statistics Figure 3 17 Detailed Statistics screen For detailed statistics for each port click the port number 3...

Page 23: ...ration and Monitoring You can read LACP status for LACP ports 3 17 Monitoring RSTP Status Figure 3 19 RSTP Status screen You can read RSTP status for RSTP ports 3 18 Monitoring IGMP Status Figure 3 20...

Page 24: ...toring 3 19 Monitoring VeriPHY Cable Diagnostics Figure 3 21 VeriPHY Cable Diagnostics screen You can read VeriPHY cable status for all ports which you want to check by clicking the port number and th...

Page 25: ...figuration and Monitoring You can set a target IP address by setting the mode that you want 3 21 Monitoring Warm Restart Figure 3 23 Warm Restart screen You can select yes no for a warm restart and th...

Page 26: ...Maintenance 4 1 Maintenance Factory Default Figure 4 1 Factory Default Settings screen You can select yes no to perform a Factory Default and the new settings will change according to your selection...

Page 27: ...Chapter 4 Maintenance Follow the instructions on the screen to upload the new software 4 3 Maintenance Configuration Upload Figure 4 3 Configuration Upload screen Follow the instructions on the screen...

Page 28: ...the original default Step 1 Turn on the Web Smart Switch Step 2 Press and hold the reset button continuously for 15 seconds and release the reset button Step 3 The switch will reboot for 20 seconds a...

Page 29: ...Page 29 724 746 5500 blackbox com LGB616A NOTES...

Page 30: ...Page 30 724 746 5500 blackbox com LGB616A NOTES...

Page 31: ...Page 31 724 746 5500 blackbox com LGB616A NOTES...

Page 32: ...LGB616A version 1 About Black Box Black Box provides an extensive range of networking and infrastructure products You ll find everything from cabinets and racks and power and surge protection product...

Reviews: