37
1.877.877.2269
BLACKBOX.COM
NEED HELP?
LEAVE THE TECH TO US
LIVE 24/7
TECHNICAL
SUPPORT
1.877.877.2269
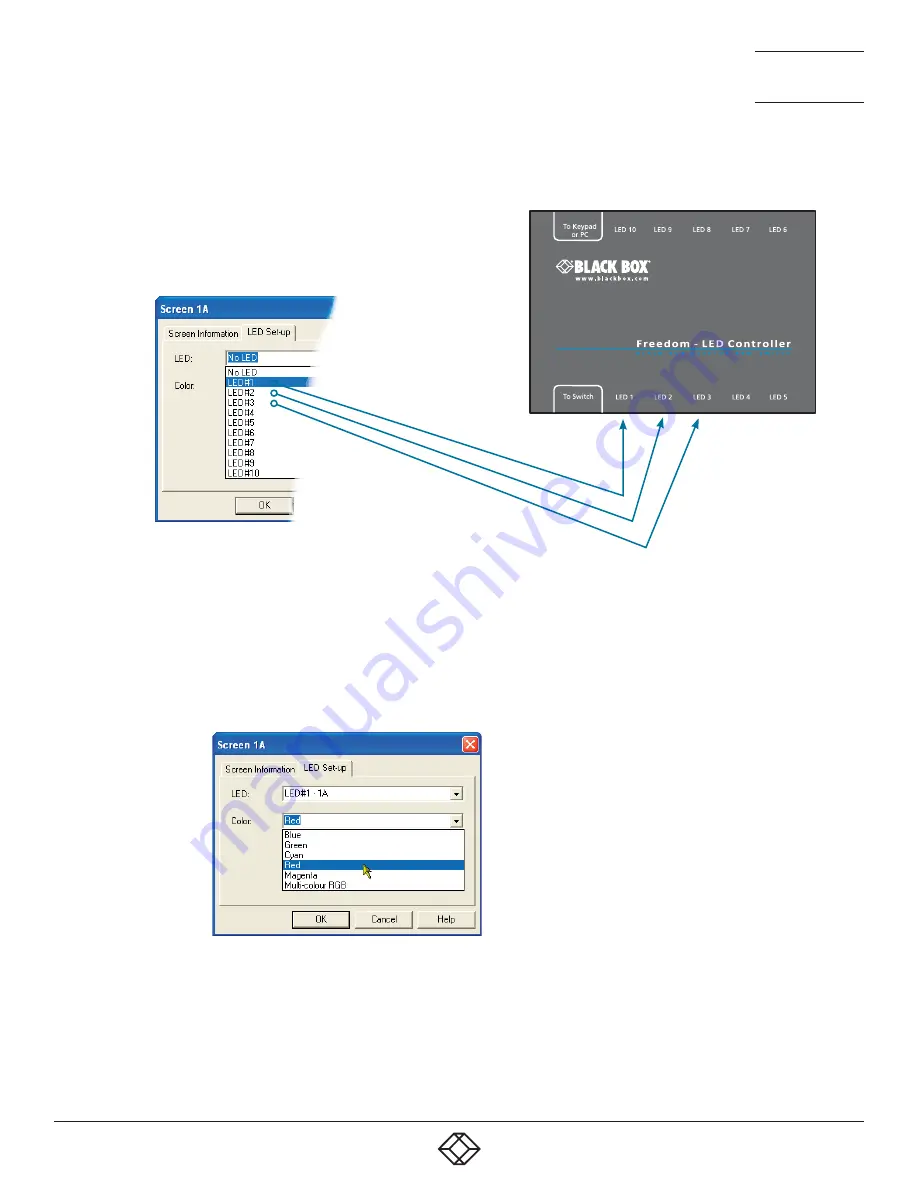
Figure 4-15. Choosing an individual indicator port
4. Choose the Freedom LED Monitor output port that you wish to associate with the currently selected video screen.
5. Optionally alter the color, from the Color: list, that you wish the LED indicator to display when the associated video screen is
selected. See Figure 4-16.
3. For a newly added screen the LED: entry will show No LED. Click on the drop down handle and choose the LED indicator that you
wish to associate with the currently selected video display screen. See Figure 4-15.
Each entry within the LED: list relates to one of the
ten output sockets on the Freedom LED Monitor
module.
Note: It is possible to associate any LED indicator
with more than one video screen.
Figure 4-16. Choosing a color for the chosen indicator port
6. Click OK to save and exit.
7. Repeat steps 1 to 6 for each screen that requires an LED monitor indicator.
8. Choose Configure > Send Layout to Switch to update the Freedom II switch.
9. The LED monitor indicators may be used without Glide and Switch. To disable Glide and Switch,simultaneously press and hold Ctrl
and Alt, then press F. This acts as a toggle, so repeat to re-enable Glide and Switch.
Note: Each LED indicator can only
have one color, so if you associate
an indicator with more than one
screen and then change the color
on a later screen assignment, it
will be changed for all the screens
in the list for that LED indicator.


