background image

-8-

Baking tips

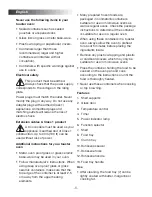
•  As with a full-size oven, frozen 

casseroles will require more cooking time 
than thawed casseroles. Loosely cover 
the tops of frozen casseroles with 
aluminium foil and uncover the last 5 or 
10 minutes to enhance browning. Make 
sure that the foil does not touch the 
heating elements.

Broiling (top and bottom elements) 
(TRO2000, TRO50, TRO55 & 
TRO60)

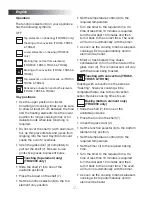
•  Do not preheat.

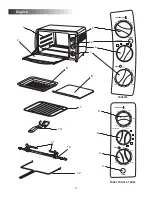
•  Always use the shelf (7) and food tray (8) 

provided.

•  Slide the shelf (7) into one of the 

available positions.

•  Place the food on the shelf (7).

•  Close the glass door (2).

•  Set the function selector (6) to the top 

and bottom element position.

•  Set the temperature control (3) to the 

required temperature.

•  Set the timer (4) to the required cooking 

time. If a time of less than 10 minutes is 
required, turn the dial past 10 minutes 
and then turn it back to the correct time. 
The oven will turn on automatically with 
the timer.

•  As soon as the cooking time has 

elapsed, cooking will stop automatically 
and an alarm will be heard.

•  Cook food carefully and remove when 

cooked and browned to your 
satisfaction.

Broiling with convection (TRO50, 
TRO55 & TRO60)

Broiling with convection is the same as 
"Broiling", however cooking will be 
completed faster due to the convection 
action. Reduce cooking times to suit.

Rotisserie (TRO50, TRO55 & TRO60)

Assembly

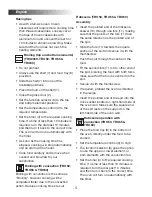
•  Insert the pointed end of the rotisserie 

skewer (10) through one fork (11), making 
sure that the points of the fork (11) face 
the same direction as the pointed end of 
the spit.

•  Slide the fork (11) towards the square 

section of the spit and secure it with the 
thumbscrew.

•  Push the spit through the centre of the 

food.

•  Fit the second fork (11) on to other end of 

the spit, piercing the food with both forks, 
make sure that the food is centred on the 
spit.

•  Secure it with the thumbscrew.

•  If required, preheat the oven as directed 

in the recipe.

•  Insert the pointed end of the spit into the 

drive socket located on right-hand side of 
the oven wall. Make sure the square end 
of the spit rests on the support on the 
left-hand side of the oven wall.

Rotisserie operation with 
convection (TRO50, TRO55 & 
TRO60)

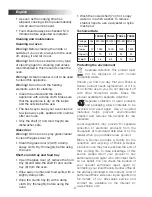
•  Place the food tray (8) in the bottom of 

the oven, directly under the food to be 
cooked.

•  Set the temperature control (3) to high.

•  The function selector (6) gives the option 

to use the upper or lower element, or 
both elements with the convection fan.

•  Set the timer (4) to the required cooking 

time. If a time of less than 10 minutes is 
required, turn the dial past 10 minutes 
and then turn it back to the correct time. 
The oven will turn on automatically with 
the timer.

English

Summary of Contents for TRO2000

Page 1: ...d efficient use of the appliance We urge you to read the Hint s section and also follow all detailed instructions even if you are familiar with using this appliance Keep this guide handy for future reference First Use Safety Recommendation English Page 02 Farsi Page 18 Arabic Page 27 ...

Page 2: ...t operate the appliance if its damage in any manner Return the complete appliance to your nearest authorized service facility for examination electrical repair mechanical repair or adjustments to avoid any hazard The use of attachments or accessories not recommended or sold by this appliance manufacturer may result in fire electric shock or personal injury Do not let the cord hang over the edge of...

Page 3: ...IMER 3 12 6 9 OFF 10 MIN 30 MIN 50 MIN 60 MIN 40 MIN 20 MIN English 3 12 1 2 4 5 6 3 11 10 TRO2000 TRO50 TRO55 TRO60 3 7 13 9 8 6 5 4 0 OFF POWER SELECTOR 0 50ºC 100ºC 150ºC 200ºC 250ºC TEMPERATURE TIMER 3 12 6 9 OFF 10 MIN 30 MIN 50 MIN 60 MIN 40 MIN 20 MIN ...

Page 4: ...in this manual for future reference Using your appliance Make sure that the appliance is switched off before connecting to or disconnecting from the power supply Always take care when using the appliance Do not use the appliance outdoors Never pull the power supply cord to disconnect the plug from the socket Keep the power supply cord away from heat oil and sharp edges If the power supply cord is ...

Page 5: ...anufacturer or its service agent or a similarly qualified person in order to avoid a hazard Never attempt to remove or replace any parts other than those specified in this manual Specific safety Instructions for toaster ovens Warning Accessible parts may become hot when the appliance is in use Children should be kept away The following symbols are found on your appliance Denotes a hot surface Alwa...

Page 6: ...cturer s instructions When using deep oven proof glass or glass ceramic containers make sure that the top edge of the container is at least 2 5 cm away from the upper heating elements Many prepared frozen foods are packaged in nonmetallic containers suitable for use in microwave ovens as well as regular ovens Check the package instructions to determine if the container is suitable for use in a reg...

Page 7: ...e temperature control 3 to the required temperature Turn the timer to the required time If a time of less than 10 minutes is required turn the dial past 10 minutes and then turn it back to the correct time The oven will turn on automatically with the timer As soon as the cooking time has elapsed cooking will stop automatically and an alarm will be heard Moist or fresh breads may cause condensation...

Page 8: ...be completed faster due to the convection action Reduce cooking times to suit Rotisserie TRO50 TRO55 TRO60 Assembly Insert the pointed end of the rotisserie skewer 10 through one fork 11 making sure that the points of the fork 11 face the same direction as the pointed end of the spit Slide the fork 11 towards the square section of the spit and secure it with the thumbscrew Push the spit through th...

Page 9: ...op automatically and an alarm will be heard Food should always be checked 5 10 minutes before expected completion Cleaning and maintenance Cleaning our oven Warning Before cleaning the inside or outside of your oven always turn the oven off unplug it and let it cool Warning Do not use solvents or any type of cleaning agent or cleaning pad unless recommended in this manual to clean the oven Warning...

Page 10: ...ude a note describing the problem to the service Centre and be sure to give your return address DESIGNED FOR DOMESTIC PURPOSES ONLY BLACK DECKER HOME APPLIANCE 2 YEAR WARRANTY 10 K p b œ Ø d s B u t b 2 ß U U a î d b œ d d d œ U v î d v u  U î D U U È ß U î X C L O s v Ø M b ß u î s u u d d u ß U U d N d È A L u s L U X L v u œ œ Å u O J t œ ß U Á œ î ö b L U X î d u œ K p b œ Ø d d t Å ö b b î u...

Page 11: ...O M v ª B u L l Ë È î d œ Á U Ê U 9 U p Ä U Ç t d u L O e Ø d œ Á Ë Ä O g Æ d œ œ Ê π b œ œ U d Ø U ö î A p Ø M O b ß O M v ª B u d t Ø d œ Ê U Ê 7 v u Ê U Ö d Â Ë Å U u Ê Ë U œ œ î q U O s d A u v u œ º A u Æ d œ œ N X Ä U Ø d œ Ê v Ø t t ß ª v L O e v u b v u O b p Ä b M f Ä K v ß d Ë U O U U K u v ß H U œ Á Ø M O b A ª B U M v H U X O j º X s Ë ß O K t U b U M b œ d U t U È U œ È M e b Ë b î X ...

Page 12: ... œ È ß X U s Ë u œ t K X L K J d œ b X Ö d U v L K O U Ä ª X Ë Ä e U ß d X O A d È π U  v u œ d ß d Œ Ø s œ b U È 0 5 O R T 5 5 O R T Ë 0 6 O R T u Á ß u Ø d œ Ê Æ D F U N U È u œ ß O a ª B u ß d Œ Ø d œ Ê d 0 1 J v Ö O d Á U 1 1 œ Ø d œ Á Ë Æ d Ö d s Ç M U U È Ö O d Á 1 1 œ ß U È u O e ß O a L O M U Ê U Å q Ø M O b Ö O d Á 1 1 t ß L X ª g Ç N U Ö u ß O a b Á Ë ß á f d t Ø L p Ä O ê U È Ë È Ö O d...

Page 13: ...X U È u u œ Æ d œ O b U Ê Ë È ß O M v 7 Æ d œ O b Ø K O b Ç d î U Ê ª U L K J d œ œ ß U Á 6 Ë È U X I j L M X U ô M E O r Ø M O b d œ ß U Á 3 Ë È œ t u œ E d î u œ M E O r Ø M O b U L d œ ß U Á Ë È b U Ê d t Ø d œ Ê u œ E d î u œ M E O r Ø M O b œ Å u v Ø t U v Ø L d 0 1 œ Æ O I t u œ E d U b œ Ö L t Ë È Ä f 0 1 œ Æ O I t Ç d î U b Á Ë ß á f d Ë È U Ê M U ß V d Ö d œ O b U D u u U p U U L d Ë s v ...

Page 14: ... Ø M O b t M U Â Æ d œ œ Ê d Ë O A t È A J s Ö u œ Ë U ß d J v O A t È œ œ î q U D L µ s u b Ø t t U ô v N U b Æ q 5 2 ß U v d L M X U È Ö d Â Ø M M b Á U ô v U U Å K t œ t U b c U È M π L b b Á U œ Á K V œ º t M b È U È O d K e È M U ß V d È Æ d Ö d s œ U U È U J d Ë Ë u Ë U U È F L u v t d Ë v ß M b U s Ë u œ U D U F t œ ß u F L q U È M b à œ Ë È º t M b È U M U ß V u œ Ê N U d È Æ d Ö d s œ U U...

Page 15: ...U π U F L O d L u œ U d Ë î D d K u Ö O d È u œ d Ö e ª B U Î t U Ø d œ Ê Ë U F u i Æ D F U œ ß U Á π e N U v Ø t œ s œ d Ç t M L U A ª h b Á b Æ b  J M O b œ ß u F L q U È L M v N r d È U U È Ô º d u t ª g U È Æ U q œ ß d ß v œ ß U Á L J s ß X œ î ö b ß H U œ Á Ê œ u b Ø u œ Ø U Ê U b œ ß U Á œ Ë t œ X ö z r d Ë È œ ß U Á L U Ë u œ œ œ ö X A ª B t ß D œ L u Á u V U O b U ß O r d œ ß U Á œ U v Ø ...

Page 16: ...d œ È t L d Á î u b œ X s œ d Ç t M L U N X d F U F b È œ U v M U ß V N b È Ø M O b ß H U œ Á œ ß U Á œ Æ X Ø M O b Ø t œ ß U Á Ä O g B U U t M U  î U Ã Ø d œ Ê Ê Ä d e d î U u U b U X œ Æ X t M U Â ß H U œ Á œ ß U Á L u Á d È d Ë È A L U v Ë œ d Ö e œ ß U Á d È B U î U à M e ß H U œ Á J M O b d È î U Ã Ø d œ Ê œ Ë U î t œ ß U Á Ä d e d d Ö e ß O r d J A O b Á Ë U d U A U Ë D u U Ö N U v Ä d e î ...

Page 17: ...N POWER TIMER 3 12 6 9 OFF 10 MIN 30 MIN 50 MIN 60 MIN 40 MIN 20 MIN 12 1 2 4 5 6 3 11 10 TRO2000 3 7 13 9 8 6 5 4 TRO50 TRO55 TRO60 0 OFF POWER SELECTOR 0 50ºC 100ºC 150ºC 200ºC 250ºC TEMPERATURE TIMER 3 12 6 9 OFF 10 MIN 30 MIN 50 MIN 60 MIN 40 MIN 20 MIN ...

Page 18: ... g U È Ê t e œ p d s d Ø e ß d Ë f Ë F L O d π U u q œ O b U F L O d J d J v J U O J v Ë U M E O r œ u œ Ê π U Â Ä c d t Ë s Ö c d Ë d Ö u t î D d O e K u Ö O d È Ö d œ œ ß H U œ Á π N O e Ë u  U v Ø t u ß j u O b Ø M M b Á œ ß U Á u Å O t A b Á Ë H d Ë L v ß b L J s ß X U Y d Ë g ß u È u J d J v Ë U Å b U d œ È Ö d œ œ d Ö e U Á b O b U ß O r d œ ß U Á t U È O e U Ä O A ª u Ê Ë e Ê U b Á Ë U U ß...

Page 19: ...K v H d U H U œ Í Å U t Q Í d o ö E W B n O N U L A J K W L d Ø e B O U W Ë Q Ø b s Ø U W M u p Å Ô L r ö ß F L U ô L M e O W I j Black Decker Black Decker Black Decker Black Decker L U Ê U q L b ß M O s _ N e L M e O W BLACK DECKER L U W O µ W π V b  ª K h s c L M Z l I O W M H U U L M e O W Ë b w u  s _ U  p U W A d N U ö b œ J d b b Ë r F b U W K π N U I b r ô ª K h M t l M H U U L M e O W _...

Page 20: ...ª b  d 7 Ë B O M O W 8 L U I j K c s L J s º K N L U œ î q º U W _ U U e U w c d ô º ª b  ª U î U M E O n e U à M E O n U e U w 2 E n U e U w 2 I D F W Æ L U K K W L U Ë Å U u Ê H n U O b Æ q A G O q d Å O M O W H U Ë Å O M O W D F U  U e U w 2 î d à ŠO M O W D F U  8 Ë î d à d 7 Ë Å O M O W H U 9 s H d Ê º U º J V s ß u z q Ë U ß I j s U I D F W Æ L U K K W Æ K O ö º Å O M O W H U 9 I D F W ...

Page 21: ... A u Ë Ê Ø U Ê D N w r A J q ß d Ÿ O π W K M I q d Í N c Æ r I K O q Ë Æ X D N w K L ö z L W L A u 0 5 O R T 5 5 O R T 0 6 O R T π L O l œ î q D d L º M s s ß O a L A u 0 1 w u Ø W Ë b 1 1 l Q Ø b s Ê ß M U Ê A u Ø W 1 1 I U q H f π U Á D d L º M s s K º U Ê d A u Ø W 1 1 w π U Á I D U Ÿ L d l s K º U Ê Ë N U w J U N U u ß D W L º L U K u w l K º U Ê w Ë ß j D F U  L d œ N u Á l A u Ø W U O W 1 1...

Page 22: ... 0 0 2 O R T I j l d 7 w Í s _ Ë U Ÿ L U W l ª e K v d 7 j Ë b î O U u U z n 6 K v Ë l F M B d F K u Í I j j Ë b J r w d 3 K v œ W d L D K u W j N U j u Æ X º V u Æ X L D K u Ø U Ê e s Æ q s 0 1 œ Æ U z o j K v 0 1 œ Æ U z o r b L H U Õ v e s L D K u H d Ê b w º ª O s L π d œ n H U Õ j u Æ X L π d œ N U u Æ X ß O u Æ n H d Ê s F L q Ë ß M D K o Å H U L J s J u Ê ª U L U K v º D b î K w K U e U w 2...

Page 23: ...Ë O W L B M u W s L F b Ê Ë e U à d Í Ë ª e e U w œ î q H d Ê l F K O L U L B M l M b ß ª b  e U à d Í Ë ª e œ î q H d Ê M b ß ª b  e U à d Í Ë ª e e U w œ î q H d Ê Q Ø b s Ê J u Ê U W ù U K v º U W 5 2 ß r K v _ Æ q s K n º ª O s F K u Í U œ U J u Ê _ F L W L π L b ß U I W π N O e H u W w Ë O W O d F b O W M U ß W ö ß ª b  œ î q L O J d Ë Ë n Ë _ d Ê F U œ W l F K O L U K v u D F U  I o s N ...

Page 24: ... K p π V Ê r ß b t s d o N W B M O F t Ë Ë Ø O K N U Ë Í N W R K W π M V b Ë À ª U d ô U Ë ß b Ë G O O d Í e O d L M B u K O N U w c b O q F K O L U _ U Ê ª U Å W U _ d Ê J N d O W M O t d H l œ W d _ e ª U O W M U A G O q π N U π V b Â Æ d _ H U ß π b c Á d u K v N U F M w ß D U ß U î M U l º K p w º U M U ß V π M V ª U d F d ô d º K p b O U K v _ ß D L J A u W d d U M U ß U u π N U Ë u Æ t K N u...

Page 25: ... D l Ø L U O W Ë K I W O d L u u œ l π N U Ë ß ª b  π N U w d O d L M B u K O t w c b O q Æ b A J q î D d Ë R œ Í v b Ë À Å U W H k N c b O q K d u Ÿ O t M b U W ß ª b  π N U Q Ø b s Ê π N U D H Q Æ q u Å O q J N d U t Ë Æ D F N U M t ß ª b  π N U c œ z L U ô º ª b  π N U î U à L M e ô π c º K p H B q I U f s W J N d U H k º K p F O b s d Ë e u Ë u U œ b À K n K º K p M U A G O q Æ r H B q I U...

Page 26: ...ON POWER TIMER 3 12 6 9 OFF 10 MIN 30 MIN 50 MIN 60 MIN 40 MIN 20 MIN 12 1 2 4 5 6 3 11 10 TRO2000 3 7 13 9 8 6 5 4 TRO50 TRO55 TRO60 0 OFF POWER SELECTOR 0 50ºC 100ºC 150ºC 200ºC 250ºC TEMPERATURE TIMER 3 12 6 9 OFF 10 MIN 30 MIN 50 MIN 60 MIN 40 MIN 20 MIN ...

Page 27: ... U W K π N U ô A b º K p M e Ÿ I U f s Q î c O U ô A G q π N U º K p Ë Æ U f U n π V ô ß F U W L d Ø e ª b W L F L b L F U M W π N U Ë Å ö t Ø N d U z O U Î Ë O J U O J O U Î π M V Í î D d Æ b d V ª U d d o Ë B b W J N d U z O W Ë Å U W _ d œ K v ß ª b  L K I U U u W w r u Å w N U M Z π N U Ë O F N U ô b Ÿ º K p b v u U W L M C b Ë ö f ß D U Î ß U î M W π M V ö º W _ ß D º U î M W l d U ß ª b  L...

Page 28: ...International Enterprises 213 Rizal Ave Extension between 2nd and 3rd Ave Kalookan City Tel 632 366 4487 Fax 632 366 4489 Qatar Al Muftah Trading Cont P O Box 875 Doha Tel 974 4650880 4446868 Fax 974 4441415 Saudi Arabia Dammam Ebrahim Fawaz Al Zayani P O Box 76026 Al Raka Dammam Tel 966 3 8140914 Fax 966 3 8140824 Jeddah Anasia Trading Co Ltd Caravan Shopping Centre Hail Street P O Box 50959 Jedd...

Reviews: