9
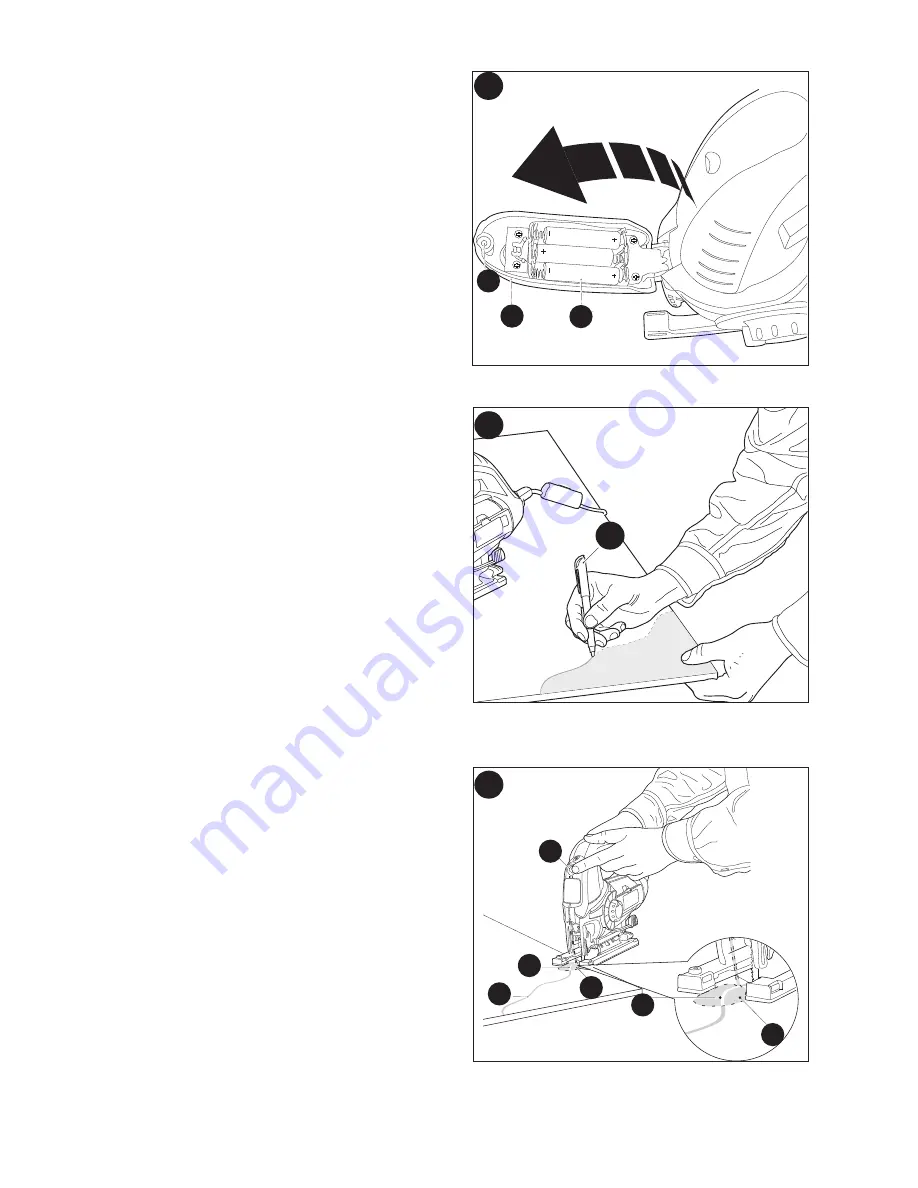
Operating the UV Module (figure F, G & H)
Installing the batteries (figure F)
- Pivot the UV module door (17) away from
the jig saw by removing the screw (18) and
pulling the door forward.
- Insert three new 1.5 Volt AAA alkaline
batteries (19), making sure to match the (+)
and (-) terminals correctly.
- Close the UV module door and replace the
screw.
Using the UV light (figure G & H)
The UV module projects a UV light which
illuminates a highlighter line drawn on the
surface of the workpiece.
To use the UV light:
- Mark your intended cutting line using the
highlighter marking pen (15) as shown in
figure G
.
- Switch the UV light (14) on by pressing the
button (13).
- To switch the UV light (14) off, press the
button (13) again.
- Position the jig saw over the cutting line
(19).
Viewing from directly above the jig saw, the
line of cut will be illuminated (20) by the UV
light (14) and can be easily followed.
F
19
17
18
G
15
H
13
20
14
19
20
14


