background image

ENGLISH

(Original instructions)

6

Additional safety instructions for batteries and 

chargers

Batteries

u

  Never attempt to open for any reason.

u

  Do not expose the battery to water.

u

  Do not store in locations where the temperature may 

exceed 40 °C.

u

  Charge only at ambient temperatures between 10 °C 

and 40 °C.

u

  Charge only using the charger provided with the tool.

u

  When disposing of batteries, follow the instructions 

given in the section "Protecting the environment".

p

Do not attempt to charge damaged batteries.

Chargers

u

  Use your BLACK+DECKER charger only to charge 

the battery in the tool with which it was supplied. Other 

batteries could burst, causing personal injury and 

damage.

u

  Never attempt to charge non-rechargeable batteries.

u

  Have defective cords replaced immediately.

u

  Do not expose the charger to water.

u

  Do not open the charger.

u

  Do not probe the charger.

$

The charger is intended for indoor use only.

+

Read the instruction manual before use.

Electrical safety

#

Your charger is double insulated; therefore no 

earth wire is required. Always check that the 

mains voltage corresponds to the voltage on 

the rating plate. Never attempt to replace the 

charger unit with a regular mains plug.

u

  If the supply cord is damaged, it must be replaced by 

the manufacturer or an authorised BLACK+DECKER 

Service Centre in order to avoid a hazard.

Features

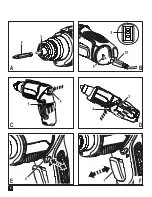
This tool includes some or all of the following features.

  1. On/off trigger switch

  2. Forward/reverse slider

  3. Bit holder

  4. Handle adjustment button

  5. Handle

  6. Micro USB charging connector

  7. LED work light

  8. State of charge indicator

  9. Magnetic bit storage

Assembly

Fitting and removing a screwdriver bit or socket 

Warning! Make certain the tool is locked to prevent switch 

actuation before installing or removing accessories.

u

  T

until it locates.

u

  To remove a screwdriver bit, pull it straight from the bit 

holder. 

Use

Warning! Let the tool work at its own pace. Do not 

overload.

were easily done before. The battery may become warm 

while charging; this is normal and does not indicate a 

problem.

Warning! Only use the charger provided to charge the 

tool - CS3653LC.

u

  To charge the battery, insert the charger plug (10) into 

the connector (6).

u

  Plug in the charger.

Summary of Contents for CS3653LC

Page 1: ...www blackanddecker au CS3653LC ...

Page 2: ...2 A C B D E F ...

Page 3: ... or unplugging the power tool Keep cord away from heat oil sharp edges or moving parts Damaged or entangled cords increase the risk of electric shock e When operating a power tool outdoors use an extension cord suitable for outdoor use Use of a cord suitable for outdoor use reduces the risk of electric shock f If operating a power tool in a damp location is unavoidable use a residual current devic...

Page 4: ...ing tools with sharp cutting edges are less likely to bind and are easier to control g Use the power tool accessories and tool bits etc in accordance with these instructions taking into account the working conditions and the work to be performed Use of the power tool for operations different from those intended could result in a hazardous situation 5 Battery tool use and care a manufacturer A char...

Page 5: ...may not be included in the enclosed safety warn ings These risks can arise from misuse prolonged use etc Even with the application of the relevant safety regulations and the implementation of safety devices certain residual risks can not be avoided These include u Injuries caused by touching any rotating moving parts u Injuries caused when changing any parts blades or accessories u Injuries caused...

Page 6: ...lated therefore no earth wire is required Always check that the mains voltage corresponds to the voltage on the rating plate Never attempt to replace the charger unit with a regular mains plug u If the supply cord is damaged it must be replaced by the manufacturer or an authorised BLACK DECKER Service Centre in order to avoid a hazard Features This tool includes some or all of the following featur...

Page 7: ...mum versatility the handle can be set to two different positions u Press the handle adjustment button 4 u Twist the handle into the desired position u Release the button For tightening screws and drilling pilot holes use forward clockwise rotation For loosening screws or removing a jammed drill bit use reverse counterclockwise rotation u To select forward rotation push the forward reverse slider 2...

Page 8: ...ling of BLACK DECKER products once they have reached the end of their working life To take advantage of this service please return your product to any authorised repair agent who will collect them on our behalf You can check the location of your nearest authorised repair agent by contacting your local BLACK DECKER a list of authorised BLACK DECKER repair agents and full details of our after sales ...

Page 9: ...s made during the relevant warranty period 2 years from date of purchase u Upon acceptance of a claim under this warranty Stanley Black Decker Australia will send you a replacement product or arrange for your product to be repaired free of charge u Any warranty related enquiries or claims may be directed to Stanley Black Decker Australia at the address or contact details listed above Statutory War...

Page 10: ...ENGLISH Original instructions 10 ...

Page 11: ...ENGLISH Original instructions 11 ...

Page 12: ...ENGLISH Original instructions 12 90619538 12 2014 ...

Reviews: