background image

8

9

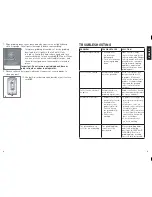
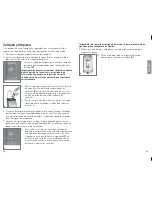
7. Wipe grinding bowl, cover, base and other parts with a slightly damp 

cloth or sponge. Dry all parts thoroughly before reassembling.

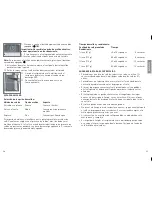
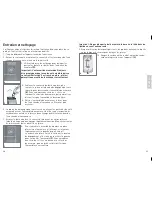
8.  To replace grinding assembly, set inside grinding 

bowl and twist slightly to the left until it falls 

into place. Grasp lock and release knob and turn 

counterclockwise to lock assembly (F). You will hear 

a series of clicks as the selection dial rotates, and 

then a distinct pop once the assembly is locked in 

place.

Important: Do not immerse grinding bowl, base or 

plug in liquid or under running water.

9. Never use harsh detergents, abrasive cleansers or scouring pads to 

clean any part.

10. Use built-in cord wrap on underside of unit to store 

cord (G).

G

F

ENGLISH

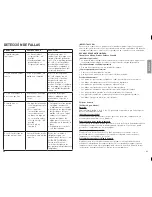
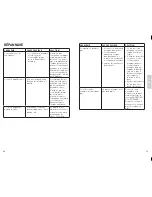
TROUBLESHOOTING

PROBLEM

POSSIBLE CAUSE

SOLUTION

Grinder stops working.

• Ground coffee 

container has 

disengaged.

• There are too many 

beans in grinding 

bowl.

Make sure discharge 

chute is clean and free of 

coffee grinds; a buildup of 

coffee grounds will cause 

ground coffee container 

to slip forward. Unplug 

appliance and remove 

some of the beans from 

grinding bowl.

Coffee tastes rancid.

Grinder has buildup 

of coffee grounds.

Oil in coffee beans will 

become rancid if left 

in grinder. Make sure 

there are no beans left in 

grinder. Clean discharge 

chute and the ground 

coffee container after 

each use.

Coffee tastes like nuts 

or spices.

Grinder has been 

used for other 

grinding operations.

Grinder will share flavors; 

purchase another grinder 

for spices and nuts.

Grinder will not start.

• Grinder cover is not 

completely closed.

• Ground coffee 

container is not 

properly placed. 

Cover is not on 

the ground coffee 

container.

• Outlet is not 

working.

• Grinder cover snaps into 

place when completely 

closed.

• Make sure cover on 

ground coffee container 

is in place; push 

ground coffee container 

securely back in base so 

that front is flush with 

base of the base.

• Check to make sure 

outlet is working.


The ground fineness 

selector is not working.

The grinding blade 

is not correctly 

positioned.

Remove grinding blade 

and clean following 

directions in CARE AND 

CLEANING. Reattach 

grinding blade  making 

sure it is fully integrated.

Summary of Contents for CBM220

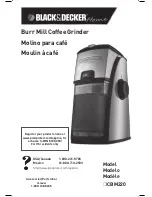
Page 1: ...gister your product online at www prodprotect com applica for a chance to WIN 100 000 For US residents only Accessories Parts USA Canada 1 800 738 0245 USA Canada 1 800 231 9786 Mexico 01 800 714 2503 http www prodprotect com applica Model Modelo Modèle CBM220 ...

Page 2: ...he risk of electric shock this plug is intended to fit into a polarized outlet only one way If the plug does not fit fully into the outlet reverse the plug If it still does not fit contact a qualified electrician Do not attempt to modify the plug in any way TAMPER RESISTANT SCREW Warning This appliance is equipped with a tamper resistant screw to prevent removal of the outer cover To reduce the ri...

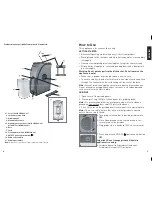
Page 3: ...ad electrical cord to one side of cord wrap then through the channel with the cord exiting out the rear of the base Note For your protection appliance contains a dual safety mechanism Do not attempt to use appliance unless the cover is closed and ground coffee container with lid is in place Grinding 1 Open cover of the grinding bowl 2 Place up to 1 cup 227 g of coffee beans into grinding bowl Note...

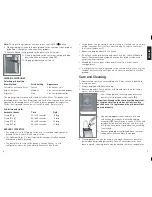
Page 4: ...Cleaning brush can also be used to sweep out any excess particles gathered under grinding assembly Once all excess particles have been removed cleaning brush may be washed in warm soapy water D E Note To stop coffee grinder at any time press the ON OFF button 9 When grinding is finished remove ground coffee container from grinder by pulling it straight out and away from grinder 10 Remove lid and s...

Page 5: ... ground coffee container to slip forward Unplug appliance and remove some of the beans from grinding bowl Coffee tastes rancid Grinder has buildup of coffee grounds Oil in coffee beans will become rancid if left in grinder Make sure there are no beans left in grinder Clean discharge chute and the ground coffee container after each use Coffee tastes like nuts or spices Grinder has been used for oth...

Page 6: ...ervice website at www prodprotect com applica or call toll free 1 800 231 9786 for general warranty service If you need parts or accessories please call 1 800 738 0245 What does your warranty not cover Damage from commercial use Damage from misuse abuse or neglect Products that have been modified in any way Products used or serviced outside the country of purchase Glass parts and other accessory i...

Page 7: ...delos de 120V Este aparato cuenta con un enchufe polarizado un contacto es más ancho que el otro A fin de reducir el riesgo de un choque eléctrico este enchufe encaja en un tomacorriente polarizada en un solo sentido Si el enchufe no entra en el tomacorriente inviértalo y si aun así no encaja consulte con un electricista Por favor no trate de alterar esta medida de seguridad TORNILLO DE SEGURIDAD ...

Page 8: ...que la tapa esté cerrada y que el recipiente de café molido se encuentre instalado con la tapa en su lugar FUNCIONAMIENTO 1 Abra la tapa en la parte superior del aparato 2 Vierta hasta 1 taza 227 g de café granulado adentro del recipiente de moler Nota Se recomienda que la cantidad máxima de café granulado molido fino sea de taza 170 g 3 Cierre la tapa del recipiente de moler hasta que encaje en s...

Page 9: ...muele demasiado grueso quedará débil y aguado C Tiempo de molido y rendimiento Cantidad de café granulado Tiempo Rendimiento taza 57 g 30 a 35 segundos 4 cucharas taza 113 g 45 a 50 segundos 8 cucharas taza 170 g 60 a 65 segundos 12 cucharas 1 taza 227 g 80 a 85 segundos 16 cucharas SUGERENCIAS PARA EL CAFÉ MOLIDO Para obtener una taza de café de sabor rico e intenso utilice 1 cuchara redondeada d...

Page 10: ...ra moler y lávelas con agua tibia y jabonosa Enjuague y seque bien todos los accesorios 6 El cepillo de limpieza también se puede utilizar para eliminar cualquier partícula que se haya acumulado debajo de las cuchillas Una vez que se hayan eliminado todas las partículas el cepillo de limpieza se puede lavar en agua tibia y jabonosa 7 Limpie el recipiente de moler la tapa la base y demás piezas con...

Page 11: ...14 2503 para ubicar el Centro de Servicio Autorizado más cercano a su domicilio en donde usted podrá encontrar partes componentes consumibles y accesorios Procedimiento para hacer válida la garantía Acuda al Centro de Servicio Autorizado con el producto con la póliza de Garantía sellada o el comprobante de compra original ahí se reemplazará cualquier pieza o componente defectuoso sin cargo alguno ...

Page 12: ...Attendance Atención al Cliente Ave Monroe 3351 Buenos Aires Argentina Tel 0810 999 8999 Chile Servicio Máquinas y Herramientas Ltda Av Apoquindo No 4867 Las Condes Santiago Chile Tel 562 263 2490 Colombia PLINARES Avenida Quito 88A 09 Bogotá Colombia Tel sin costo 01 800 7001870 Costa Rica Aplicaciones Electromecanicas S A Calle 26 Bis y Ave 3 San Jose Costa Rica Tel 506 257 5716 223 0136 Ecuador ...

Page 13: ...sée une lame plus large que l autre Afin de minimiser les risques de secousses électriques ce genre de fiche n entre que d une façon dans une prise polarisée Lorsqu on ne peut insérer la fiche à fond dans la prise il faut tenter de le faire après avoir inversé les lames de côté Si la fiche n entre toujours pas dans la prise il faut communiquer avec un électricien certifié Il ne faut pas tenter de ...

Page 14: ...longer l appareil dans l eau Lorsqu il est en marche l appareil doit être posé sur une surface plane Pour assurer la stabilité de l appareil faire passer le cordon électrique d un côté de l enrouleur de cordon puis le faire sortir par la rainure à l arrière de la base Remarque Pour assurer votre protection cet appareil est doté d un double mécanisme de sécurité N utiliser l appareil que lorsque so...

Page 15: ...outure et rendement Quantité de grains de café Durée Rendement 57 g de tasse 30 à 35 secondes 57 g 4 c à table 113 g tasse 45 à 50 secondes 113 g 8 c à table 170 g de tasse 60 à 65 secondes 170 g 12 c à table 227 g 1 tasse 80 à 85 secondes 227 g 16 c à table CONSEILS SUR LA MOUTURE DU CAFÉ Pour obtenir une tasse de café au goût riche et savoureux utiliser 23 ml 1 c à table comble de café moulu pou...

Page 16: ...e puis tourner le verrou et le bouton de dégagement vers la droite pour déverrouiller l ensemble de mouture E Vous entendrez une série de clics en tournant le sélecteur de mouture puis un bruit sec distinct lorsque l ensemble se déverrouillera 5 Retirer l ensemble de mouture et le laver dans de l eau chaude et savonneuse Rincer et bien assécher 6 La brosse de nettoyage peut aussi servir à nettoyer...

Page 17: ... d épices Le moulin a été utilisé pour moudre autre chose que du café Le moulin à café absorbe les saveurs se procurer un autre moulin pour les épices et les noix PROBLÈME CAUSE POSSIBLE SOLUTION Le moulin ne démarre pas Le couvercle du moulin n est pas bien fermé Le contenant à mouture n est pas bien positionné Le couvercle n est pas sur le contenant à mouture La prise de courant est défectueuse ...

Page 18: ...arantie On peut également communiquer avec le service des pièces et des accessoires au 1 800 738 0245 Qu est ce que la garantie ne couvre pas Des dommages dus à une utilisation commerciale Des dommages causés par une mauvaise utilisation ou de la négligence Des produits qui ont été modifiés Des produits utilisés ou entretenus hors du pays où ils ont été achetés Des pièces en verre et tout autre ac...

Page 19: ...36 2009 2 13 10E S F Printed on recycled paper Impreso en papel reciclado Imprimé sur du papier recyclé Copyright 2009 Applica Consumer Products Inc ...

Reviews: