background image

Model # 900142: Page 11 


TROUBLESHOOTING


Dispenser does not operate. 


Make sure the power cord is properly connected to a working outlet. 


Water is leaking. 


Bottle may have a leak. Remove bottle and replace with new bottle. 


If leak remains, remove probe from bottle and call 866-429-7566 for assistance. 


No water is coming from the taps. 


Make sure the bottle is not empty. If so replace it. 


Make sure to push the water controls in fully. 

 
Cold water is not cold. 


It takes up to one hour after setup to secure cold water. 


Make sure the back of the dispenser is at least 4 inches from a wall and there is 
free airflow on all 4 sides of the dispenser. 

 
Hot water is not hot. 


It takes 15-20 minutes after setup to secure hot water. 


Make sure the power cord is properly connected to a working outlet. 


Make sure energy saving switch is ON. 

 
Dispenser is noisy. 


Make sure dispenser is positioned on a level surface. 


Water tastes bad. 


Drain water from reservoirs and replace bottle with a fresh one. 


Sanitize dispenser per Proper Care & Cleaning instructions. 


Nightlight Isn’t Working 


Make sure the power cord is properly connected to a working outlet. 


Bulb could be out. Call 866-429-7566 for assistance. 


Water Isn’t Pumping 


Make sure the power cord is properly connected to a working outlet.


Make sure the probe connection with the water bottle forms a complete seal. 


Make sure the door is closed. 


The Cup or Glass on the Display are Blinking 


This is normal. It indicates the dispenser is either heating or cooling water. See 
page 8 for details. 

Summary of Contents for 900142

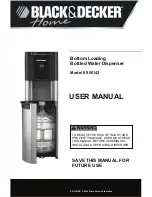
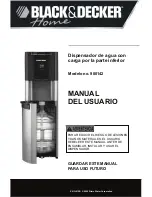
Page 1: ...led Water Dispenser Model 900142 USER MANUAL PN O 012B 2008 Primo Water Corporation TO REDUCE THE RISK OF INJURY AND PROPERTY DAMAGE USER MUST READ THIS MANUAL BEFORE ASSEMBLING INSTALLING OPERATING DISPENSER SAVE THIS MANUAL FOR FUTURE USE ...

Page 2: ...sunlight Do NOT use outdoors Install and use only on a hard flat and level surface Do NOT place dispenser into an enclosed space or cabinet Do NOT operate dispenser in the presence of explosive fumes Position back of dispenser no closer than 4 inches from wall and permit free airflow between wall and dispenser There must be at least 4 inches clearance on the sides of the dispenser to permit airflo...

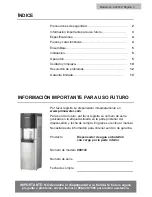
Page 3: ...ited Warranty 12 KEY INFORMATION FOR FUTURE USE Please register your dispenser immediately at www primowater com For future support please record your serial number located on label on back of dispenser and date purchased Staple your receipt to manual You will need this information to obtain warranty service Product Bottom Loading Bottled Water Dispenser Model Number 900142 Serial ID Number Date o...

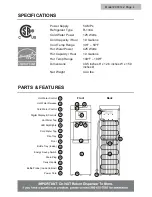
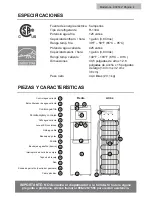
Page 4: ...ge 149 F 199 F Dimensions 40 5 inches H x 12 6 inches W x 15 0 inches D Net Weight 44 4 lbs PARTS FEATURES Energy Saving Switch Front Back LED Nightlights Bottle Tray Inside Bottle Probe Inside Cabinet Hot Water Control Hot Water Release Hot Water Tap Cold Water Tap Drip Tray 1 2 3 4 5 6 7 8 9 10 11 Carry Handle Drain Plug Power Cord Digital Display Controls 1 2 3 4 5 6 7 8 9 10 12 15 11 14 12 13 ...

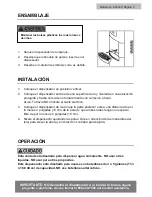
Page 5: ... grounded wall outlet Notice Do NOT plug in power cord yet 3 Position dispenser so the back is at least 4 inches from wall and there are at least 4 inches of clearance on both sides 4 Level dispenser by adjusting feet Turn clockwise to raise height and counterclockwise to lower OPERATION This unit is intended for water dispensing only Do NOT use other liquids Do NOT use for other purposes This dis...

Page 6: ...into bottle Push lightly down on head to create a tight seal with the bottle Note Unit will NOT operate properly unless there is a tight seal between the probe head and the bottle 8 Slide tray into cabinet and close door completely Note Unit will NOT operate properly with the door open 9 Plug cord into a properly grounded wall outlet The unit will come ON and start pumping air into the bottle whic...

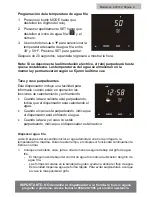
Page 7: ...er above are flashing 3 Use or button to select desired hot water temperature between 149 199 F Press SET to save 4 After 20 seconds readout will return home Setting Cold Water Temperature 1 Press and hold in MODE button until clock digits flash 2 Press Set repeatedly until both cold icon and number above are flashing 3 Use or button to select desired hot water temperature between 39 59 F Press SE...

Page 8: ...r shapes in the drip plate help align the flow of water This unit dispenses water at a fast rate To avoid splashes hold cup as close to the tap as possible 2 Depress cold water control downward to start flow 3 Release cold water control once desired fill level is achieved Dispensing Hot Water This unit dispenses water at temperatures that can cause severe burns Avoid direct contact with hot water ...

Page 9: ...up 3 Hang probe on inside of door so it remains clean 4 Remove empty bottle from tray and replace it with a fresh one 5 Remove tamper seal from cap of fresh bottle 6 Clean bottle cap and neck with a soft cloth and warm soapy water then rinse 7 Use tool to apply slight pressure downwards on cap plug until it releases into the bottle 8 Slide probe into bottle Push lightly down on head to create a ti...

Page 10: ...Remove remaining water from cold reservoir by dispensing from the cold tap into a pitcher 9 Remove the cap from a spare empty 5 gallon bottle Fill the bottle with 1 gallon of tap water and 3 tablespoons of household bleach 10 Place the spare bottle cap that comes with this unit onto the bottle so there is a complete seal 11 Place bottle onto tray and insert probe so it has a complete seal on the b...

Page 11: ...t It takes 15 20 minutes after setup to secure hot water Make sure the power cord is properly connected to a working outlet Make sure energy saving switch is ON Dispenser is noisy Make sure dispenser is positioned on a level surface Water tastes bad Drain water from reservoirs and replace bottle with a fresh one Sanitize dispenser per Proper Care Cleaning instructions Nightlight Isn t Working Make...

Page 12: ...suse alteration misapplication improper installation or improper maintenance or service by you or any third party or failure to perform normal and routine maintenance on the dispenser as set out in the User s Manual In addition the Limited Warranty does not cover damages to the finish such as scratches dents discoloration or rust after purchase The Limited Warranty is in lieu of all other express ...

Page 13: ...66 429 7566 para recibir asistencia Dispensador de agua con carga por la parte inferior Modelo no 900142 MANUAL DEL USUARIO PARA REDUCIR EL RIESGO DE LESIONES Y DAÑOS MATERIALES EL USUARIO DEBE LEER ESTE MANUAL ANTER DE ENSAMBLAR INSTALAR Y USAR EL DISPENSADOR GUARDAR ESTE MANUAL PARA USO FUTURO PN O 012B 2008 Primo Water Corporation ...

Page 14: ...s Instalar y usar únicamente sobre superficies duras niveladas y planas NO instalar el dispensador en espacios o gabinetes cerrados NO use este dispensador en presencia de gases explosivos Posicionar la parte posterior del dispensador a una distancia de por lo menos 4 pulgadas 10 cm de la pared para permitir el flujo de aire entre la pared y el dispensador Debe haber por lo menos 4 pulgadas 10 cm ...

Page 15: ...o y limpieza 10 Resolución de problemas 12 Garantía limitada 13 INFORMACIÓN IMPORTANTE PARA USO FUTURO Por favor registre su dispensador inmediatamente en www primowater com Para servicio futuro por favor registre su número de serie ubicado en la etiqueta situada en la parte posterior del dispensador y fecha de compra Engrape su recibo al manual Necesitará esta información para obtener servicio de...

Page 16: ...galón 3 8 litros Rango temp caliente 149 F 199 F 65 C 93 C Dimensiones 40 5 pulgadas de alto x 12 6 pulgadas de ancho x 15 pulgadas de largo 103 cm x 32 cm x 38 cm Peso neto 44 4 libras 20 1 kg PIEZAS Y CARACTERÍSTICAS Interruptor de ahorro de energía Frente Atrás Luces LED nocturnas Bandeja de garrafón dentro Sonda de garrafón dentro del gabinete Control agua caliente Botón liberador de agua cali...

Page 17: ...ción protegida y fresca cerca de un tomacorriente con conexión a tierra Aviso Todavía NO enchufe el cable eléctrico 3 Coloque el dispensador de modo que la parte posterior esté a una distancia de por lo menos 4 pulgadas 10 cm de la pared y que ambos lados tengan un espacio libre de por lo menos 4 pulgadas 10 cm 4 Nivele el dispensador ajustando las patas Gire en dirección de las manecillas del rel...

Page 18: ...rese de que la tapa esté bien colocada y que el botellón esté sellado firmemente 6 Como se muestra en la ilustración A use una herramienta para aplicar una leve presión hacia abajo sobre el tapón de la tapa hasta que éste se suelte dentro del botellón Aviso NUNCA use la sonda para liberar la tapa 7 Como se muestra en la ilustración B deslice la sonda dentro del botellón Presione levemente hacia ab...

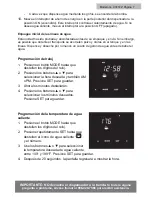
Page 19: ...acumulen polvo y olores en el tanque y en las líneas Dispense y deseche por lo menos un cuarto de galón de agua antes de beber el agua Programación del reloj 1 Presione el botón MODE hasta que destellen los dígitos del reloj 2 Presione los botones o para seleccionar la hora deseada y también AM o PM Presione SET para guardar 3 Ahora los minutos destellarán 4 Presione los botones o para seleccionar...

Page 20: ...deantes Este dispensador incluye una facilidad para informarle cuando están en operación las funciones de calentamiento y enfriamiento Cuando la taza caliente está parpadeando indica que el dispensador está calentando el agua Cuando el vaso está parpadeando indica que el dispensador está enfriando el agua Cuando la taza y el vaso no están parpadeando indica que el dispensador está inactivo Dispens...

Page 21: ...ja de goteo ayudan a alinear el flujo de agua Esta unidad dispensa agua de forma rápida Para evitar salpicaduras acerque el vaso lo más posible al grifo 2 Presione hacia adentro el botón rojo de liberación de agua caliente y presione el control de agua caliente hacia abajo para empezar el flujo 3 Suelte el control de agua caliente una vez que se alcance el nivel de agua deseado Reemplazo de un bot...

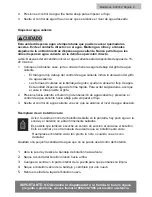
Page 22: ...o 5 minutos Aviso NO usar materiales abrasivos ni limpiadores químicos 1 Limpie las superficies del gabinete con un paño suave y agua tibia con jabón 2 Limpie el polvo de la parte posterior del dispensador para mejorar la eficiencia 3 Saque la bandeja de goteo deslizándola hacia adelante Saque la cobertura Ponga la bandeja y la cobertura en el lavaplatos o límpielas con un paño suave y agua tibia ...

Page 23: ... 3 cucharadas de lejía 10 Instale la tapa de botellón que se incluye con esta unidad en el botellón asegurándose de que quede firmemente sellada 11 Coloque el botellón en la bandeja e inserte la sonda sellándola firmemente a la tapa del botellón 12 Deslice la bandeja dentro del gabinete y cierre la puerta 13 Enchufe el cable eléctrico al tomacorriente con conexión a tierra de la pared 14 Mueva el ...

Page 24: ...r El agua caliente no está caliente Calentar el agua demora de 15 a 20 minutos después del encendido Asegúrese de que el cable eléctrico esté correctamente enchufado al tomacorriente Asegúrese de que el interruptor de ahorro de energía esté en la posición ON encendido El dispensador hace ruido Asegúrese de que el dispensador esté sobre una superficie nivelada El agua sabe mal Drene el agua de los ...

Page 25: ...miento o servicio inapropiado o falla en la realización de mantenimiento normal y rutinario del enfriador de agua como se prescribe en este manual del usuario Además la garantía limitada no cubre daños al terminado de la unidad tales como rasguños abolladuras descoloridos oxidaciones y otros daños causados por la intemperie después de la compra de la unidad Esta garantía limitada reemplaza cualqui...

Reviews: