


BJ-EX5 MyRoom! Centre
Page 3
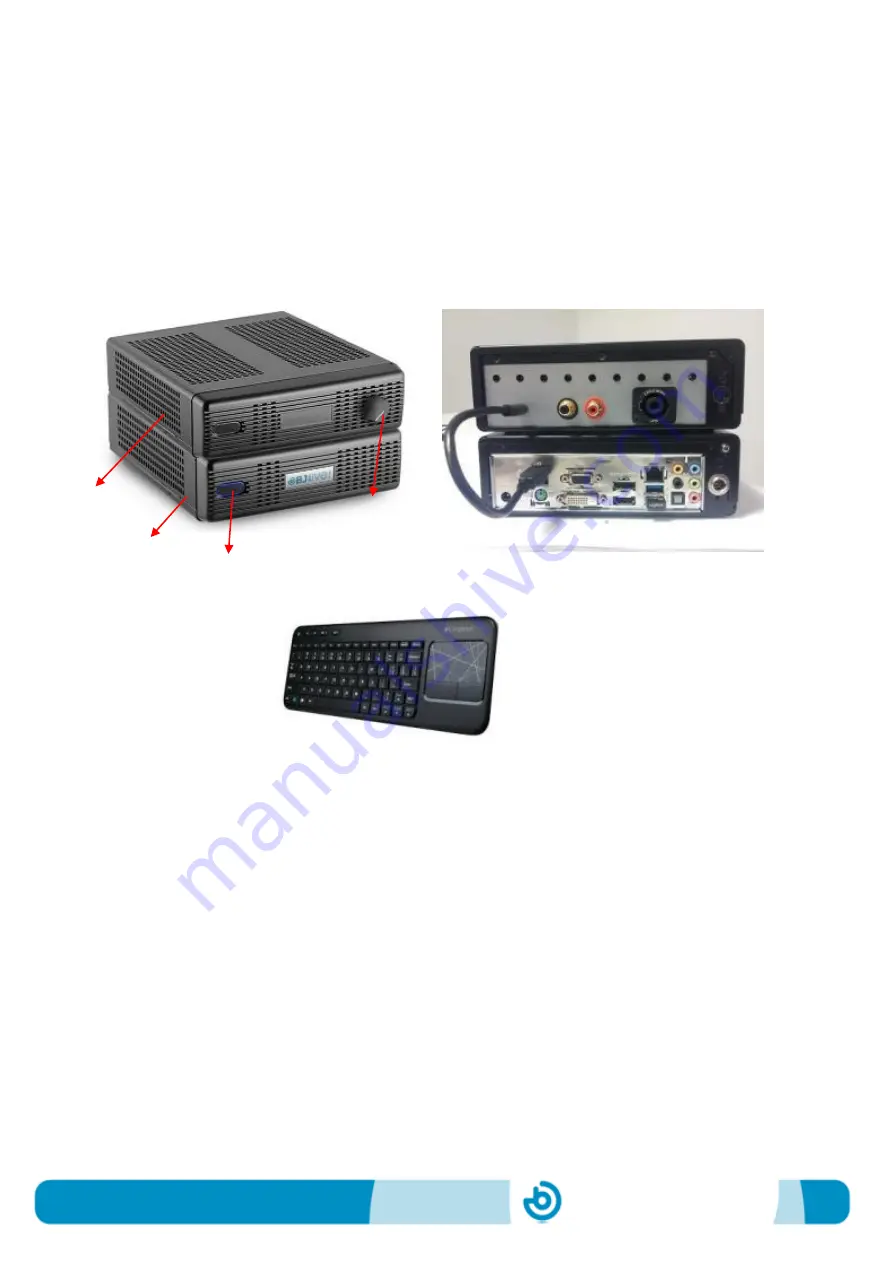
1_Parts of the equipment
1.1_ Components
MyRoom! Centre is comprised by two different modules (see figure below) connected
to each other by means of a USB cable. The equipment includes a wireless keyboard
with a touchpad to control the pointer.
Fig. 1
– Parts of MyRoom! Centre: Front view, Rear view, Keyguard with touchpad.
Module 1 contains:
Optimized Windows Computer
Control SHX software and default contents
Switch on button
Module 2 contains:
SHX Central Device
Vibration and audio amplifier
Control of vibration intensity
Unlike the SHX Central Rack, MyRoom! Centre does not include a PC monitor. Section
2 explains how to connect and configure the displays.
Module 1
Module 2
Switch on
button
Control of
vibration
intensity
Summary of Contents for BJ-EX5 MyRoom! Centre
Page 17: ......


