www.bitrek.eu
+380 44 507 02 07
To establish the connection you need:
7.1.1.
Remove the tracker’s 2 screws on the bottom cover, and then remove the top
cover.
7.1.2.
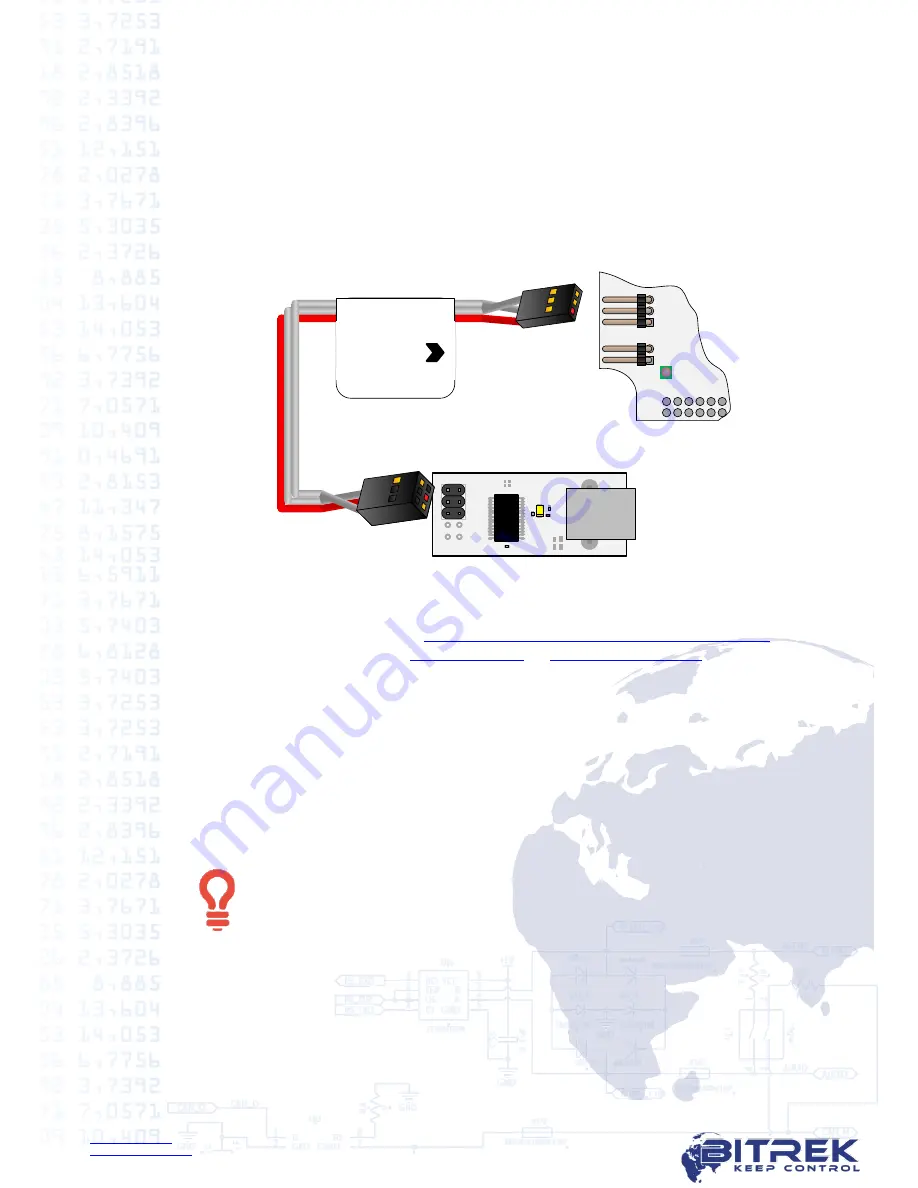
Connect cable for configuration to XP2 jack on the top chip.
Red
cable must
be connected to pins 1 both on tracker and programmer (picture 7.5).
7.1.3.
Connect USB-A – USB-B cable with the narrow connector to programmer, and
with wide connector to any free USB-port of your PC.
7.1.4.
Apply 12-24V power on tracker’s appropriate contacts (picture 6.1.).
BI 810 TREK
BI 820 TREK
BI 820 TREK (OBD)
BI 310 CICADA
X
P
7
X
P
8
1
2
3
4
5
6
BI 868 TREK
3
2
1
Picture 7.5. Tracker to programmer connection
After tracker connection to PC is successful, your operating system will automatically
install driver for programmer. If the automatic driver installation has not occurred,
download it from the link
http://www.ftdichip.com/Drivers/VCP.htm
or from
BITREK
TM
corporate websites
www.bitrek.eu
or
www.bitrek.com.ua
.
7.2.
Remote tracker configuration
For remote configuration, you need to have a power source 12-24V and a GSM
modem with an activated SIM-card with available SMS service inserted in.
GSM-modems supported models
*
:
BITREK GSM-modem
Cinterion MC35i
*
GSM-modems, which were tested with
BITREK CONFIGURATOR
.
BITREK CONFIGURATOR
can
work with any GSM-modem, connected to the COM-port of PC.
Activated SIM-card with available SMS and GPRS services must be
inserted in tracker. On SIM-card PIN-code verification needs to be
removed and the phone book needs to be empty. If you are going to
use voice communication, voice services also needs to be activated on
the SIM-card.


