3. Speed control signal on motor amplifier should measure .250 VDC per mill per hour E.G.
NOTE:
Measurement taken at J1, PIN 1 to PIN 2 (ground)
1mph = .250 VDC
2mph = .500 VDC
4mph = 1.00 VDC
8mph = 2.00 VDC
If speed control signals are OK, proceed to step 4.
4. Check Amplifier Output. The Output Terminals are located on top of amplifier and are
designated “m+” and “m-”. The Output voltage should be:
1mph = 32 VAC, 2mph = 52 VAC
NOTE:
Remember to use the volts A.C. selection on your meter. The Amplifier is pulse width
modulating, therefore, A.C. scale is required.
If amplifier output is OK, proceed to step 5.
5. Check Motor Resistance. The motor has a winding resistance of 1.3 to 3 Ohms. The
value is dependent on commutation position. If resistance reading is significantly higher
the windings or brush contacts are defective.
To measure resistance turn treadmill power OFF. Place meter lead across terminals
marked “m+” and “m-”. Set meter scale to the lowest resistance selection. Check resis
tance in several commutator positions by rotating motor shaft 9.0 degrees for every one
revolution.
CONTENTS
TROUBLE-SHOOTING
— 24 —
Summary of Contents for 950-273
Page 4: ......
Page 6: ......
Page 12: ......
Page 18: ......
Page 26: ......
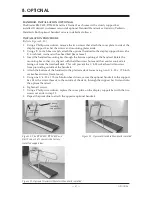
Page 28: ...CONTENTS OPTIONAL 28 Figure 12 Handrail installation...
Page 30: ......
Page 32: ......
Page 34: ......
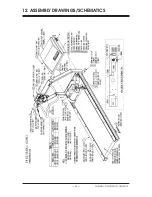
Page 35: ...12 ASSEMBLY DRAWINGS SCHEMATICS 35 ASSEMBLY DIAGRAMS SCHEMATICS...
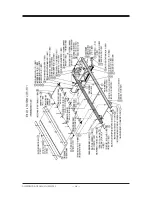
Page 36: ...CONTENTS ASSEMBLY DIAGRAMS SCHEMATICS 36...
Page 37: ...CONTENTS 37 ASSEMBLY DIAGRAMS SCHEMATICS...
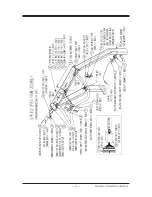
Page 38: ...CONTENTS ASSEMBLY DIAGRAMS SCHEMATICS 38...
Page 39: ...CONTENTS 39 ASSEMBLY DIAGRAMS SCHEMATICS...
Page 40: ...CONTENTS ASSEMBLY DIAGRAMS SCHEMATICS 40...
Page 41: ...CONTENTS 41 ASSEMBLY DIAGRAMS SCHEMATICS...
Page 42: ......
Page 43: ......

