Step 1
-
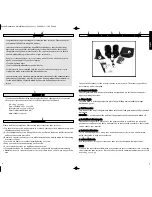
Charge the battery.
Insert your charger into a socket and then
connect it to your unit (Fig. a). It’ll take approximately 2-3 hours to
fully charge the battery. Your unit is fully charged when all three sec-
tions of the battery icon are full. The battery icon will flash when the
battery is low and needs to be recharged.
NOTE
:
Do not leave your unit connected to the charger when the bat-
tery is fully charged.
Step 2
-
Connect the unit to the garments.
The unit and garments must
be connected properly for your
SLENDERTONE ARMS ACCESSORY
to work.
‘Click’ the unit connector into the garment connector as shown in Fig. b.
Step 3
-
Place the pads on the garments.
Place the garments so
that the four silver studs are facing you. Remove the adhesive pads
from their pack. You’ll notice that one side of each pad has a grid
pattern on it while the other side is plain black.
(i)
Remove the covers from the
patterned side
of the four pads (Fig. c).
(ii)
Place the
patterned side
of the pads over the silver studs within
the white squares (Fig. d).
IMPORTANT
:
Before you progress, make sure that all of the silver studs are
completely covered by the pads. Press the edges of each pad firmly
onto the material before use.
1. On/Off Button ( )
Press and hold this button for 2 seconds to turn your
unit on or off. You may also pause the exercise by briefly
pressing this button.
2. Increase Toning Intensity ( )
Press and hold these buttons to increase the intensity
of the exercise. The right-hand button controls the
garment marked
R
. The left-hand button controls the
garment marked
L
.
3. Decrease Toning Intensity ( )
Press and hold these buttons to decrease the intensity
of the signal to either arm.
4. Programme Button ( P )
Press this button to select the toning programme you wish to
use. There are 3 programmes, which are explained later in this
manual (page 8).
5. Information Button ( i )
Press this button to see your training information, such as the maximum intensity for
your current or last session and the number of sessions you have completed.
Toning intensity from the left arm garment.
Toning intensity from the right arm garment.
Counts down the time left in the current session. Also displays error messages
(see page 9).
Appears when the exercise has been paused.
Indicates that the sound is off.
Keylock is active - you cannot change the intensity levels or the program
accidentally.
This symbol indicates a poor contact between the unit and garments or between
the pads and the skin (see page 11 for more details).
Shows the battery power remaining.
Number of sessions completed.
Shows the programme currently running (1 - 3).
This symbol appears during each contraction phase.
Maximum intensity for the current/ last session.
5
4
1.
2.
3.
5.
4.
unit display
setting up your slendertone arms accessory
Fig. a
Fig. b
Fig. c
Fig. d
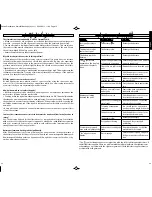
SLENDERTONE ARMS
uses electrical muscle stimulation (EMS) technology. This technology has
been used in hospitals and by physiotherapists for over 50 years. Here is a summary of
how EMS technology works.
Step 1
Signals are sent between the pads.
The signals switch on the nerves
which control the triceps muscles.
Step 2
As the signal strength increases, the
nerves, in turn, cause your muscles
to contract and relax rhythmically.
how does muscle stimulation technology work?
how does the unit work?
unit display
English
Resize Slendertone Arms IM Backups_Layout 1 26/10/2011 11:32 Page 6


