background image

6

GROUNDING INSTRUCTIONS

IN THE EVENT OF A MALFUNCTION OR BREAKDOWN,

 grounding provides the path of 

least resistance for an electric current and reduces the risk of electric shock. This tool 

is equipped with an electric cord that has an equipment grounding conductor and a 

grounding plug. The plug MUST be plugged into a matching outlet that is properly 

installed and grounded in accordance with ALL local codes and ordinances.
DO NOT MODIFY THE PLUG PROVIDED. If it will not fit the outlet, have the proper outlet 

installed by a licensed electrician.
IMPROPER CONNECTION of the equipment grounding conductor can result in electric 

shock. The conductor with the green insulation (with or without yellow stripes) is the 

equipment grounding conductor. If repair or replacement of the electric cord or plug is 

necessary, DO NOT connect the equipment grounding conductor to a live terminal.
CHECK with a licensed electrician or service personnel if you do not completely under-

stand the grounding instructions or whether the tool is properly grounded.
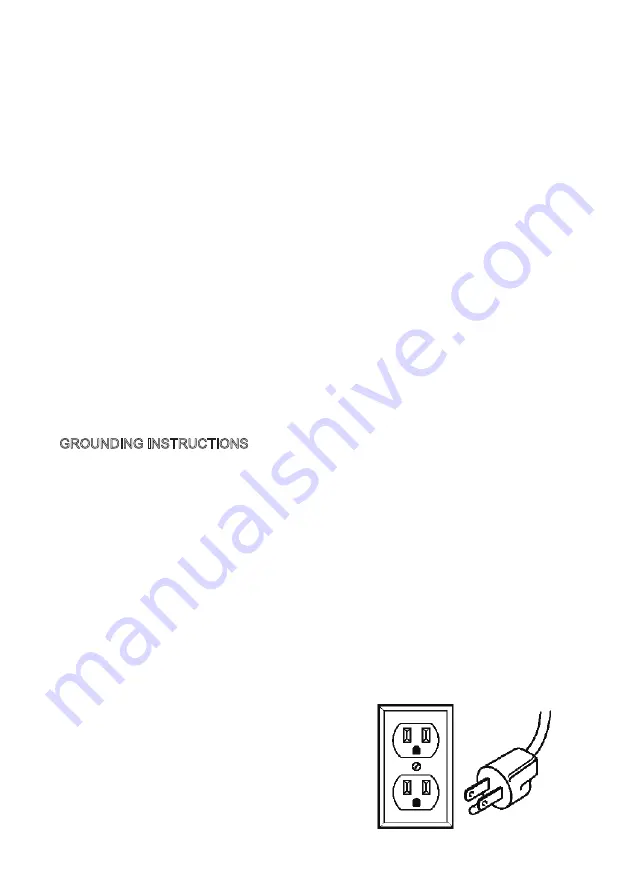
USE ONLY THREE-WIRE EXTENSION CORDS that 

have threepronged plugs and outlets that accept 

the tool’s plug as shown in Fig. 1.Repairor replace

a damaged or worn cord immediately.
CAUTION: In all cases, make certain the outlet in

question is properlygrounded. If you are not sure,

have a licensed electrician check the outlet.

17.Keep the distance between the wheel and tool rest at most a 1/8-inch (3.2 mm) space. 

     Adjust the work rest accordingly as the wheel grinds down to a smaller diameter with 

     use over time.

18.Guard against electrical shock by preventing body contact with grounded surfaces. 

     For example: pipes, radiators,ranges, refrigerator enclosure, etc.

19.Never reach to pick up a workpiece, a piece of scrap, or anything else that is in or near 

     the grinding path of the wheel.

20.Avoid awkward operations and hand positions where a sudden slip could cause your 

     hand to move into the wheel. Always make sure you have good balance.

21.Do not turn the switch on and off rapidly. This could cause the wheel to loosen and 

     create a hazard. Should this ever occur, stand clear and allow the wheel to come to 

     a complete stop. Disconnect your grinder from the power supply and retighten the wheel 

     nut securely.

22.Frequently clean grinding dust from beneath the grinder.

23.If any part of this grinder is missing, broken, bent, or damaged in any way, or if any 

     electrical component fails to perform properly, shut off the power switch, remove the 

     machine plug from the power source and have the damaged, missing, or failed parts 

     replaced before operation.

Electrical information

Summary of Contents for TL-GD-6L

Page 1: ...226002 6 INCH BENCH GRINDER INSTRUCTION MANUAL Thank you for ordering our product If you have any issue please email it and your order ID to inquiry bilthardusa com or call 888 680 2849...

Page 2: ...ew 14 Parts list 15 Motor Speed no load 3450 RPM 3450 RPM TL GD 6L TL GD 6SD Wheel Size 6 x 3 4 x 1 2 inch Wheel Grits 36 Coarse 60 Medium Work Stand Yes No Lamp 40W MAX Bulb not included 6 x 3 4 x 1...

Page 3: ...tlet Never modify the plug in any way Modified plugs with non matching outlets will increase the risk of electric shock 3 Check all power supplies periodically Do not use defective cords Damaged or en...

Page 4: ...order before operating the tool All protection and safety devices must be in place after completing repair and maintenance procedures 6 Never leave a running tool unattended Do not leave the tool unti...

Page 5: ...to its supporting surface to prevent the grinder from tipping over sliding or walking during operation 8 Do not remove the wheel guard unless changing a grinding wheel Ensure the cover is replaced bef...

Page 6: ...rn cord immediately CAUTION In all cases make certain the outlet in question is properlygrounded If you are not sure have a licensed electrician check the outlet 17 Keep the distance between the wheel...

Page 7: ...r cord The smaller the gauge number the heavier the cord Make sure your extension cord is properly wired and in good condition Always replace a damaged extension cord or have it repaired by a qualifie...

Page 8: ...L Spacer 1 M Washer 8 N Hex nut 4 UNPACKING This product requires assembly Carefully remove the tool and any accessories from the box Make sure that all items listed in the Loose Parts are included O...

Page 9: ...e left side I O Washer Hex head bolt Clamp bracket Eye shield INSTALLING THE EYESHIELD 1 Attach the right eye shield arm to the bench grinder using the bracket flat washer and bolt supplied 2 Fit the...

Page 10: ...der on the stand in a safe location Make sure that the power cord will reach an appropriately grounded outlet 3 Matching up the mounting holes in the grinder base to the drilled holes in the stand 4 U...

Page 11: ...d unplugged perform safety inspections Make sure the work area is safe and clean Make sure the wheel is in good condition Make sure the guards are in place and in working order Make sure the guards ar...

Page 12: ...ng wheels with any damp cloth 3 Always make sure the eye shields are transparent and not blocking the view of the grinding wheel 4 In normal use grinding wheels may become cracked grooved rounded at t...

Page 13: ...inding wheel to a Ring Test a Make sure the grinding wheel is clean and free of dust and debris b Suspend the wheel by its arbor hole and tap each of its four quadrants lightly with a nonmetallic item...

Page 14: ...1 2 3 20 7 7 8 9 10 13 14 15 17 18 19 17 14 21 22 23 24 25 26 25 27 28 29 30 33 34 29 49 48 25 26 25 24 47 22 46 45 32 32 11 6 5 4 12 10 16 30 31 38 39 37 51 50 13 35 41 42 43 44 43 42 41 40 38 39 37...

Page 15: ...8UF 300V Philips screw spring washer assy M4 120 Hex nut M5 Right inner guard Philips screw spring washer assy M5X10 flange Wheel stone QTY 4 2 1 1 1 2 3 1 1 3 1 1 6 2 1 1 2 1 1 1 2 6 1 4 4 2 Specific...

Page 16: ...the grinding wheel 4 Use softer wheel or reduce the feed rate 1 Short circuit in motor or loose connections 2 Low voltage 3 Incorrect fuses or circuit breakers in power line 4 Motor overload 1 Inspec...

Reviews: