


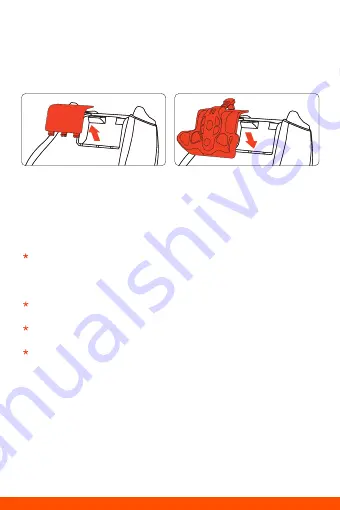
1. Remove the battery compartment cover off the Controller and attach the
ARMORX to the battery compartment.
2. Plug the USB-C flexible cable of ARMORX into the USB port of the Xbox Series
Controller.
NOTICE:
For best performance, please fully charge the ARMORX before using it for the first time.
It takes about 2.5 hours to fully charge a depleted battery.
ATTACH THE ARMORX
The Xbox Series controller with ARMORX can support Xbox/ PC/ Switch originally.
Hold the power button to turn on the ARMORX and plug the USB wireless adapter
into the console’s USB port. The ARMORX will detect the platform automatically.
LED1 slowly flashes mean that the ARMORX is connecting with the adapter. And
the fast flashes mean that the ARMORX is paring with the adapter. After the
connection is successful the LED1 will become always on (The adapter indicator
is same).
After the connection is successful the LED1 and adapter indicator will become
always on and switch to the corresponding platform color.
LED2 flashes mean the connection between ARMORX and controller is
unsuccessful and always on means connection success.
Connect with Switch console need to set: System Settings > Controllers and
Sensors > Pro Controller Wired Communication On.
CONNECT TO THE CONSOLE
1. After attaching the ARMORX to the Xbox Series controller, hold the power button to
turn it on.
2. Connect the Type-C port of ARMORX to the console with a Type-C cable.
3. Check the indicator lights of the ARMORX until both indicators are always on,
which means the wired connection is successful.
Note:
3.5mm audio jack is only available under wired connection, wireless connection
does not support 3.5mm audio.
WIRED CONNECTION