34
DOWNLOADING APPS AND
PAIRING YOUR DEVICE WITH YOUR EQUIPMENT
DOWNLOADING THE SOFTWARE
Connect the Apple device with the App Store (iTunes) or your Android Device with Google Play, search
for "Pafers", then read the APP introductions and Download the APPs with bicycle/elliptical machine
functions to your device.
Note: if you download an APP for a treadmill and pair it with an Elliptical it will
not work.
• The App uses bluetooth mode, so please make sure the machine and device you are using has the
optional DUALKIT installed. See BH DualKit installation on this page.
• The App contains the following functions, the user must open a 3G network or wi-fi network:
(a) Managing Data - After completing the registration in the "Pafers" App, log on to your personal account.
Now that you have registered you can record all of your workout data and save it to your device.
(b) Some APPs need connection to Google maps in order to function correctly.
BH DUALKIT INSTALLATION
1. To Access iConcept compatible apps, an optional (purchased separately) BH DualKit Module is re-
quired.
INSTALLATION:
1.) Take out the Phillips Locking Screw from the slot on the back of the console and set aside.
2.) Select the appropriate BH DualKit Module. On the front of the module, it will say the machine type
and on the back of the module it will say if it is a SMART or CLASSIC type. There are 3 types of modules:
a.) Bike & Elliptical - Classic
b.) Treadmill - Classic
c.) BH DualKit - Works for all machine types
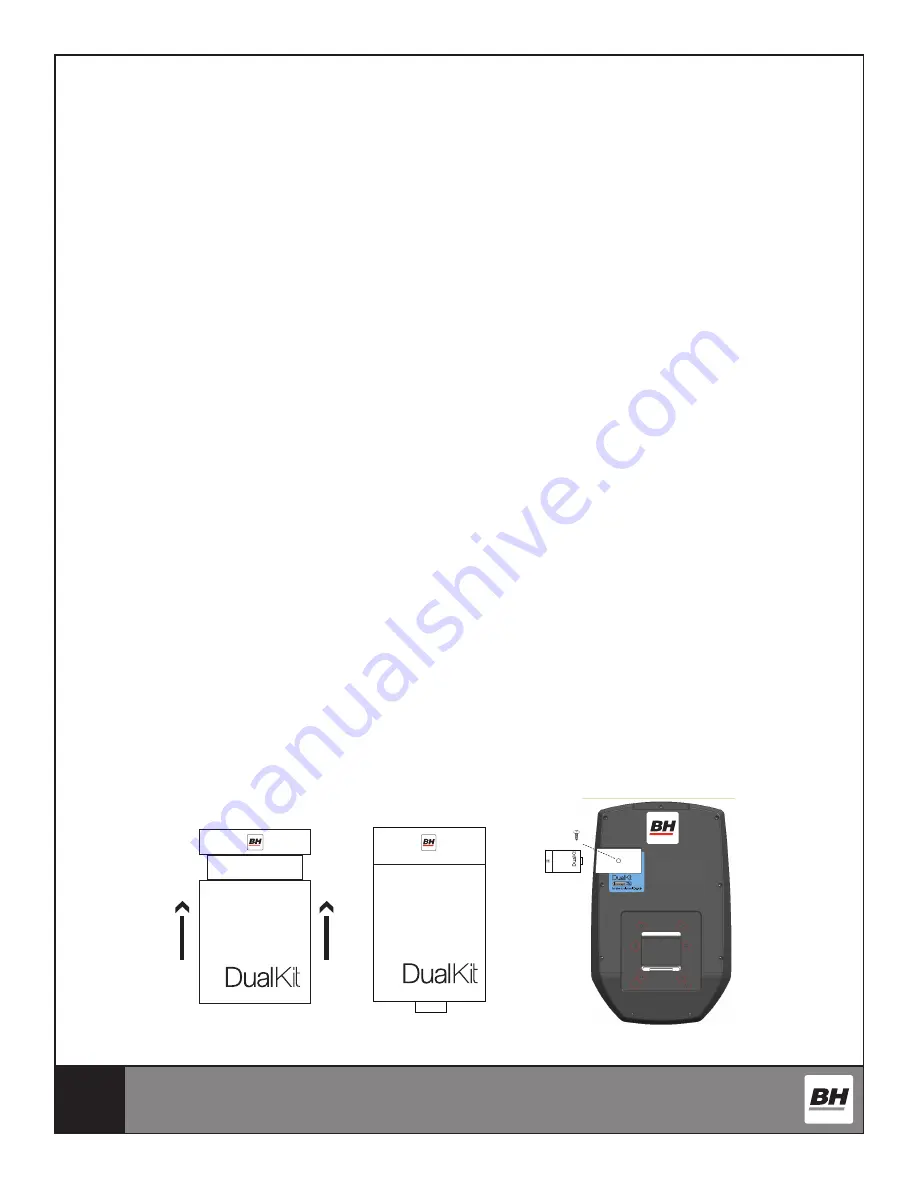
3.) Make sure the USB part is extended from the module.
- Push up on the sides of the DualKit Module (Fig. 1)
- The USB Port should extend out of the bottom of the module (Fig. 2)
4.) Push the module in the slot at the back of the console (Fig. 3)
5.) Once the module is plugged in, take the Phillips Locking Screw previously set aside and screw it in
behind the module to secure.
Fig. 3
Fig. 1
Fig. 2
Summary of Contents for S1XiB
Page 4: ...4 WARNINGS AND LABELS...
Page 13: ...13 PRE ASSEMBLY CHECKLIST...
Page 14: ...14 HARDWARE PACK...
Page 15: ...15 ASSEMBLY INSTRUCTIONS...
Page 26: ...26 ASSEMBLY VIEW...
Page 27: ...27 CONSOLE OPERATIONS...
Page 37: ...37 EXPLODED VIEW DRAWING...
Page 44: ...44 Gardez vos mains et doigts loign s de cet endroit TIQUETTE D AVERTISSEMENT...
Page 53: ...53 PI CES FOURNIES...
Page 54: ...54 MAT RIEL FOURNI...
Page 55: ...55 INSTRUCTIONS D ASSEMBLAGE...
Page 66: ...66 VUE CLAT E...
Page 67: ...67 FONCTIONNEMENT DE LA CONSOLE...
Page 78: ...78 VUE CLAT E...


